Prerequistes
Kubernetes Version
While different TPU types require different mininum GKE version, considering all TPU types, Node Auto Provisioning Support and ability to run without privileded mode, we recommend using 1.28.7-gke.1020000 or later and 1.29.2-gke.1035000 or later Please refer to following links for up to date requirements- https://cloud.google.com/kubernetes-engine/docs/concepts/tpus#availability
- https://cloud.google.com/kubernetes-engine/docs/concepts/node-auto-provisioning#tpus
- https://cloud.google.com/kubernetes-engine/docs/how-to/node-auto-provisioning#configuring_tpus
- https://cloud.google.com/kubernetes-engine/docs/concepts/tpus#plan-tpu-configuration
Regional Availability
TPUs are available in limited zones. Following table lists the availability for Single Host TPUs. Please refer to following links for up to date availability:Quota
Please make sure you have enough quota available in the respective region. You can apply for Quotas on your GCP Console: https://console.cloud.google.com/iam-admin/quotasNode Auto Provisioning
Once you have Quota, add the TPU accelerators to NAP’s limits. Please follow the guide at https://cloud.google.com/kubernetes-engine/docs/how-to/node-auto-provisioning#config_file to update these limits.CPU and Memory Limits
TPU VMs often have large amounts of CPU and Memory. Please make sure to also adjust CPU and Memory resource limits in NAP config. Inadequate limits on CPU and Memory might block TPU nodes from scalingAdding TPU Devices
Using Spec or Python SDK
You can add TPU by simply adding it under the
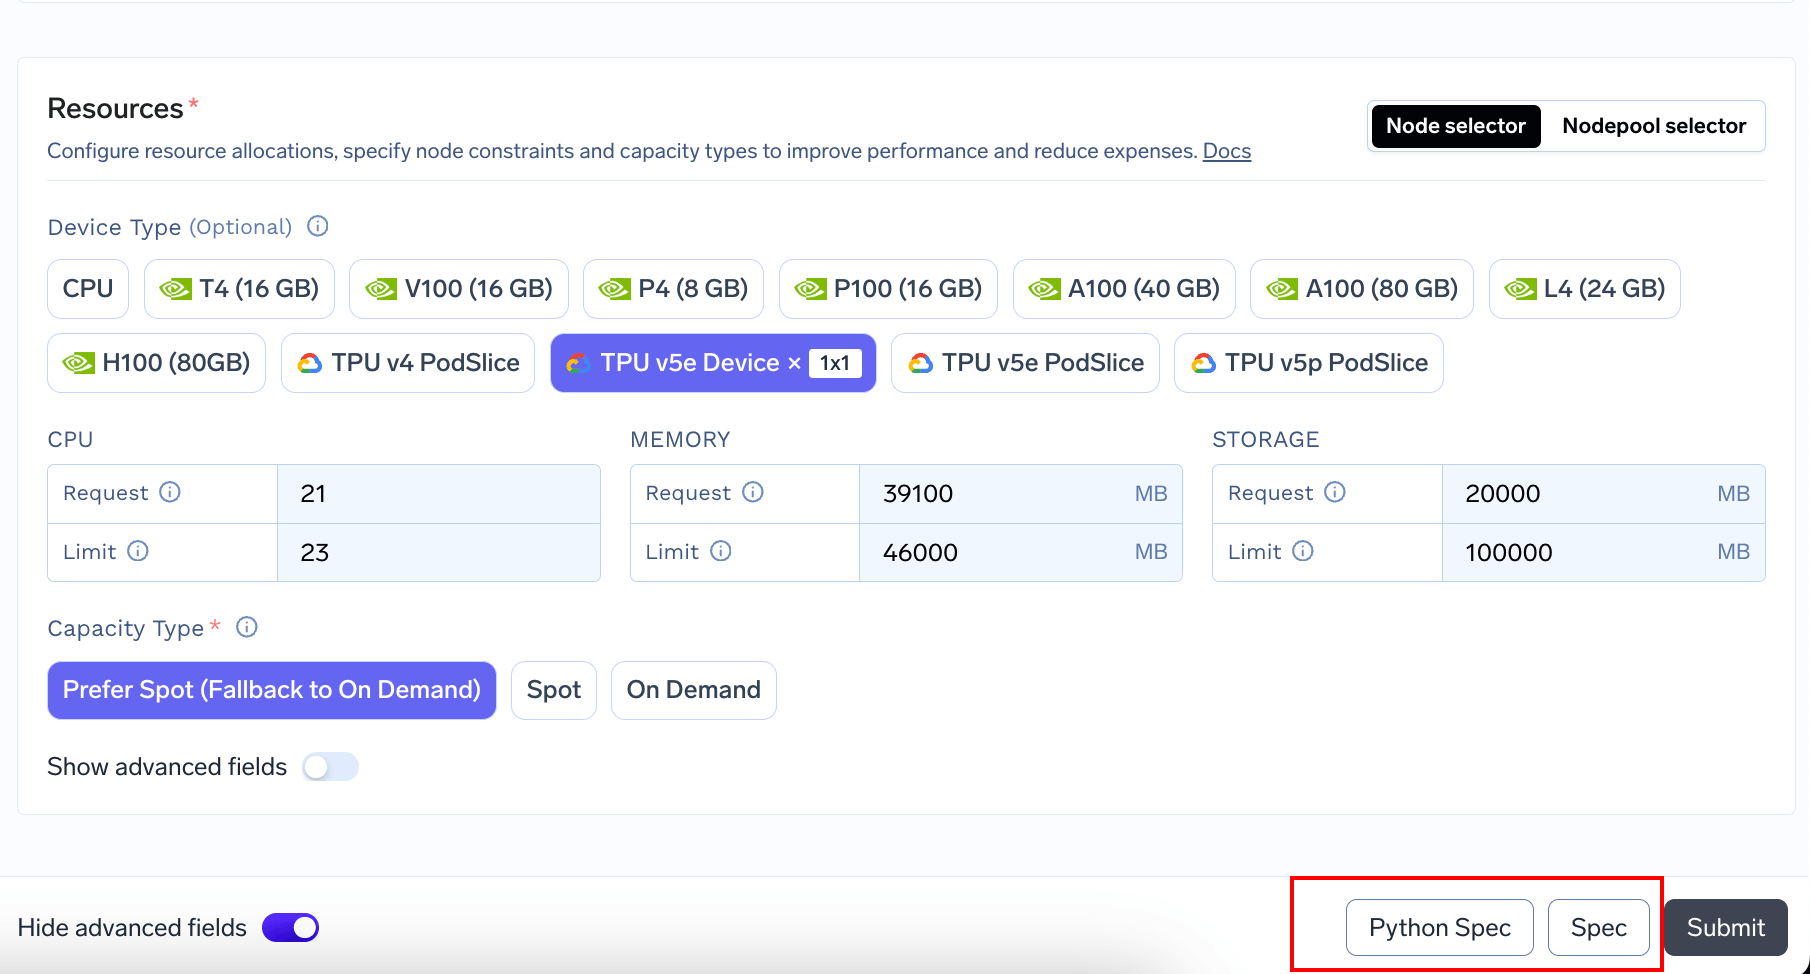
resources.devices section like folllows:
Using UI
You can add TPUs to your Service / Job / Notebook / SSH Server by simply selecting a TPU Type and a topology from the Resources section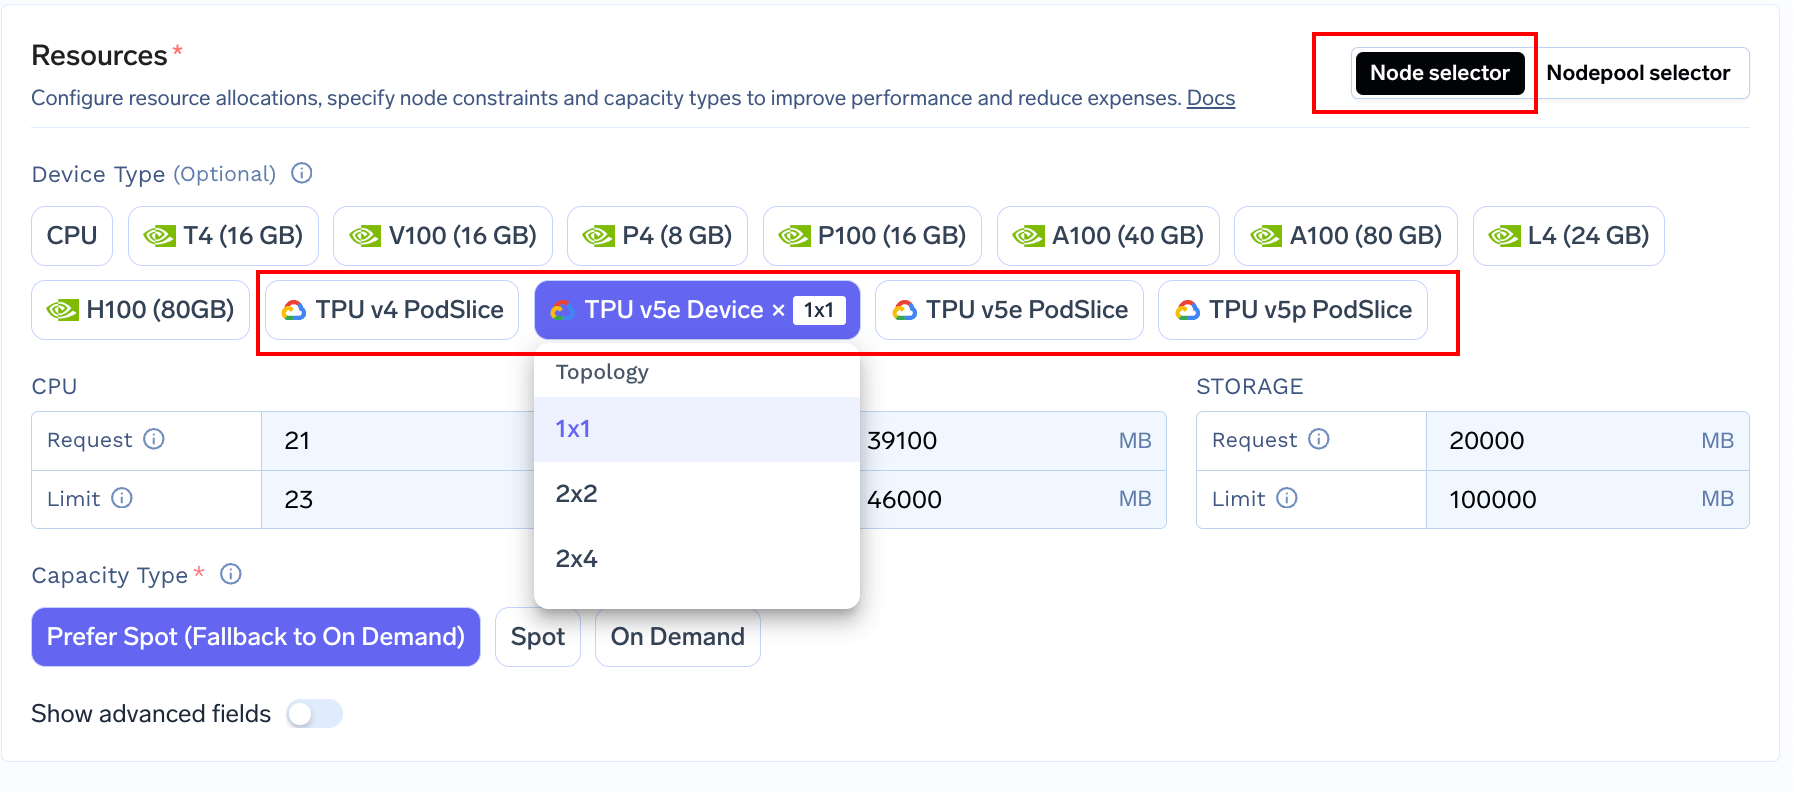
Examples
Before you begin
We recommend reading through following pages first to understand basics of deployment with TrueFoundryEnumerate TPU chips
This simple example Job installs Jax and enumerates the assigned TPU devicesRunning Gemma 2B with Jax
This Sample Notebook demonstrates running Gemma 2B using Jax in an interactive environment. The notebook can be uploaded directly to Notebook instance running with TPUs on TrueFoundryDeploying Gemma 2B LLM with Jestream & MaxText on TPU v5e
This section is adapted from official GKE Guide: https://cloud.google.com/kubernetes-engine/docs/tutorials/serve-gemma-tpu-jetstream Step 1: Get Access to the model on Kaggle- Request Access to the Model on Kaggle: https://cloud.google.com/kubernetes-engine/docs/tutorials/serve-gemma-tpu-jetstream#sign-consent
- Create Kaggle Access Token: https://cloud.google.com/kubernetes-engine/docs/tutorials/serve-gemma-tpu-jetstream#generate-token . You will download a
kaggle.jsonwhich we will use in the next step
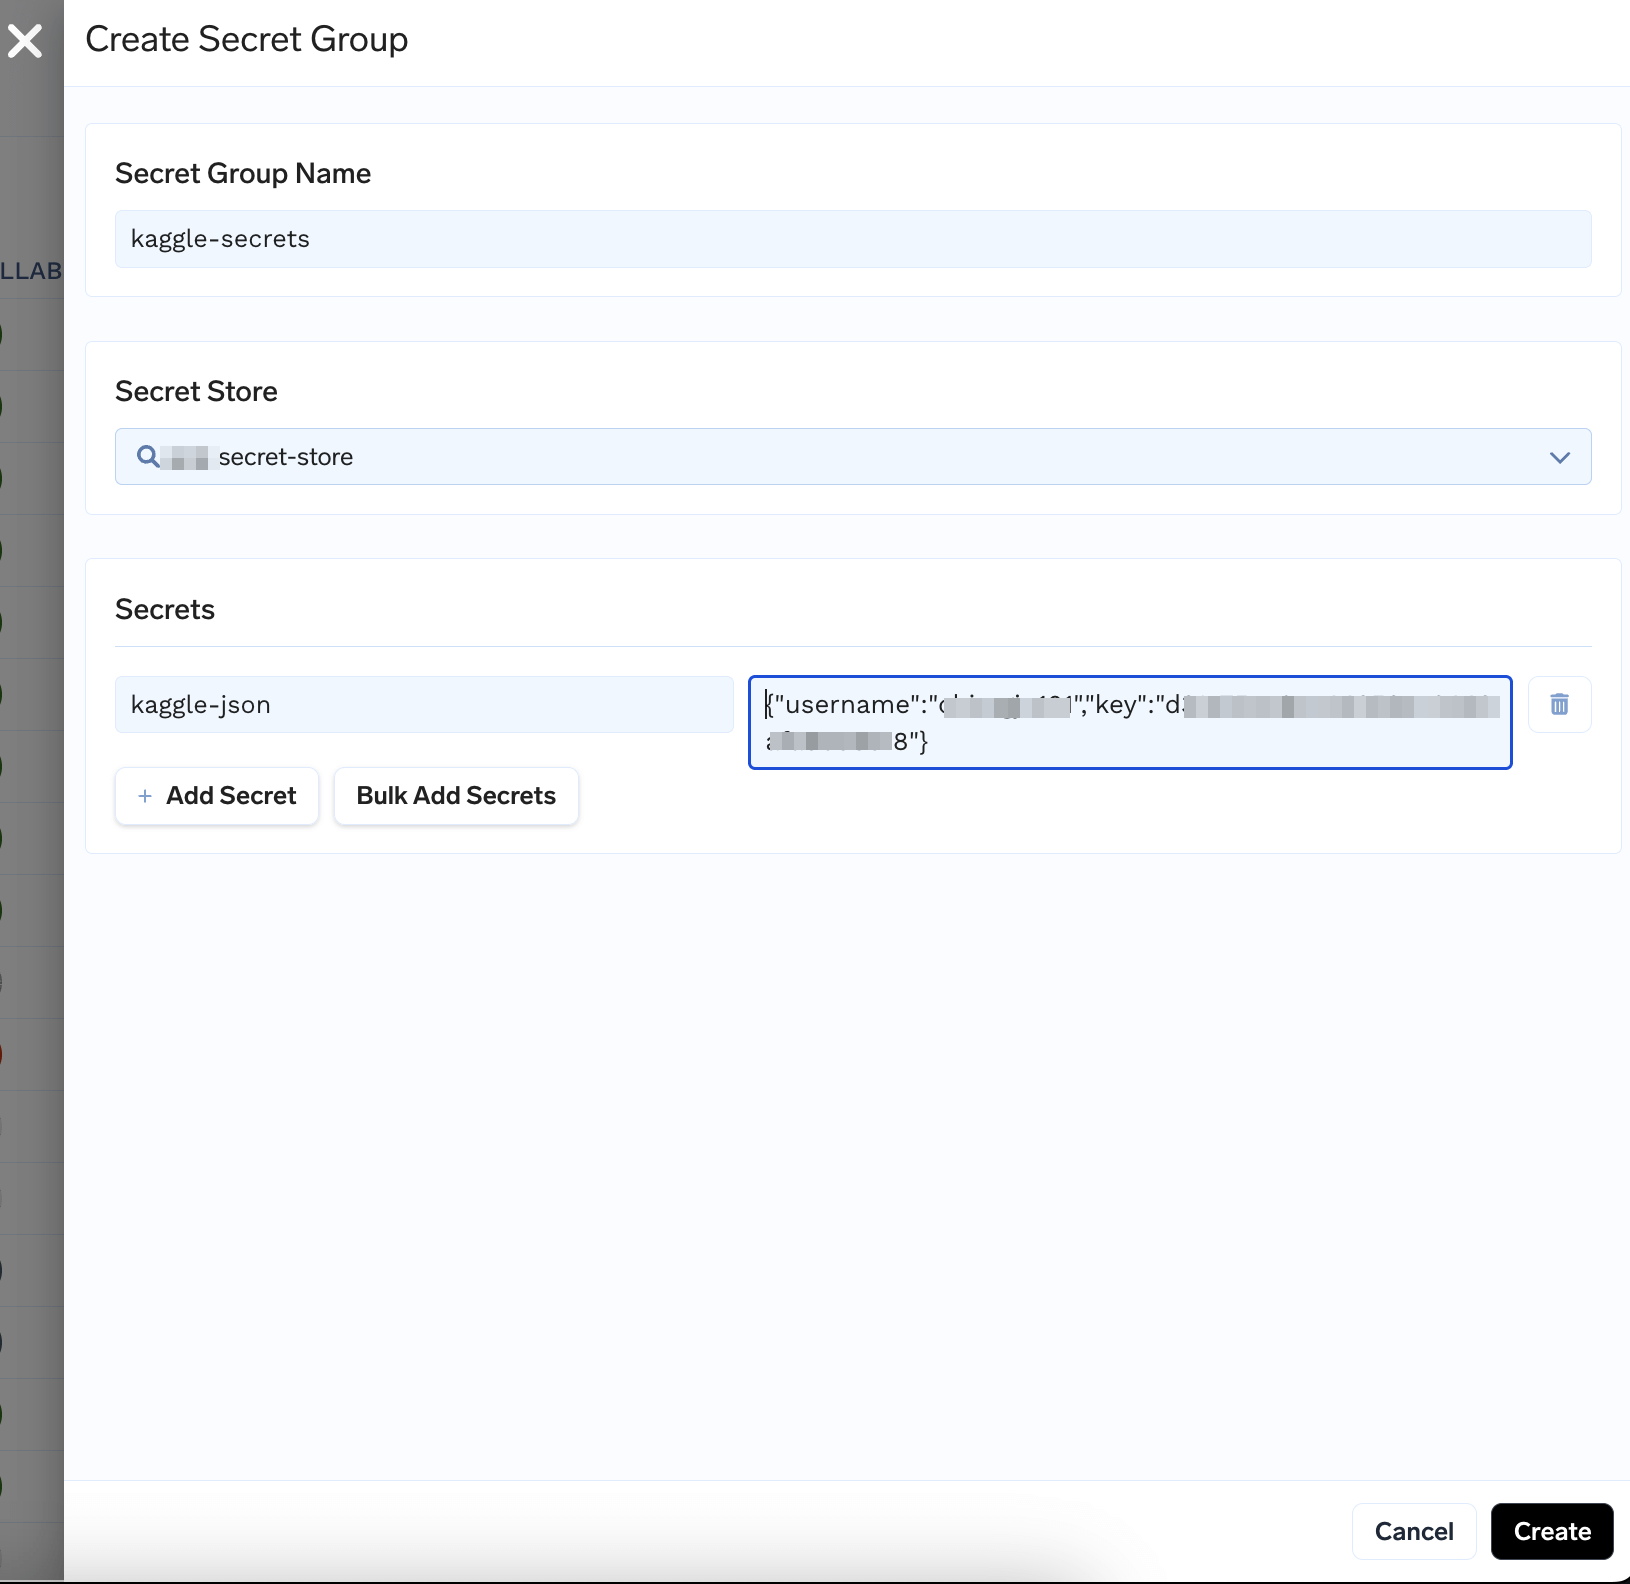
kaggle.json to Secrets
Create a Secret add the contents of kaggle.json like follows.

- Create a Workspace to deploy the model to
- Create a GCS Bucket from GCP Console
- Run the following script to create GCP Service Account with correct permissions. Make sure to edit your project id, bucket name, regions, workspace name
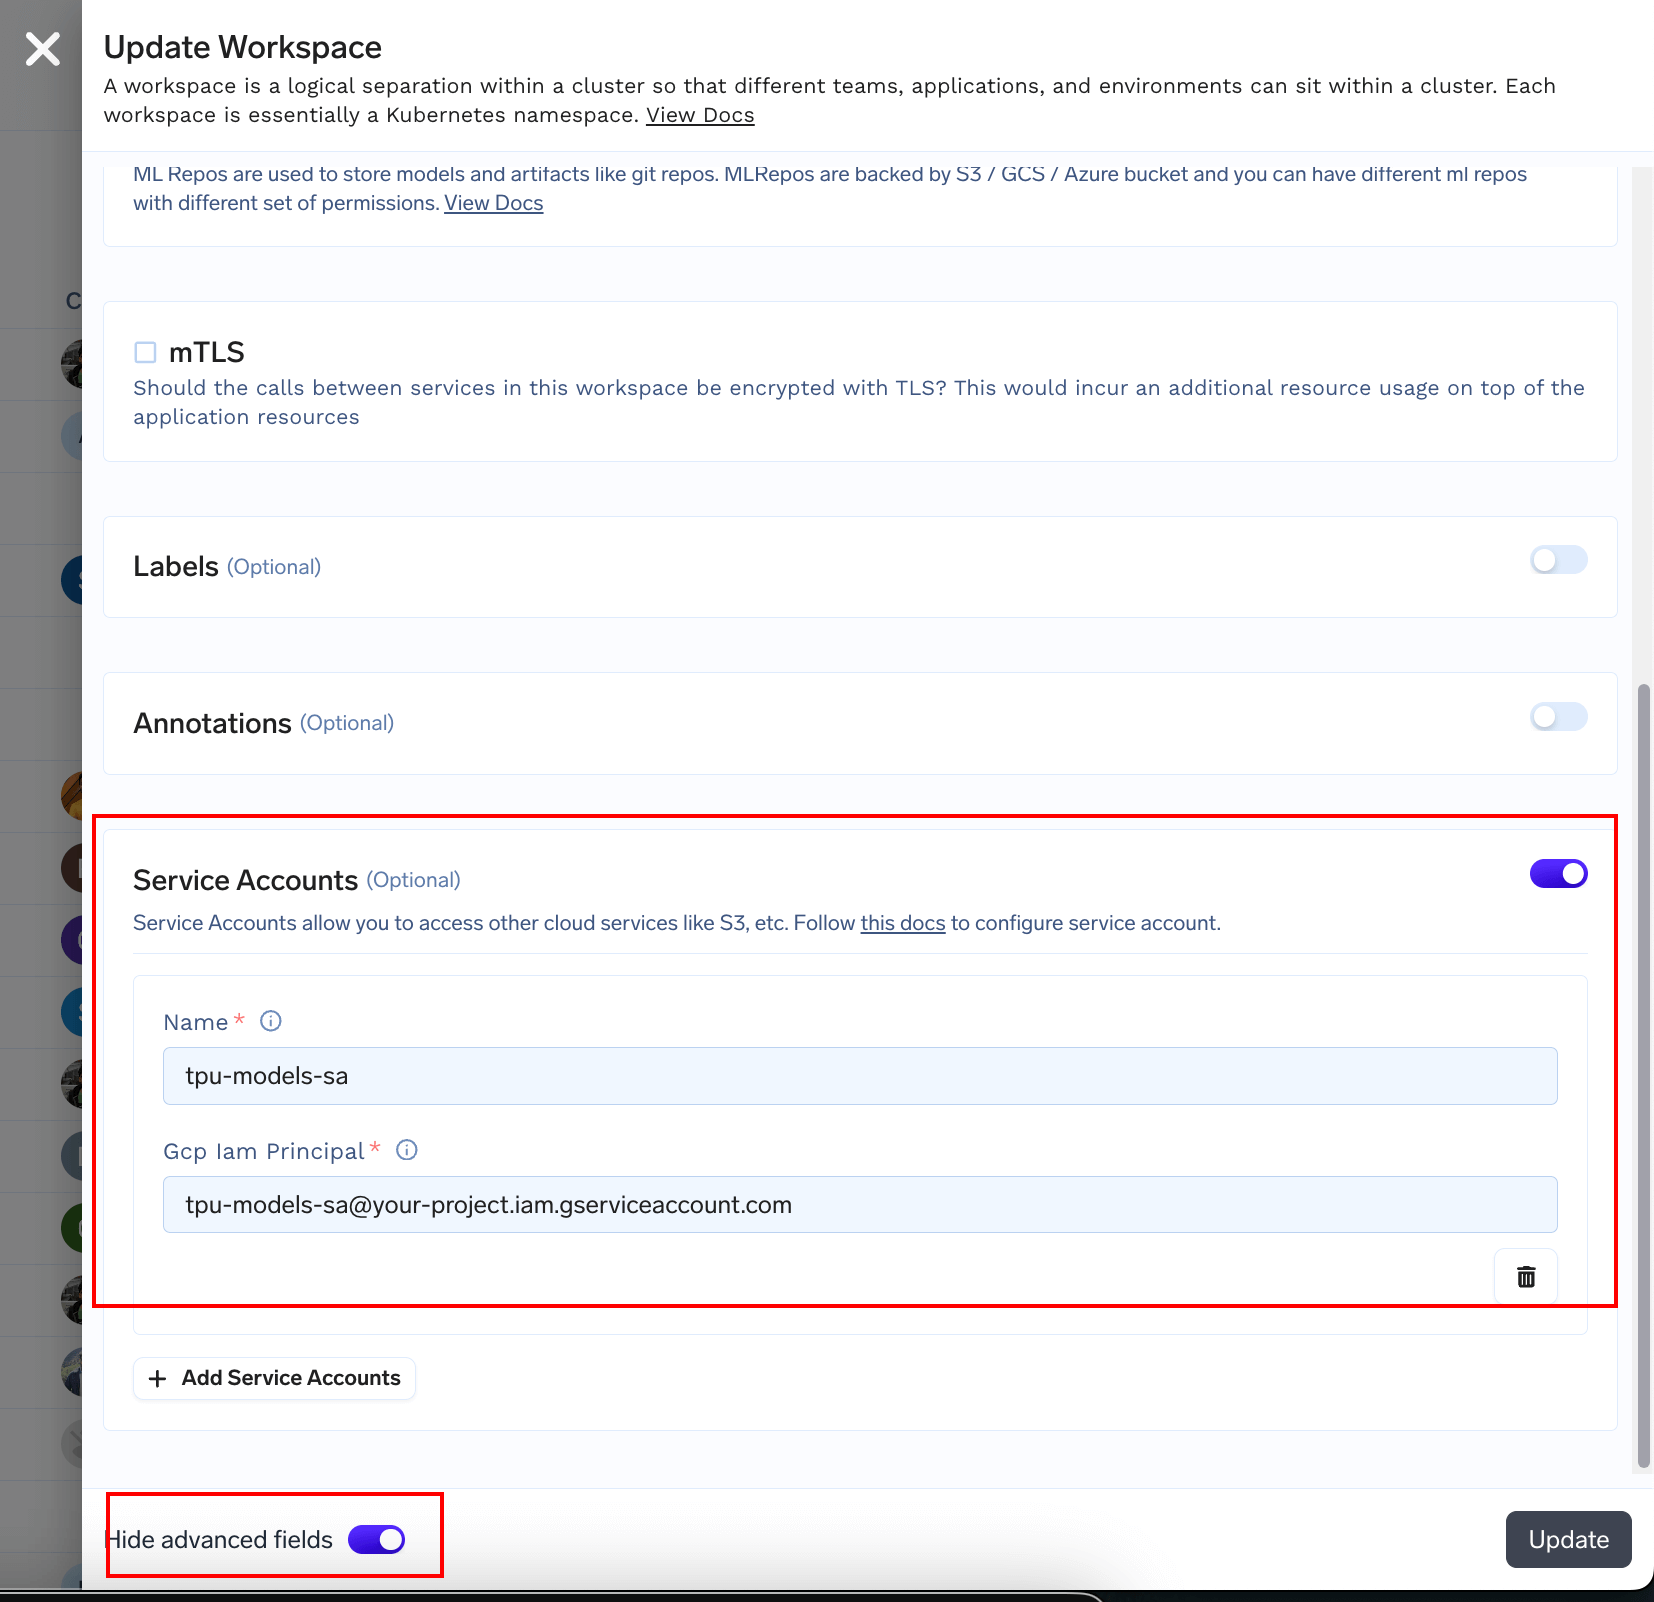
- Finally edit the workspace you created and add the service account principal
kaggle.json secret we created earlier and puts them in your GCS bucket using the serviceaccount we created earlier
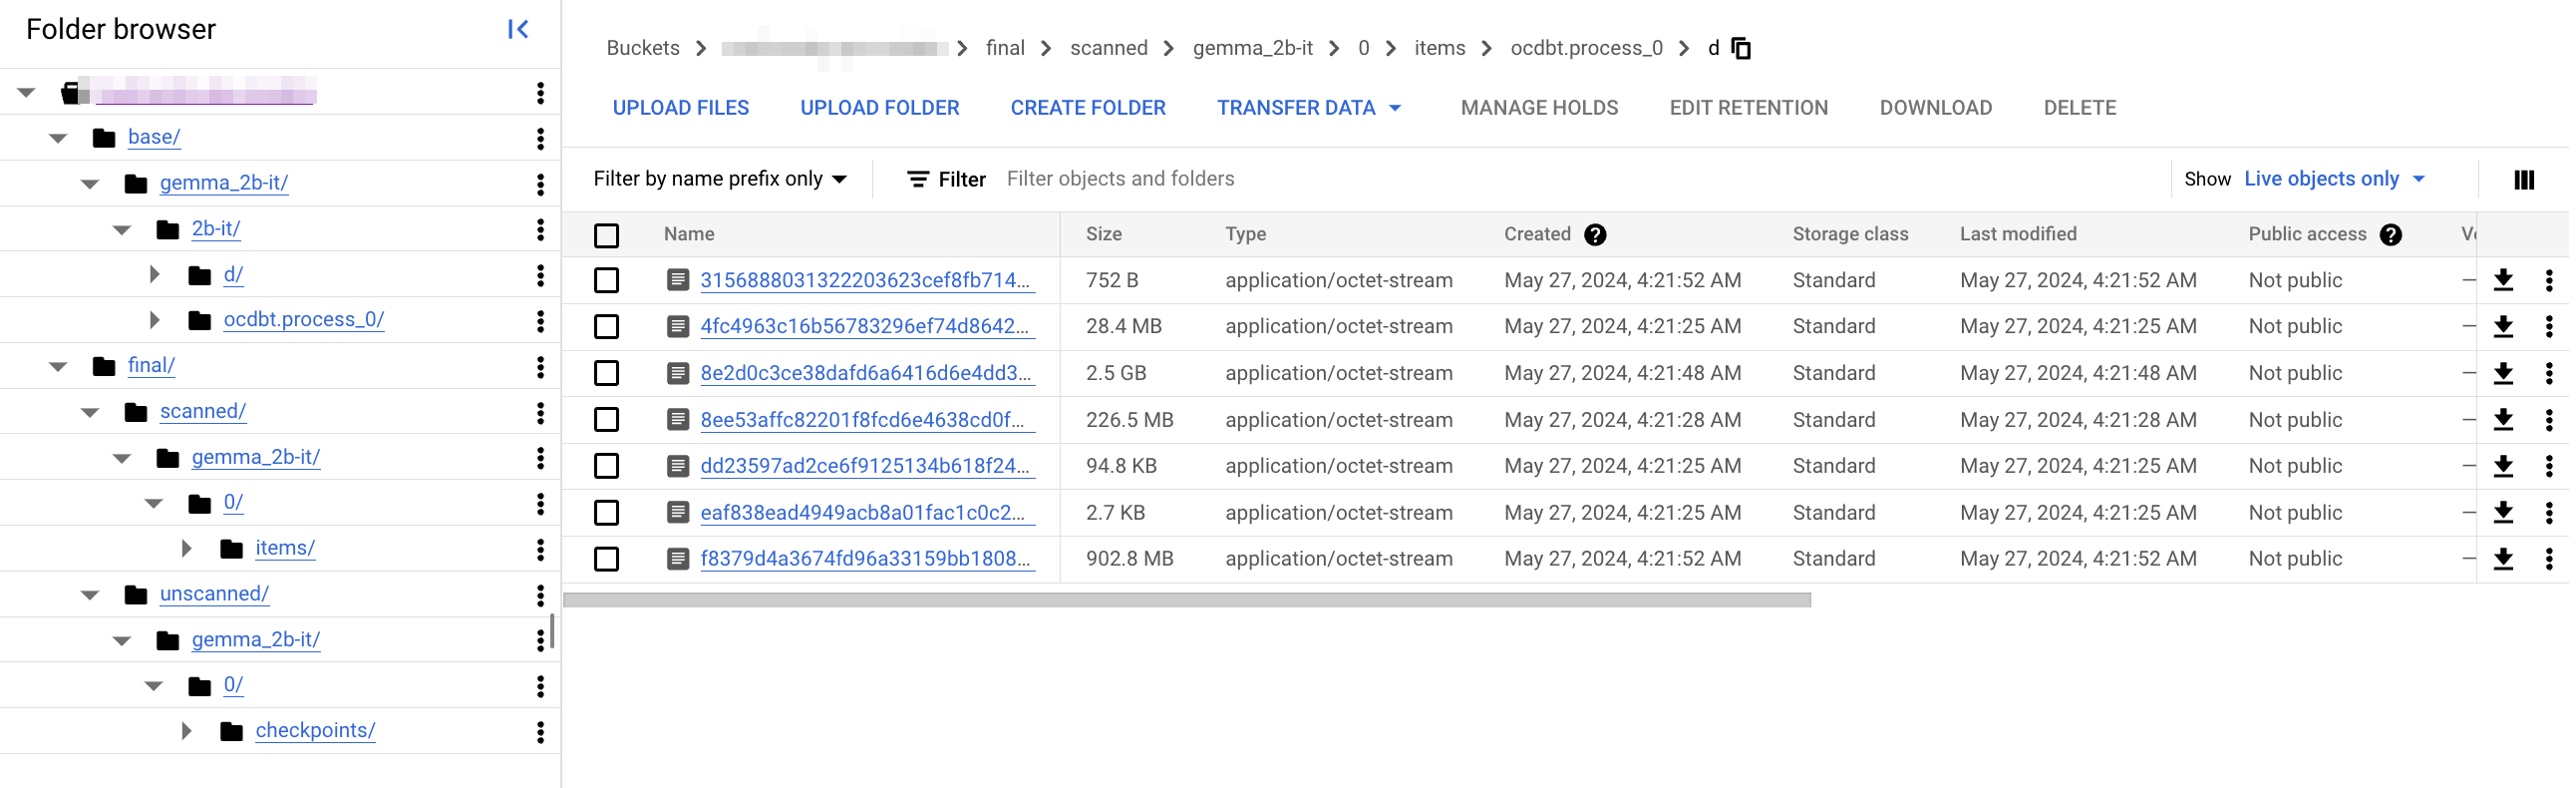
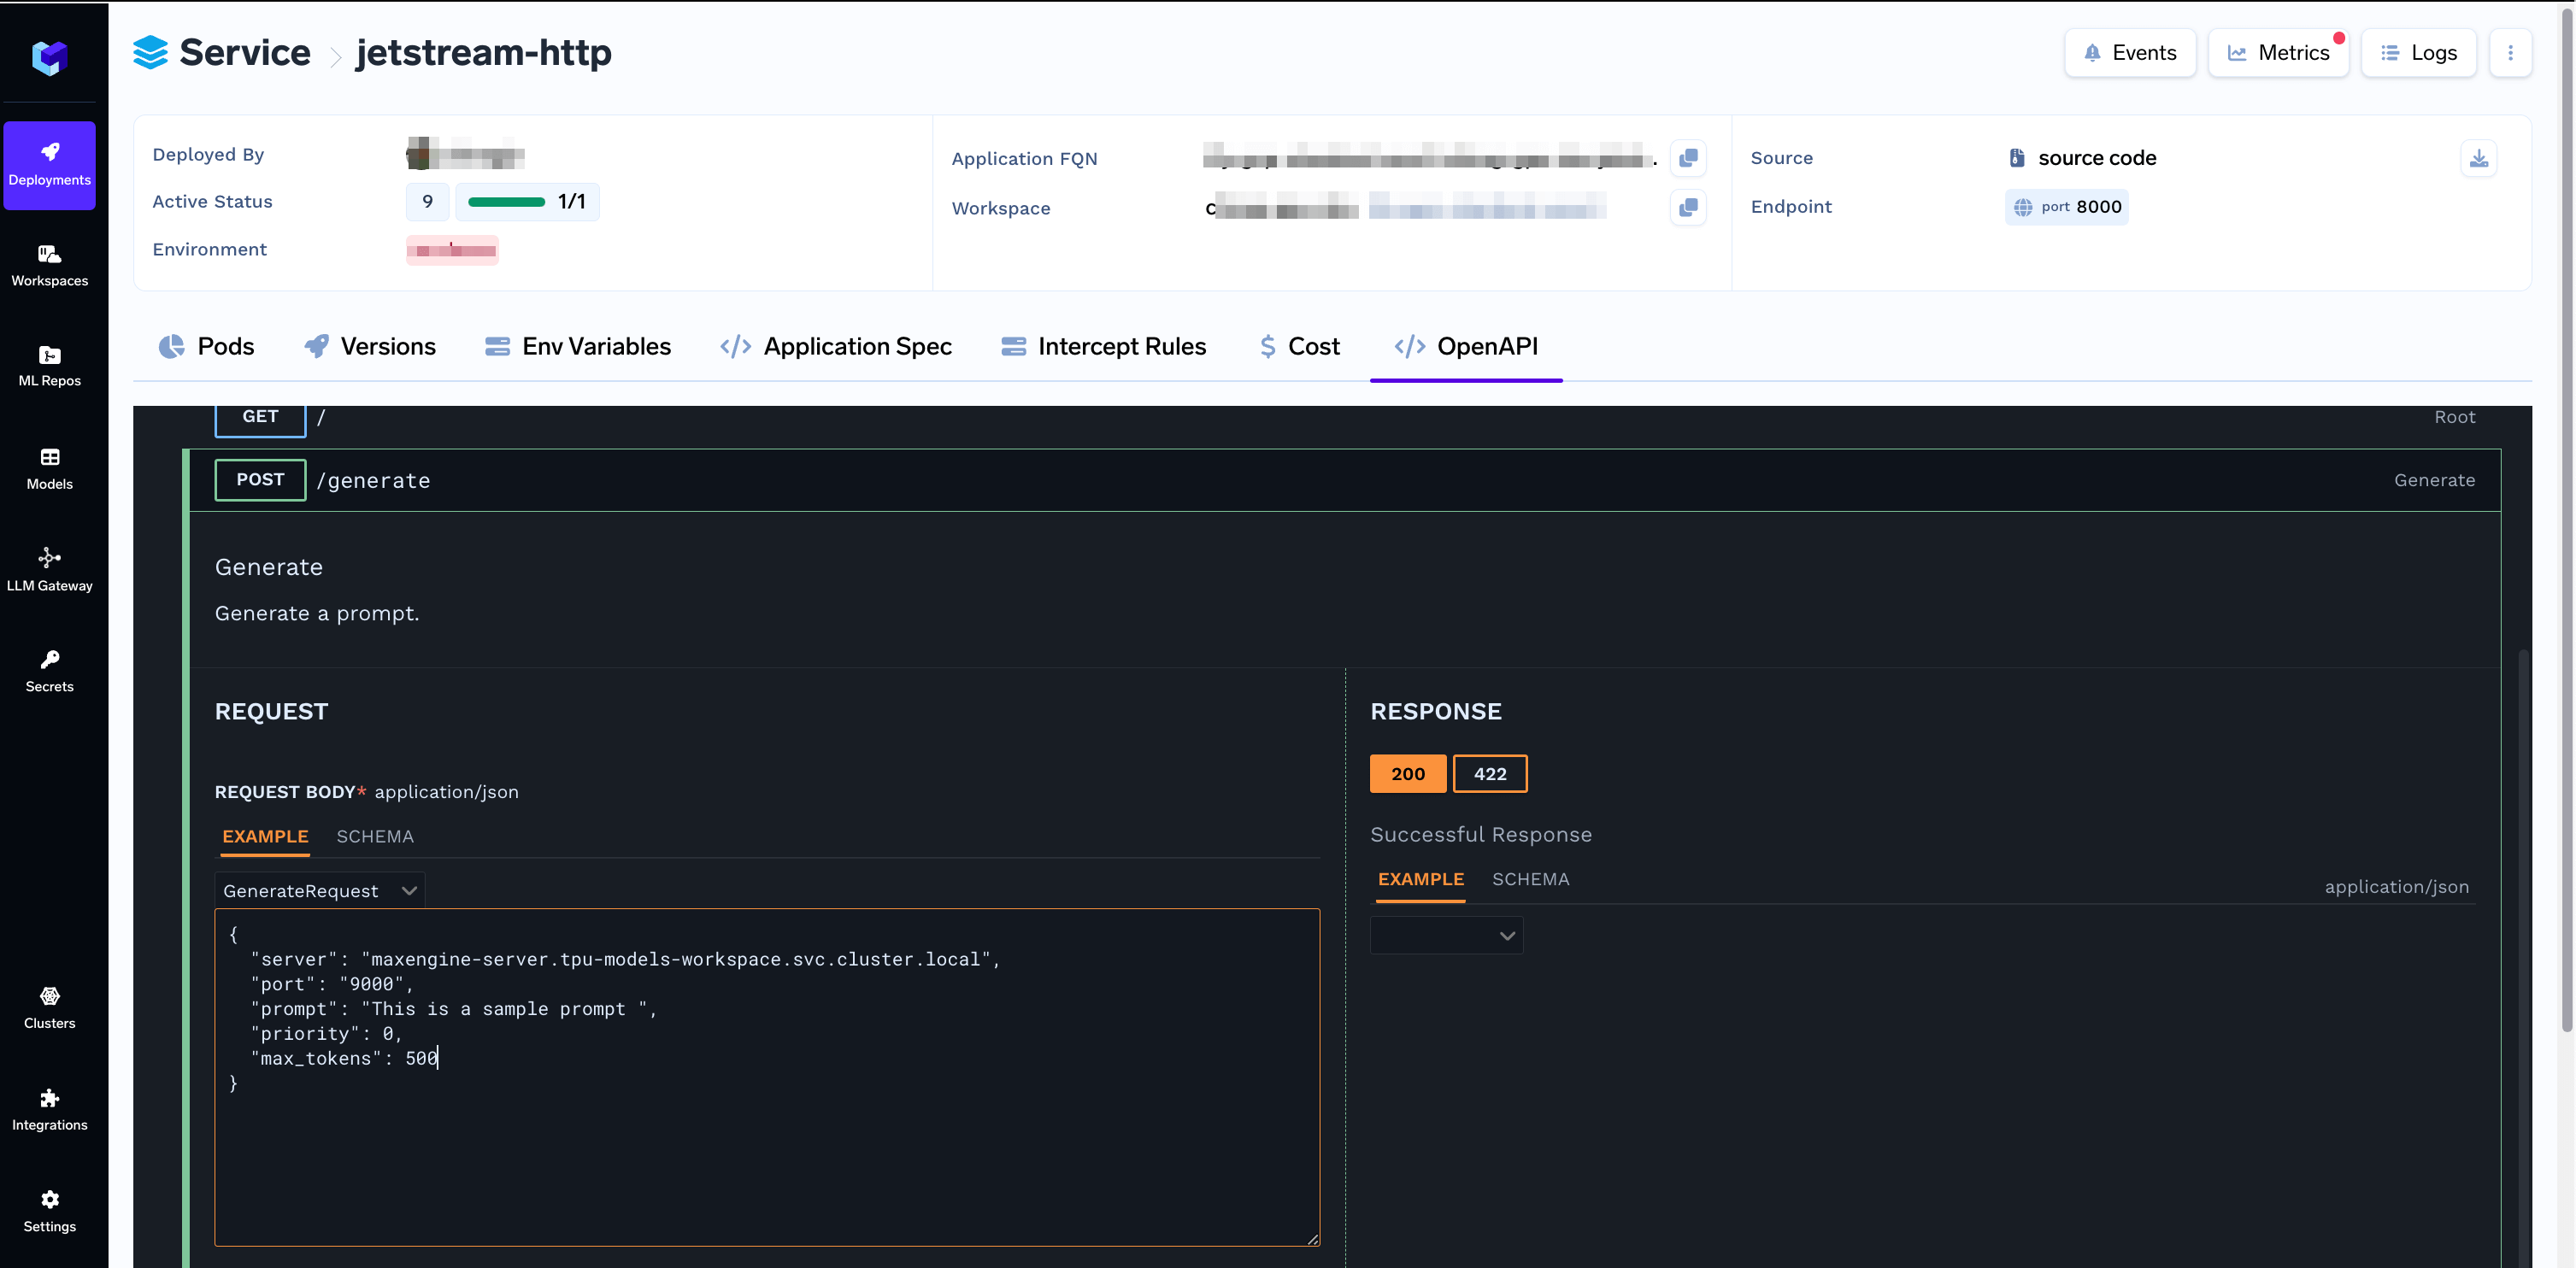
/generate endpoint