Setting Resources for your application
You can select the resources from theResources section in the deployment form.
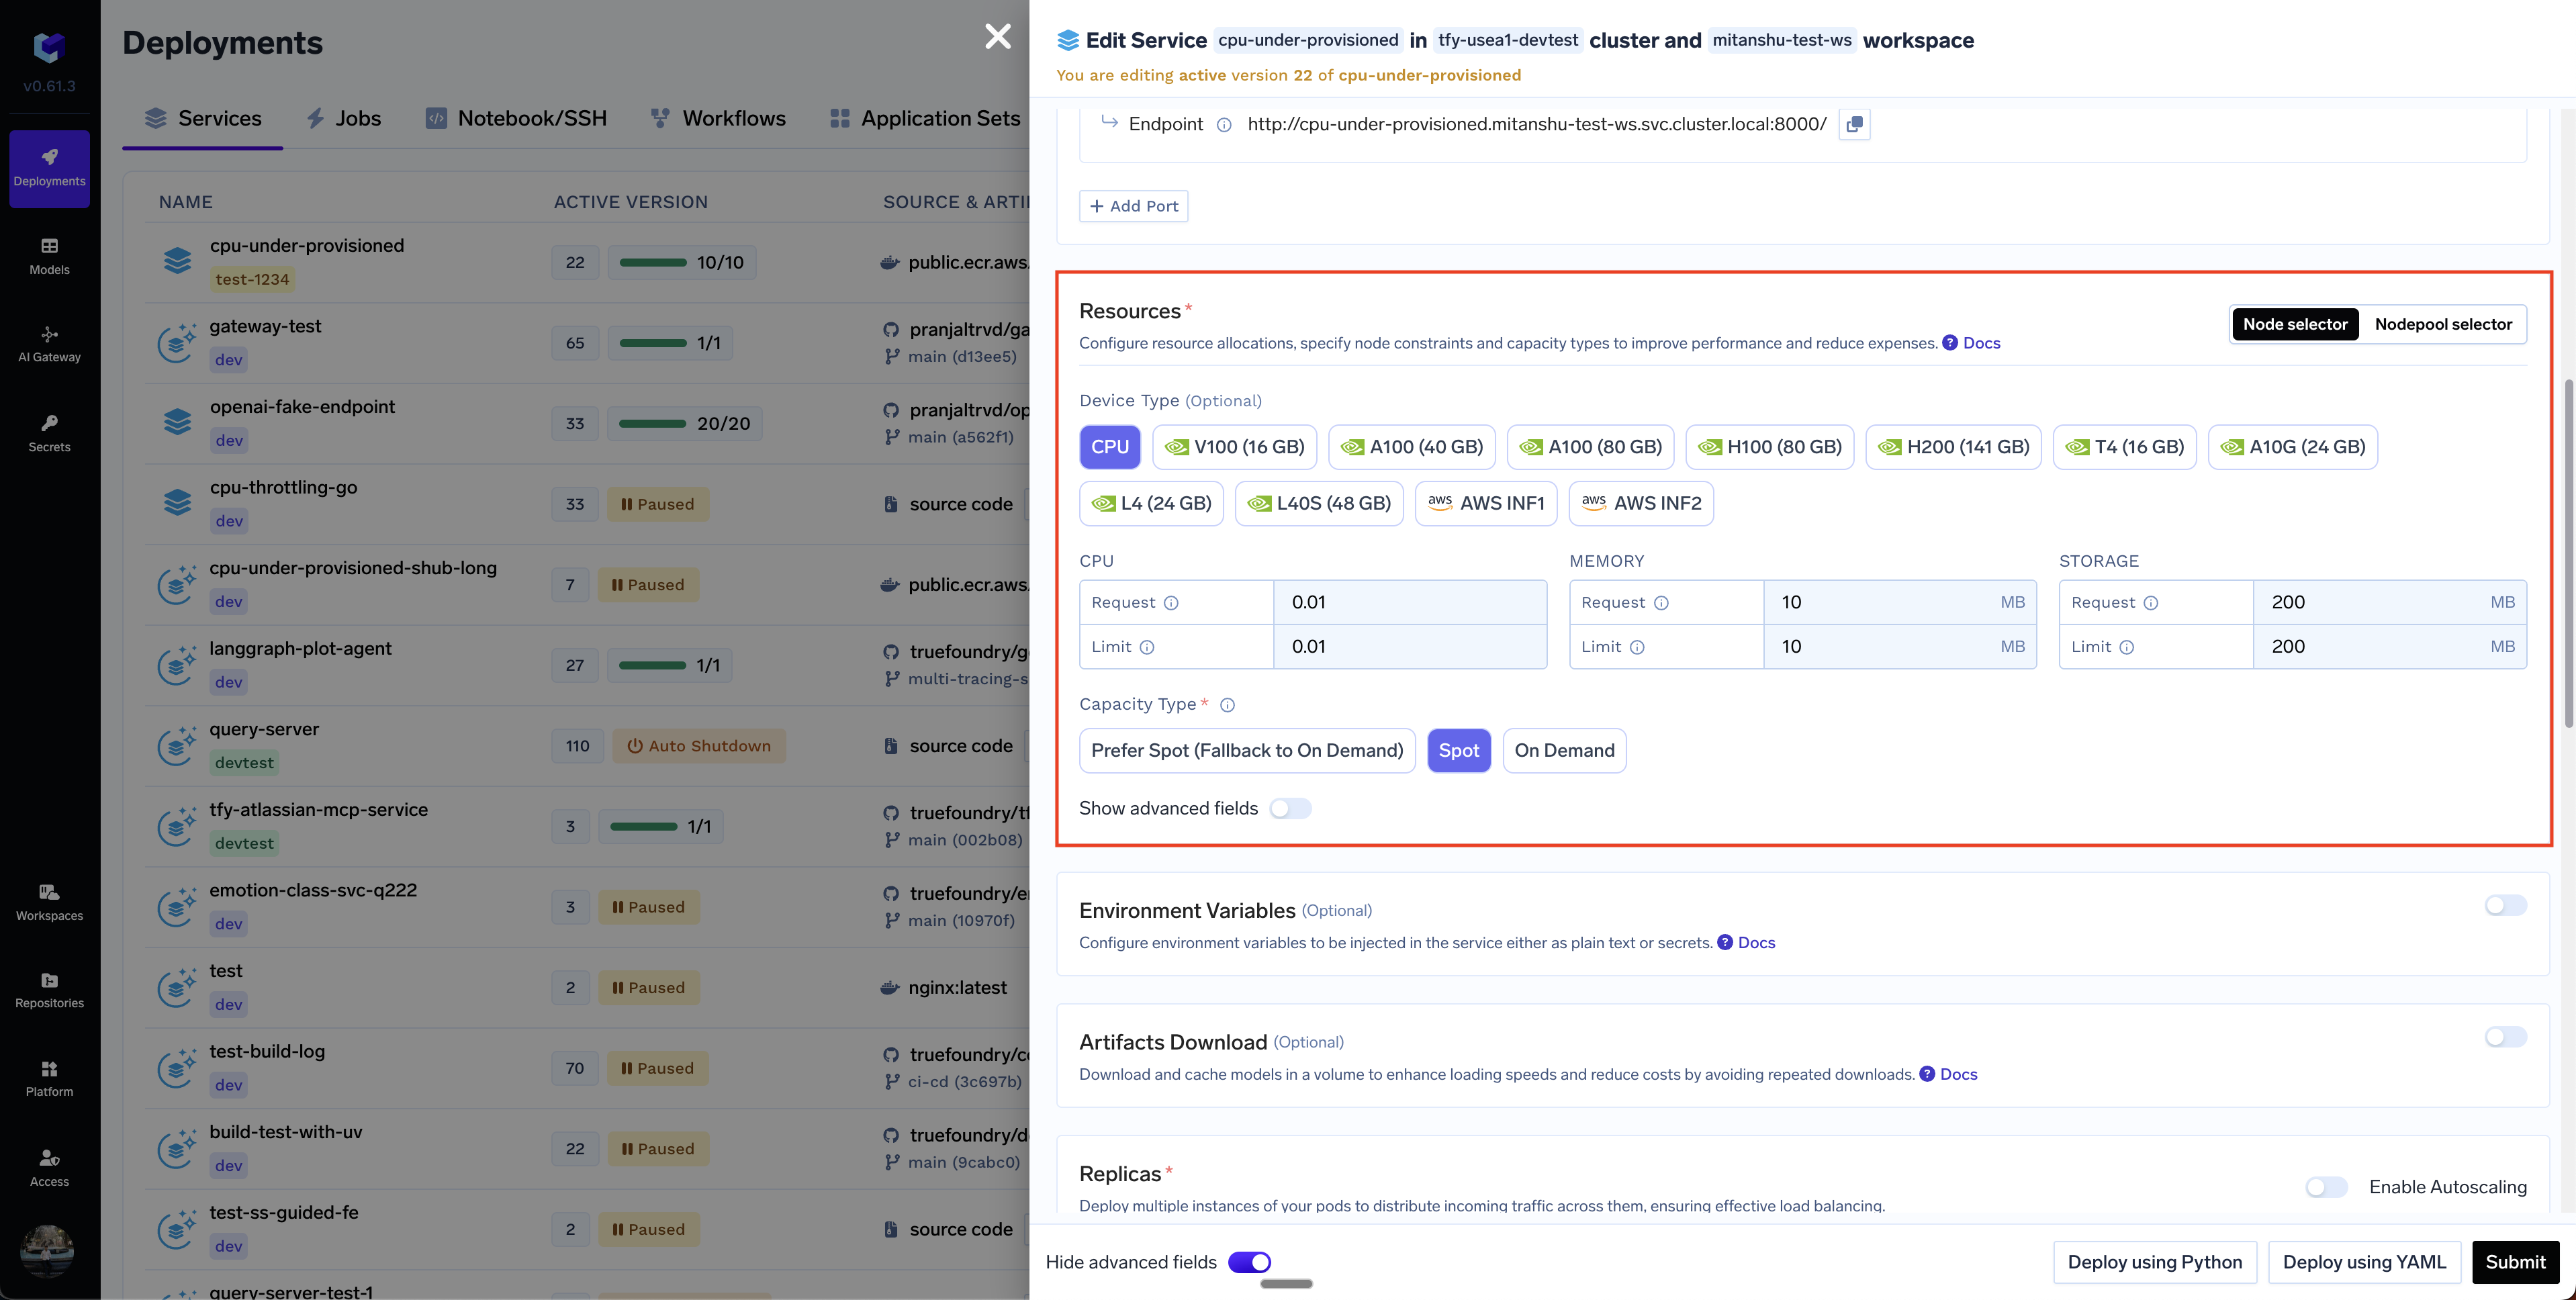
- Choose CPU or GPU along with its type.
- Fill up the CPU, Memory and Ephemeral Storage request and limit fields.
- Select the capacity type - we have the following options here:
On-demand- This will deploy the application on on-demand instances.Spot- This will deploy the application on spot instances.Prefer Spot (with fallback on On-demand)- This will try to deploy the application on spot instances. If the spot instances are not available, it will bring up the application on on-demand instances. If a spot instance is preempted, we will try to replace it with another spot instance, failing which, it will be shifted to an on-demand instance.
What are On-demand and Spot Instances?
What are On-demand and Spot Instances?
Spot and on-demand instances are two types of instances offered by cloud providers like AWS, GCP, and Azure.On-demand instances are the standard, pay-as-you-go compute resources offered by cloud providers. You pay for the compute time you use, with no long-term commitments.Spot instances are spare compute capacity offered by cloud providers at a significantly discounted price (often up to 90% off the on-demand price). However, the catch is that the cloud provider can reclaim these instances with minimal notice (typically a 2-minute warning) if demand for that instance type increases. The spot prices also fluctuate based on demand and supply.Here’s an example of a snapshot of the spot vs on-demand prices of a few instance types in AWS, GCP and Azure:
- AWS
- GCP
- Azure
Which capacity type option should I choose?
Which capacity type option should I choose?
Spot instances are a good option for nodes when:
- You are running multiple replicas of a service - hence the chances of all the spot machines going down at the same time is extremely low.
- You are running a long running training job and saving checkpoints which allows you to resume the training from the last checkpoint in case the machine is taken away.
- Your service can handle going down and restarting on a different node.
How does TrueFoundry handle spot interruptions?
How does TrueFoundry handle spot interruptions?
TrueFoundry’s handling of the spot instances depends on the cloud provider. Here’s what happens in each of the cloud providers:
- AWS
- GCP
- Azure
TrueFoundry uses Karpenter to orchestrate spot and on-demand instance provisioning. Karpenter automatically monitors the availability of spot instances and can bring up another instance in case a spot instance is taken away. We configure Karpenter to prefer a balance between cost and availability - so that we don’t just prioritize the cheapest option always which might have a high rate of preemption. AWS also sends a signal 2 minutes before a spot instance is taken away. TrueFoundry configures Karpenter to start bringing up a new instance the moment AWS sends this signal to reduce the node provisioning time to a few seconds.Because of this, the downtime of a pod to switch to another node is actually just a few seconds (depending on docker image download time) and hence spot instance based scheduling works quite well in AWS. We have also seen a average uptime of around 12 hours for spot instances - although this varies based on the region and the instance type.
Advanced Options
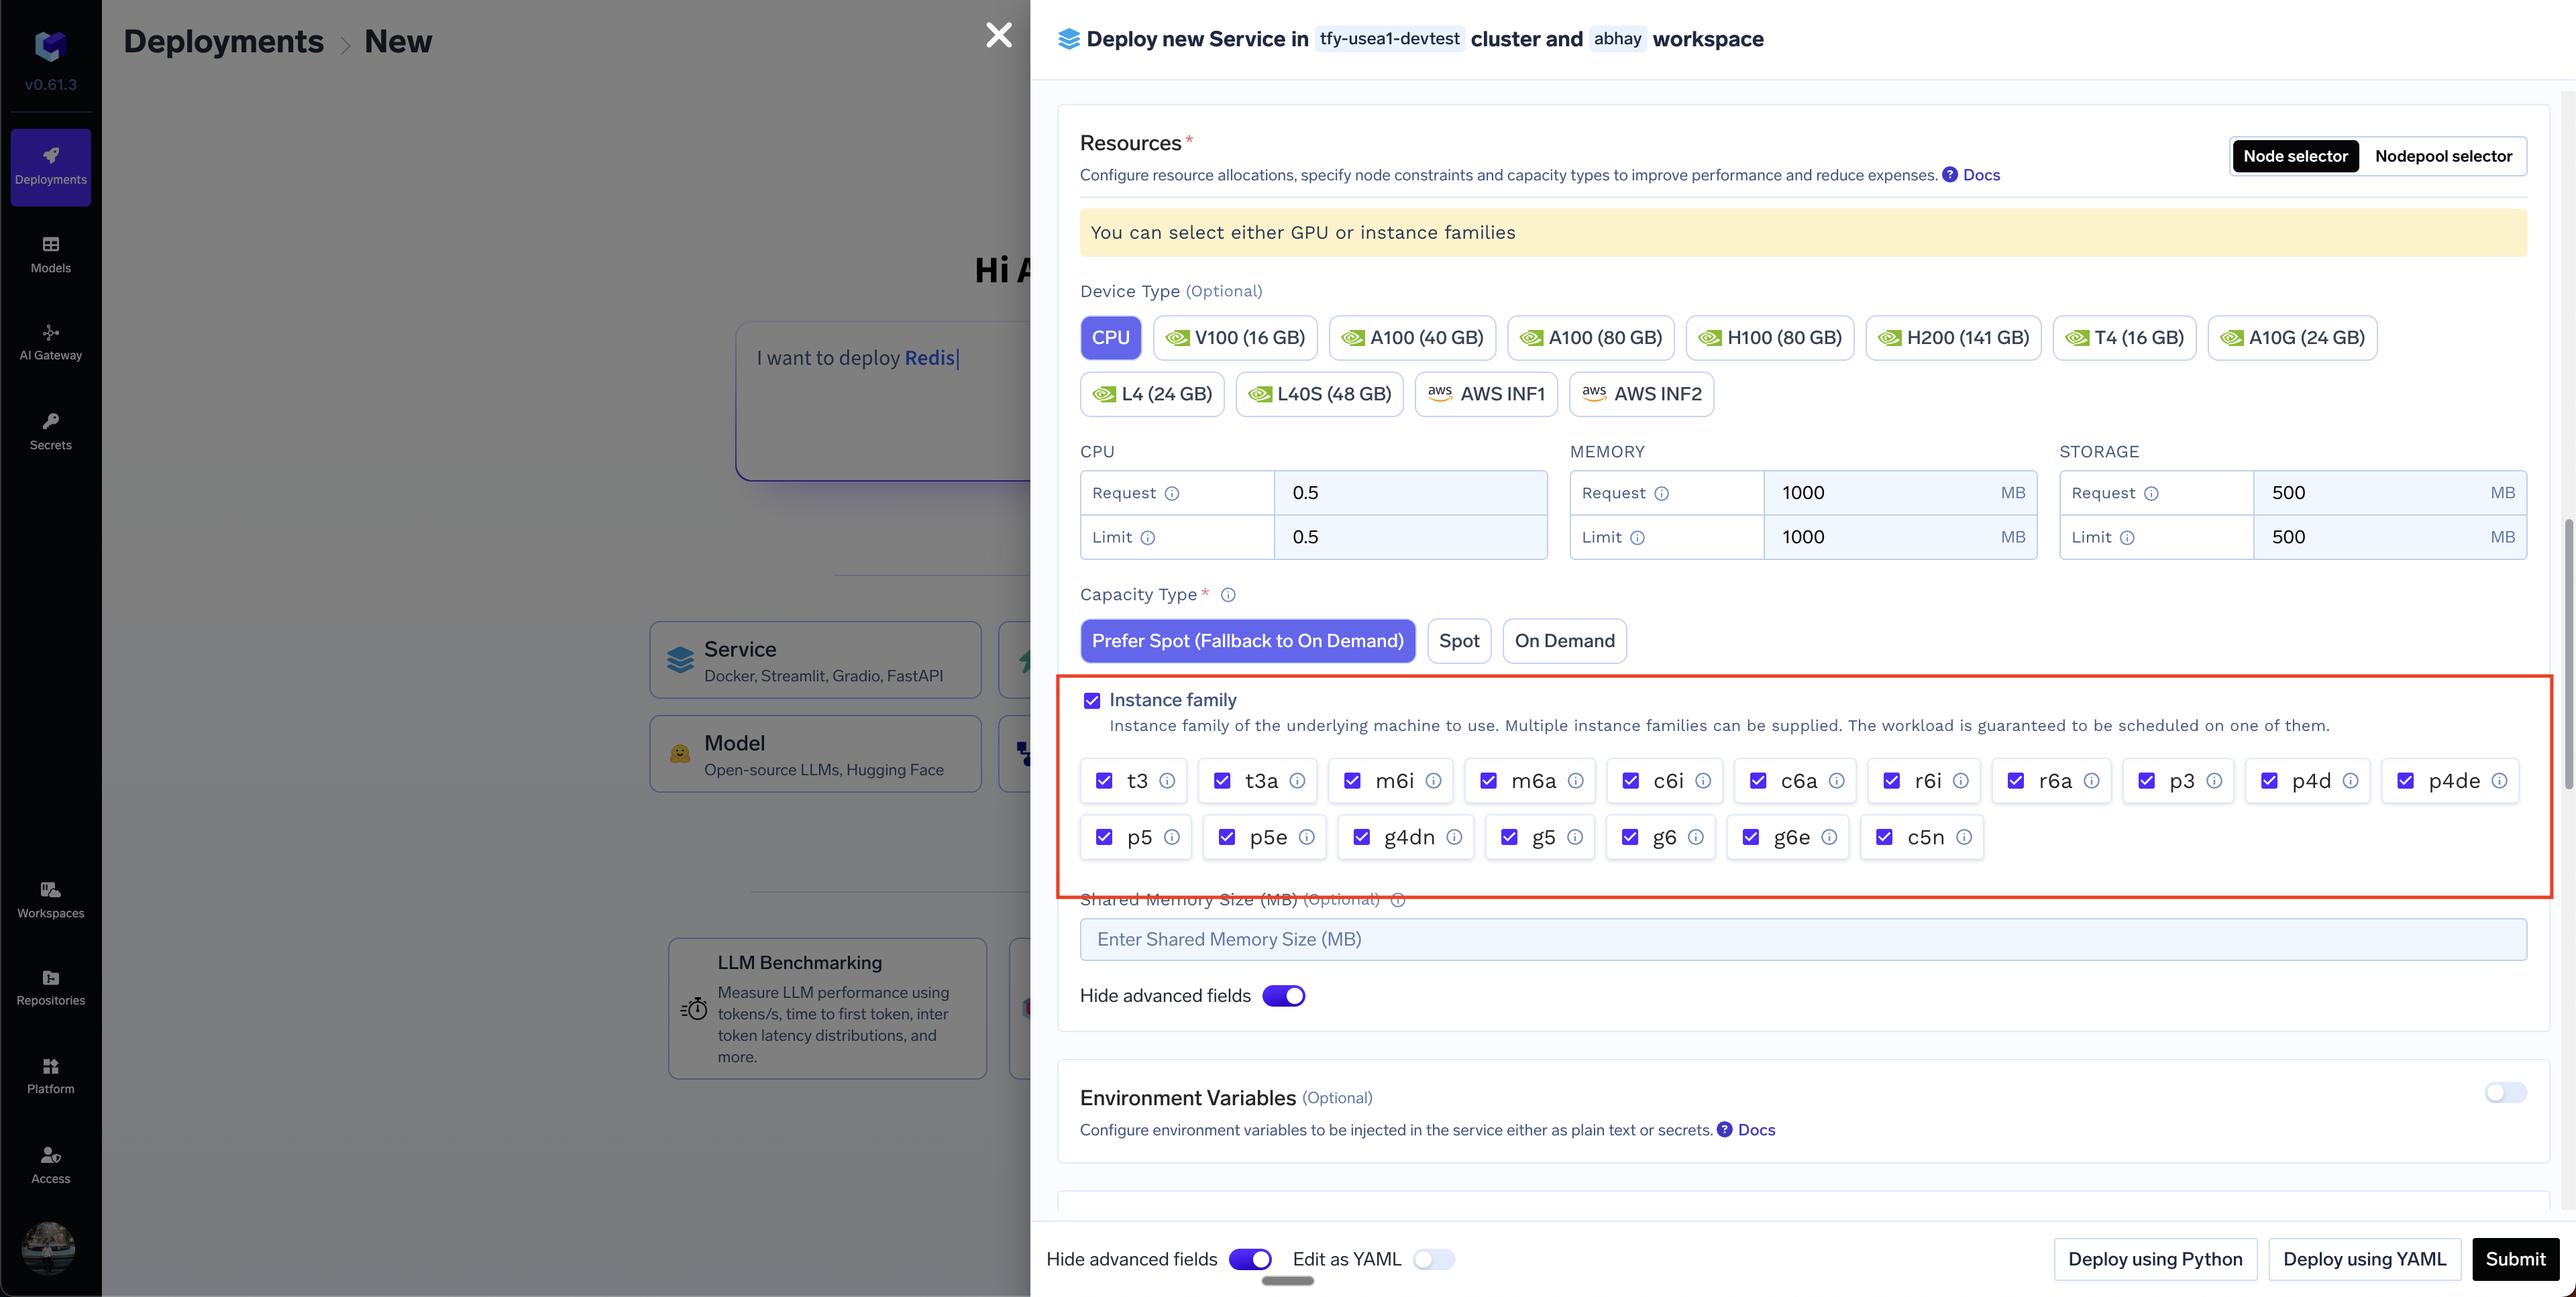
Selecting a specific instance type
You can select an instance type by clicking on theAdvanced Options button in Resources section and then selecting Instance Family option.
Selecting a Kubernetes nodepool
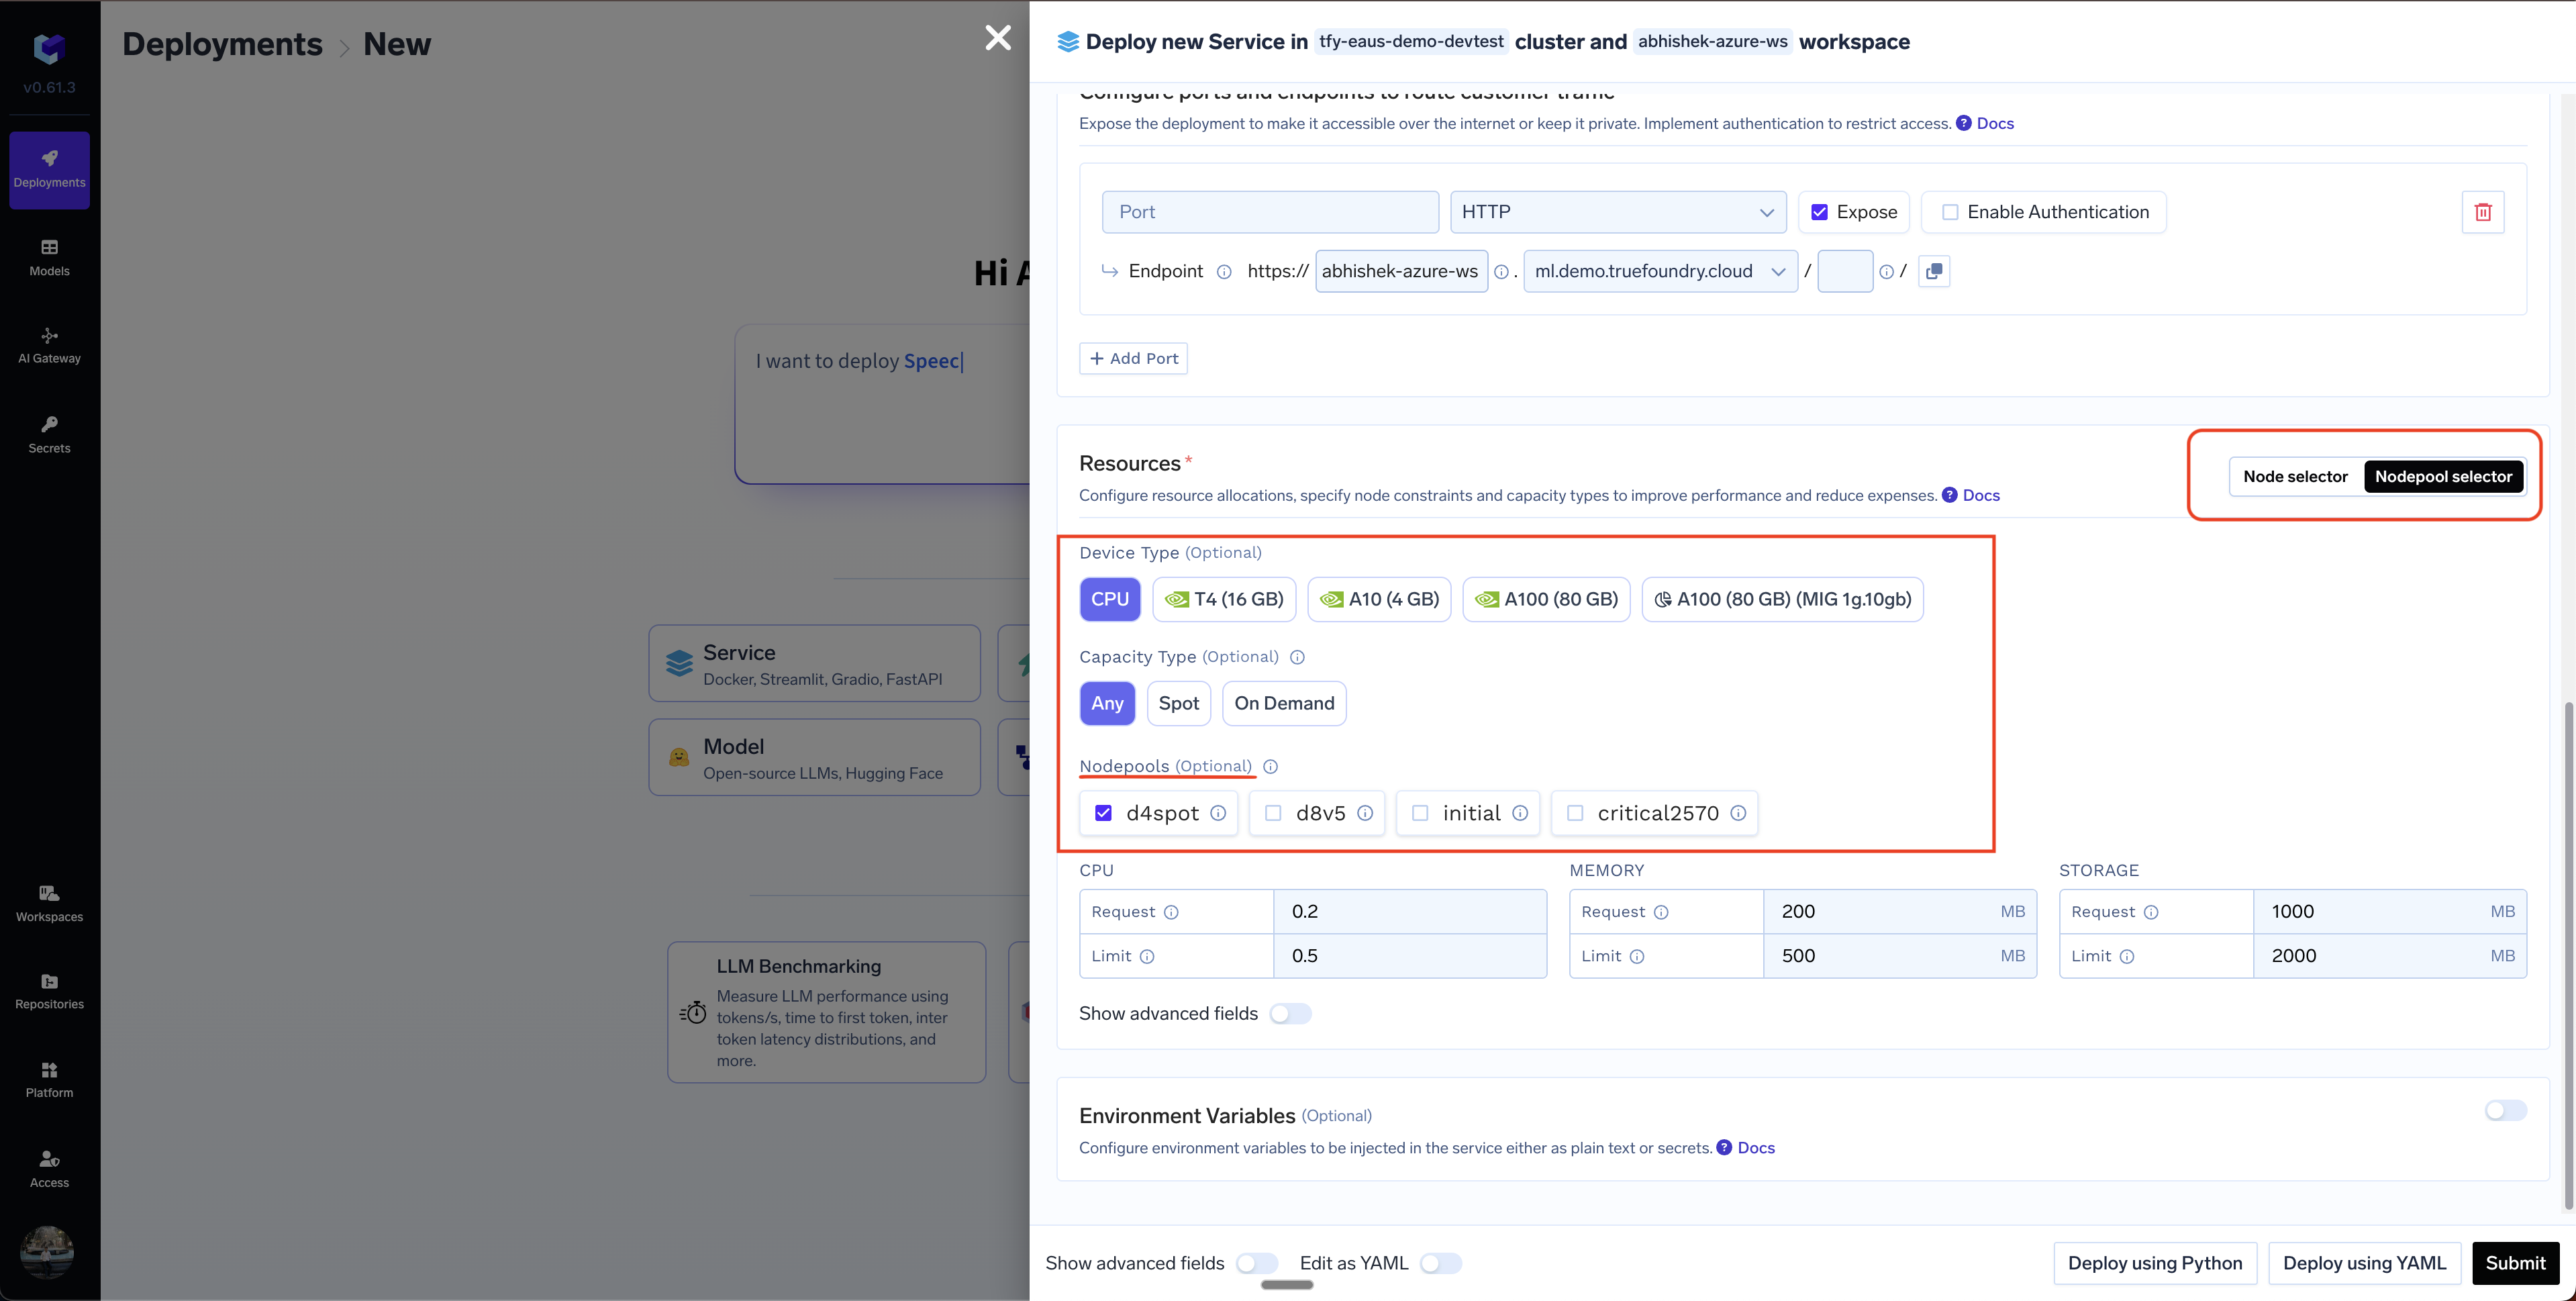
If you are using the nodepools in Kubernetes and want to specifically select a certain nodepool to deploy your application, you can do so by clicking on theNodepool Selector option and then selecting the nodepool. We automatically parse the possible options from the available nodepools to show you the filtered set of nodepools - for e.g. if you select Spot, it will filter the set of nodepools that have spot instances.