

If you’re new to deploying services on TrueFoundry, we recommend first going through the Deploy Your First Service guide to understand the basic deployment workflow.
Prerequisites
- MCP server source code (in a GitHub repository or on your local machine)
- A TrueFoundry workspace (Create workspace if you don’t have one)
- If deploying from GitHub: repository integrated with TrueFoundry (see GitHub Integration Setup)
- Understanding of whether your server uses HTTP/SSE or stdio communication
Writing Your Own MCP Server
If you’re writing your own MCP server, here are examples to get you started.HTTP-Based Server (Python with FastMCP)
HTTP-Based Server (Python with FastMCP)
HTTP-based servers are easier to deploy and integrate. FastMCP is a Python framework for building HTTP MCP servers:requirements.txt:Repository Structure:Testing Locally:Before deploying, test your server locally:
server.py
Stdio-Based Server (Python)
Stdio-Based Server (Python)
If you prefer stdio communication, you’ll need to implement the MCP protocol over stdin/stdout:Repository Structure:Dockerfile:Testing Locally:Before deploying, test your stdio server locally:
server.py
Determine Your Server Type
Before deploying, you need to identify whether your MCP server uses:- HTTP/SSE: The server exposes HTTP endpoints and can be accessed directly
- Stdio: The server communicates through standard input/output (stdin/stdout)
Deployment Steps
The deployment process is the same whether your code is in a GitHub repository or on your local machine. The only difference is the source selection in the second step.1
Navigate to Service Deployment
- Log in to your TrueFoundry dashboard
- Navigate to Deployments → New Deployment → Service
- Select your workspace
2
Choose Your Source
- From GitHub Repository
- From Local Machine
- Select Git Repo as the source
- Choose your repository from the Repo URL dropdown
- Set the Path to Build Context to the directory containing your MCP server code
Path to Build Context: This is the path to the directory in the GitHub repository that contains the code for your MCP server. If your MCP server is in the root of the repository, use
"./". If it’s in a subdirectory like mcp-server/, use "./mcp-server/".- Source: Git Repo
- Repo URL:
https://github.com/your-org/your-repo - Path to Build Context:
"./mcp-server/" - Path to requirements.txt:
"./requirements.txt" - Python Version:
3.11 - Command:
python server.py - Port:
8000
3
Choose Build Method Based on Server Type
- HTTP/SSE Server
- Stdio Server
For HTTP-based servers, you can deploy directly without additional wrappers.
Option A: With Dockerfile (Recommended)
If you already have a Dockerfile in your repository:Example Configuration:- Path to Build Context:
"./mcp-server/" - Path to Dockerfile:
"./Dockerfile" - Command:
python server.py
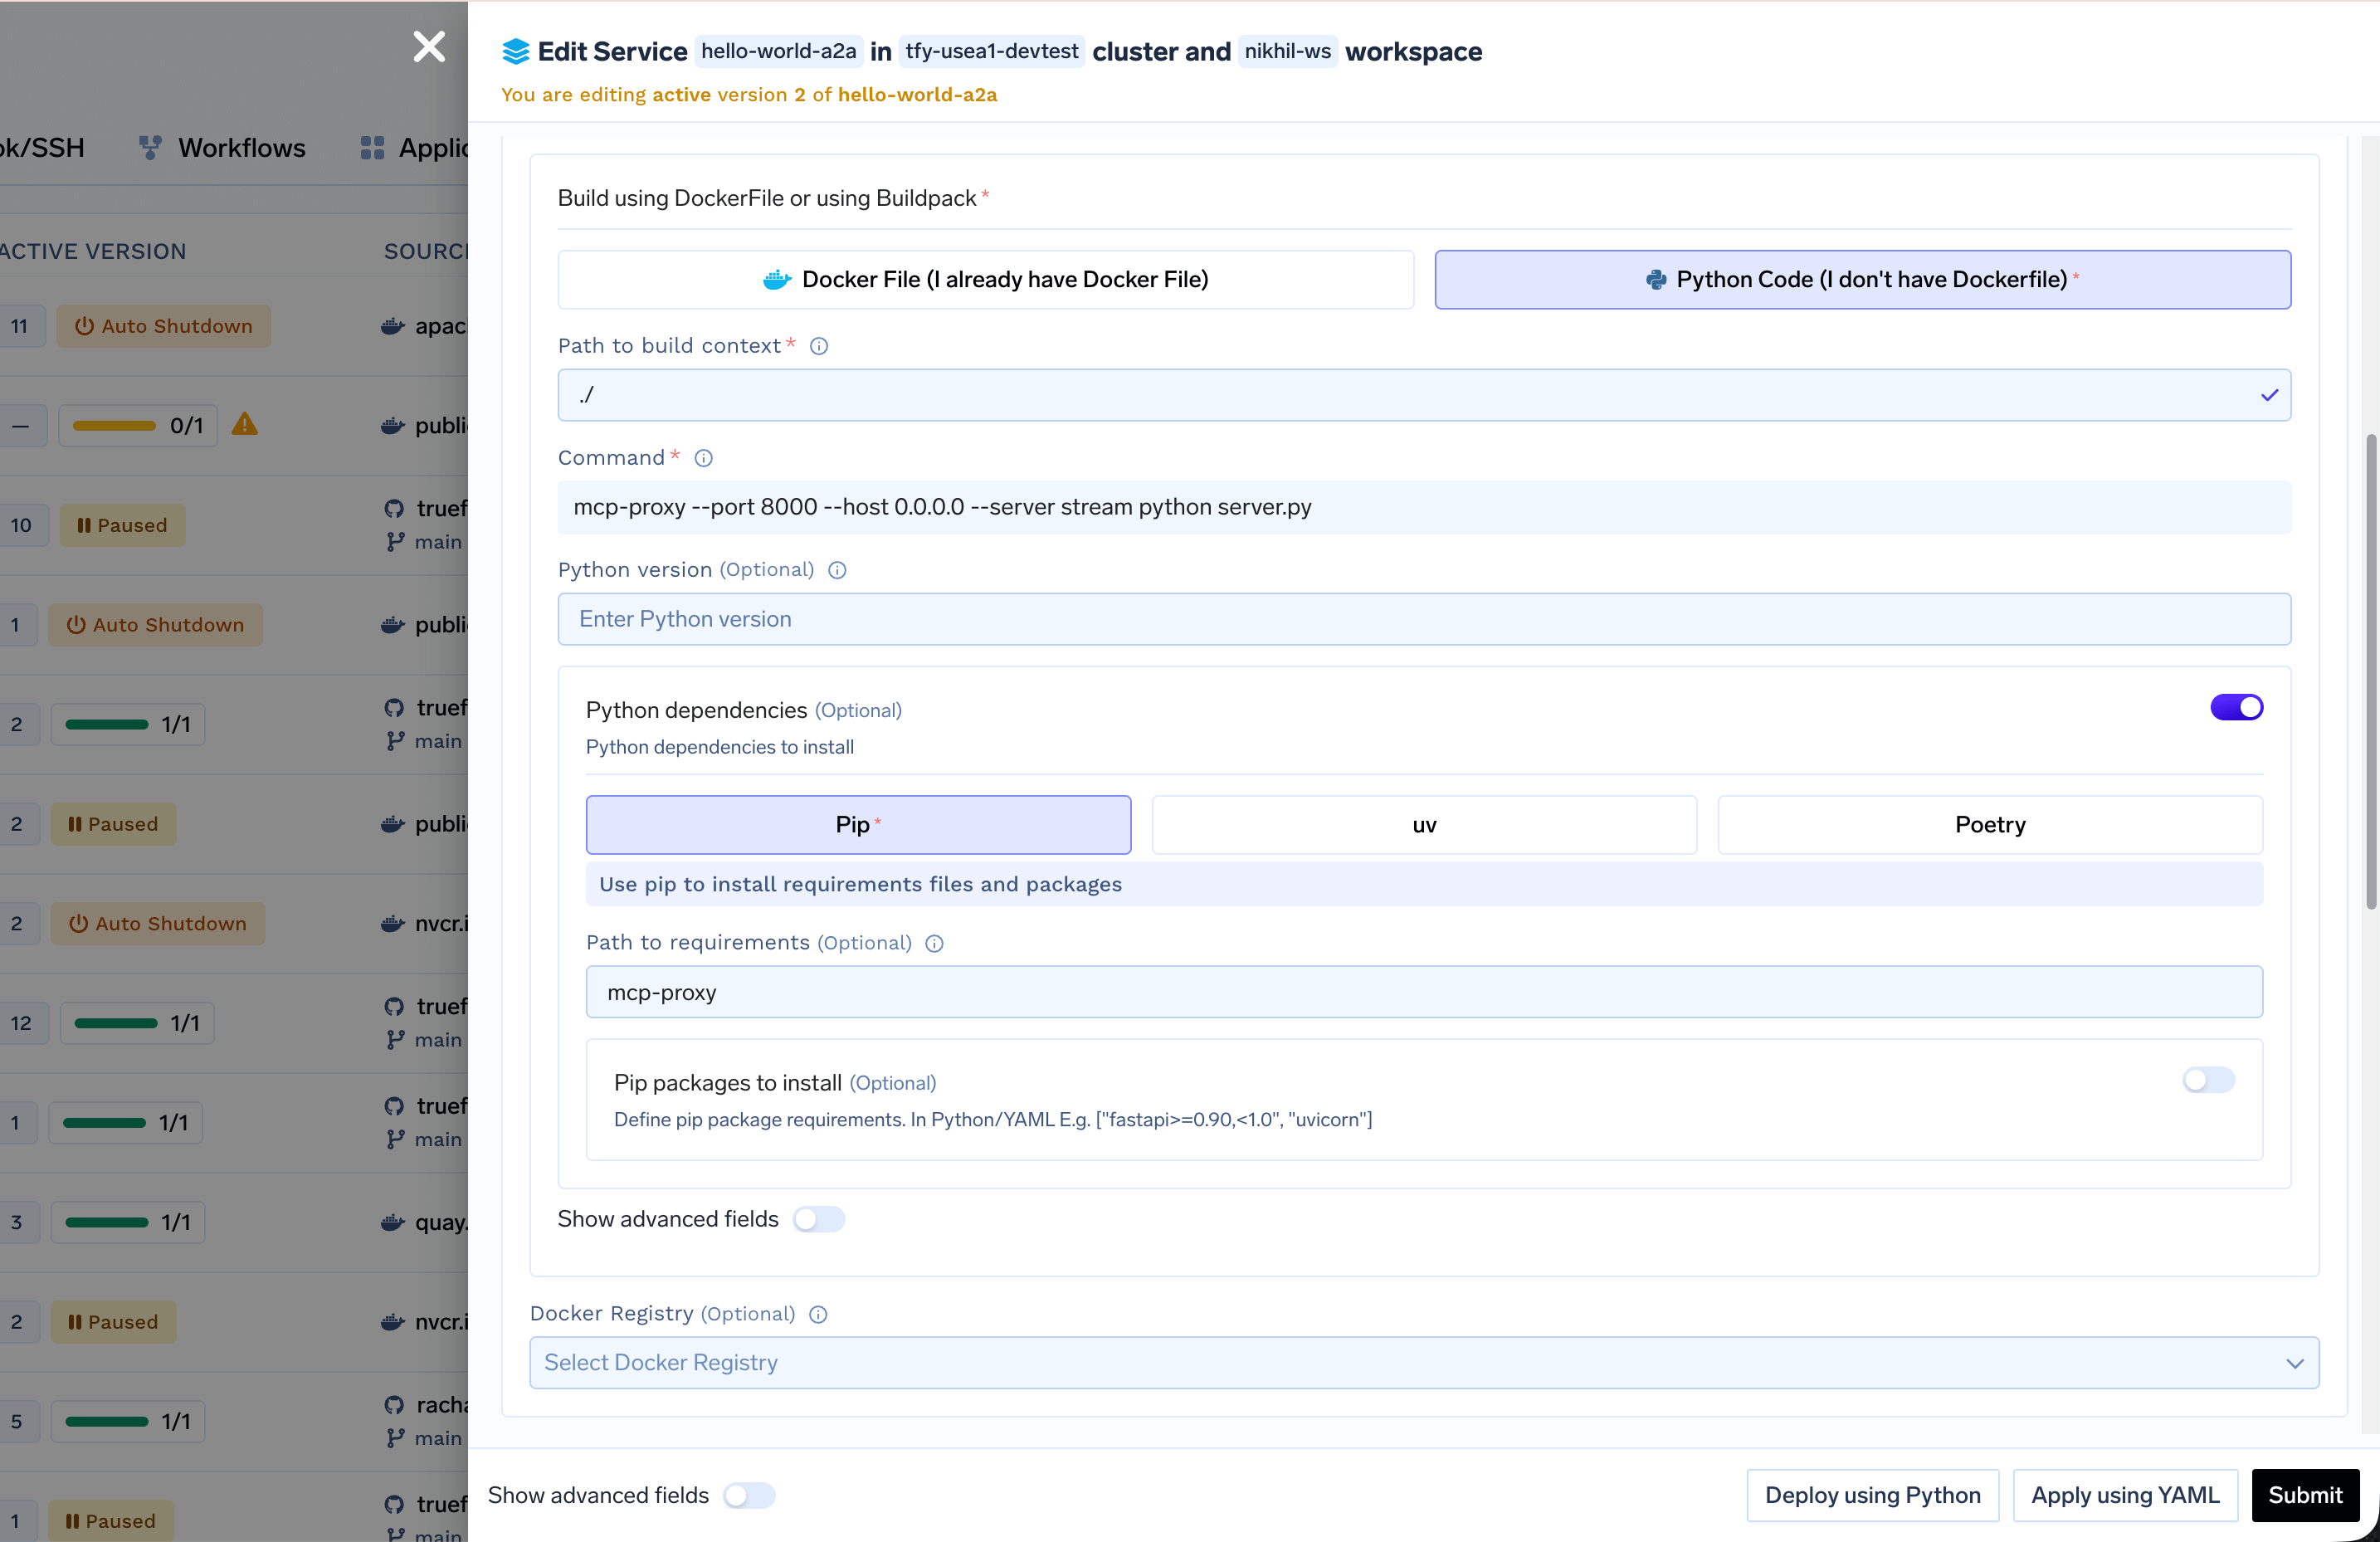
Option B: Without Dockerfile (Python)
If you’re using Python without a Dockerfile:- Select Python Code (I don’t have Dockerfile)
- Set Path to requirements.txt relative to the build context
- Choose Python Version (e.g.,
3.11) - Set Command to run your server
- Path to Build Context:
"./mcp-server/" - Path to requirements.txt:
"./requirements.txt" - Python Version:
3.11 - Command:
python server.py
- Path to Build Context:
"./mcp-server/"(or"./"if in root) - Path to requirements.txt:
"./requirements.txt" - Python Version:
3.11 - Command:
python server.py - Port:
8000
4
Configure Port
- Click Add Port
- Set Port to
8000(or the port your server uses) - Set Protocol to
TCP - Set App Protocol to
http - Set Expose to
false(the service will be accessible internally) - Optionally set a Host if you want a custom domain
5
Set Environment Variables and resources
Add any required environment variables in the Environment Variables section. For resources, if unsure, start with the default values and later change if needed.
For sensitive values, use TrueFoundry Secrets instead of plain environment variables.
6
Deploy
Click Submit to start the deployment. Monitor the deployment status until it shows DEPLOY_SUCCESS.
After clicking Submit, your deployment will be processed in a few seconds, and your service will be displayed as active (green) in the dashboard, indicating that it’s up and running. You can view all the information about your service, including logs and metrics, from the deployment dashboard.
7
Verify Deployment
After deployment:The endpoint should respond with MCP protocol messages over HTTP.
- Check the service status in the dashboard (should be green/running)
- Note the service endpoint URL
- Test the endpoint:
mcp-proxy Command Options
For stdio servers, themcp-proxy command supports several options:
--port: Port to expose HTTP endpoint (default: 8000)--host: Host to bind to (use0.0.0.0for TrueFoundry)--server stream: Use streaming mode for MCP protocol--debug: Enable debug logging
Best Practices
Error Handling
Error Handling
Always implement proper error handling:
Input Validation
Input Validation
Validate inputs before processing:
Logging
Logging
Add logging for debugging and monitoring:
Troubleshooting
Service won't start
Service won't start
- Check that the command is correct
- Verify the port matches your server configuration
- Ensure the server binds to
0.0.0.0, notlocalhost - Check service logs in the TrueFoundry dashboard
Cannot access endpoint
Cannot access endpoint
- Verify the port is correctly configured
- Check that the service is running (green status)
- Ensure the endpoint path matches your server configuration
- For internal access, use the cluster-internal URL
mcp-proxy not found (stdio servers)
mcp-proxy not found (stdio servers)
- Ensure
mcp-proxyis installed in the Docker image - Check that the installation command runs successfully
- Verify the PATH includes npm global bin directory
Stdio server not starting
Stdio server not starting
- Verify the command to run your stdio server is correct
- Check that all dependencies are installed
- Review service logs for startup errors
- Ensure the stdio server reads from stdin and writes to stdout
Build fails
Build fails
- Verify the repository URL and path are correct (for GitHub)
- Check that requirements.txt exists and is valid (for Python)
- Ensure Python version matches your code requirements
- Review build logs in the deployment dashboard
Tools not appearing
Tools not appearing
- Verify
tools/listmethod returns correct format - Check tool schemas are valid JSON Schema
- Ensure the MCP protocol version matches
- Test the endpoint directly with curl
Tool execution fails
Tool execution fails
- Check error handling in tool implementations
- Verify input validation is working
- Review service logs for detailed errors
- Test tools individually using curl or the playground