

Prerequisites
- A TrueFoundry tenant with Admin access to Settings → Security & Access → SSO.
- A Microsoft Entra ID tenant with permission to create Enterprise Applications (Cloud Application Administrator or higher).
Configuration overview
Create the SSO configuration in TrueFoundry
Create an Enterprise Application in Entra
Configure the SAML connection on both sides
Assign users and test
Step 1 — Create the SSO configuration in TrueFoundry
Open SSO settings
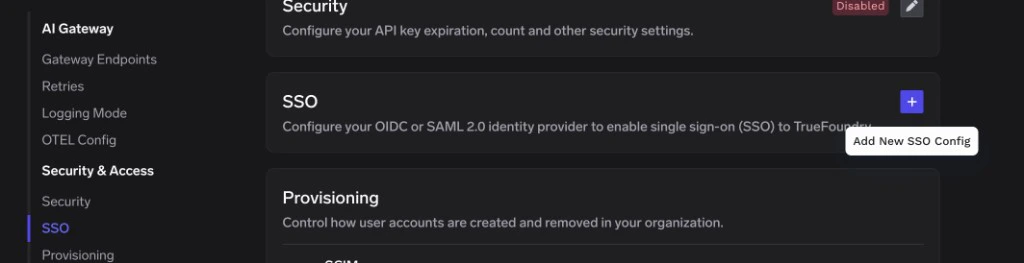
SSO page in TrueFoundry — click the + icon to add a new SSO configuration
Fill in the basic fields
- Enabled: turn this on.
- Name: a lowercase alphanumeric label — for example,
entraidsaml. - SSO Provider: choose Azure AD.
- Authentication Configuration: select SAML v2.
Save to reveal the Reply URL, Identifier (Entity ID), and Relay URL
- Identifier (Entity ID) in Entra — Audience URI (SP Entity ID) in TrueFoundry.
- Reply URL (Assertion Consumer Service URL) in Entra — Single Sign On URL in TrueFoundry.
- Relay State in Entra — Relay URL in TrueFoundry.
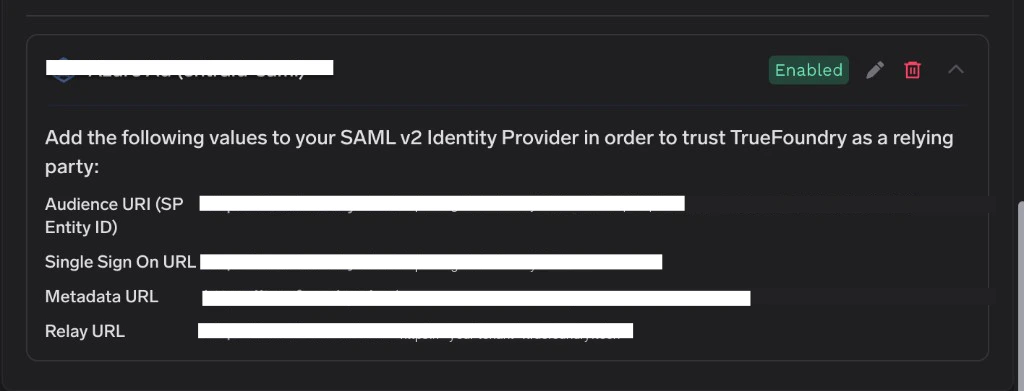
TrueFoundry SSO configuration card showing the SAML values to copy into Entra
Step 2 — Create an Enterprise Application in Entra
Open the Microsoft Entra admin center
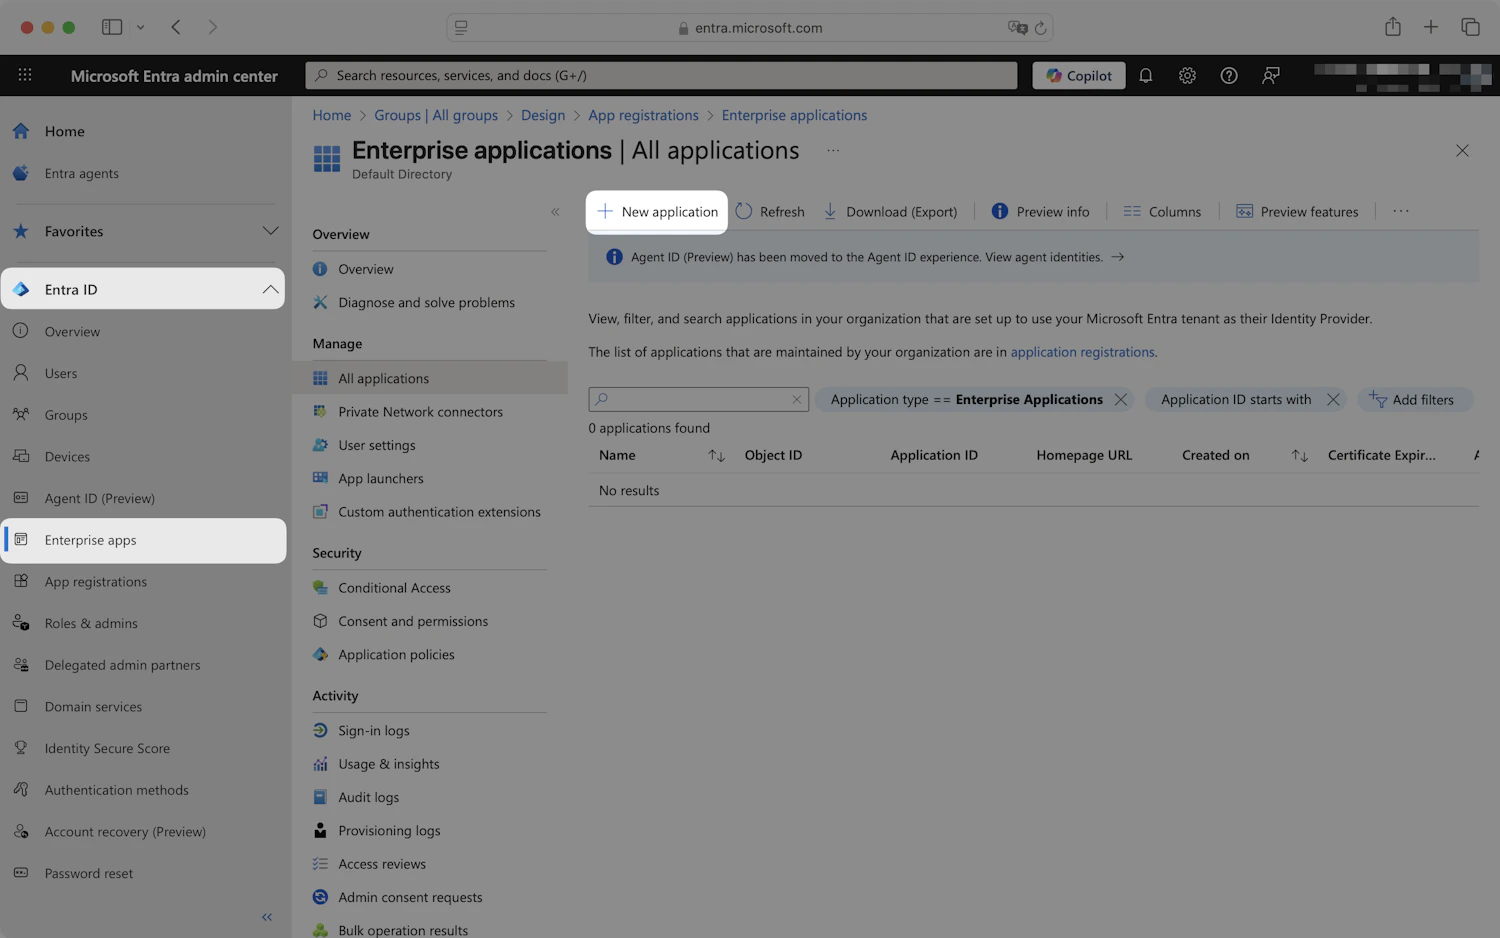
Enterprise applications page in the Microsoft Entra admin center
Create a new application
- Give the application a name — for example,
TrueFoundry. - Choose Integrate any other application you don’t find in the gallery (Non-gallery).
- Click Create. It may take a few seconds for Entra to finish provisioning the application.
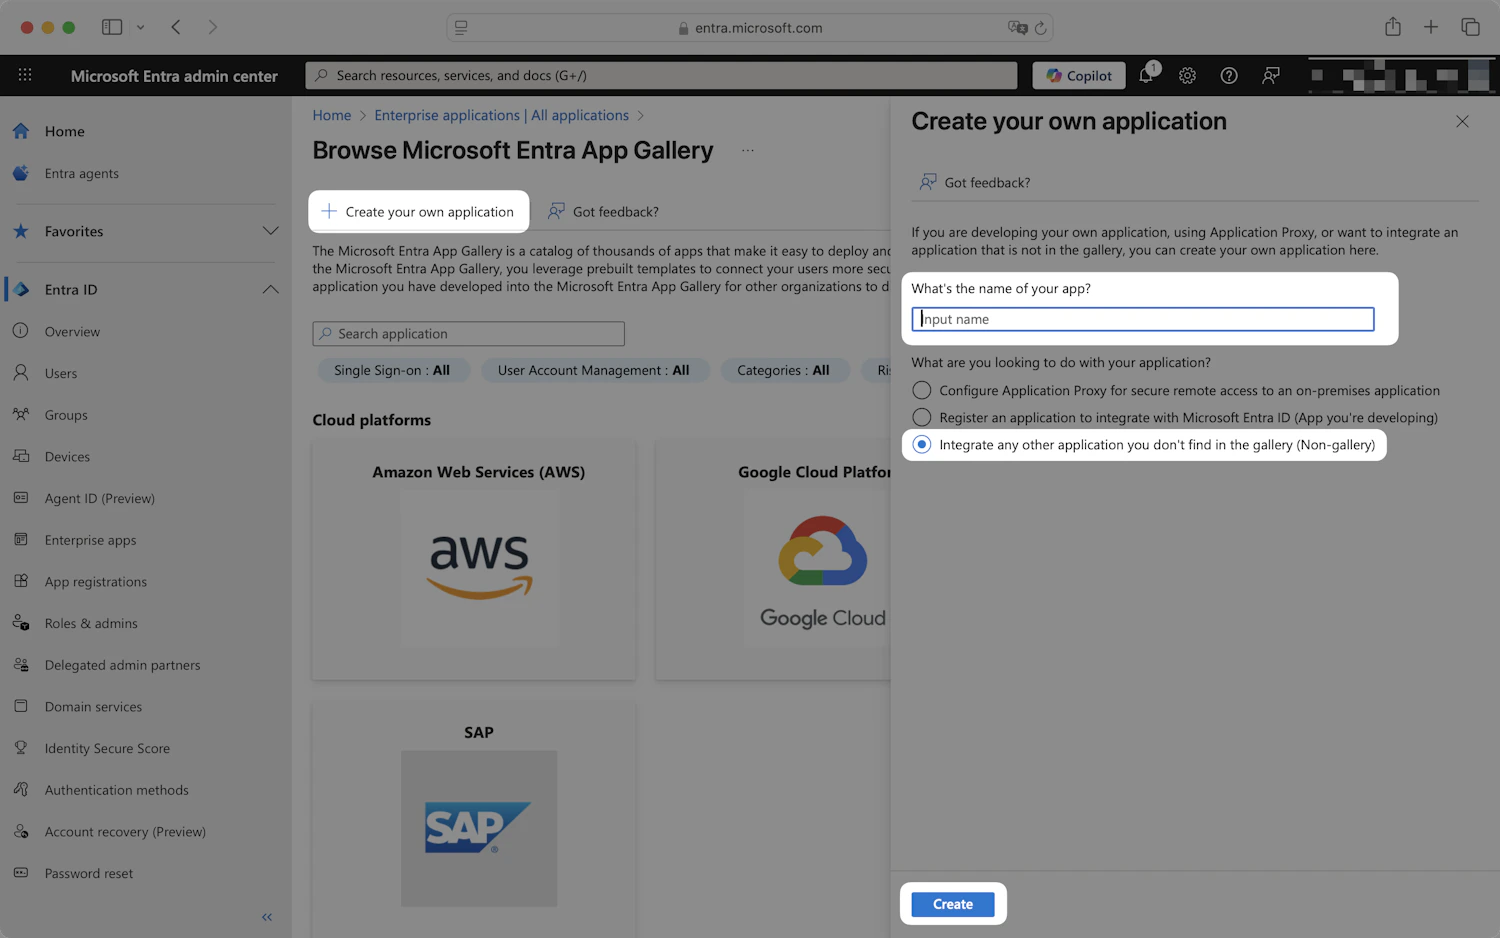
Create your own application panel in Entra
Open single sign-on
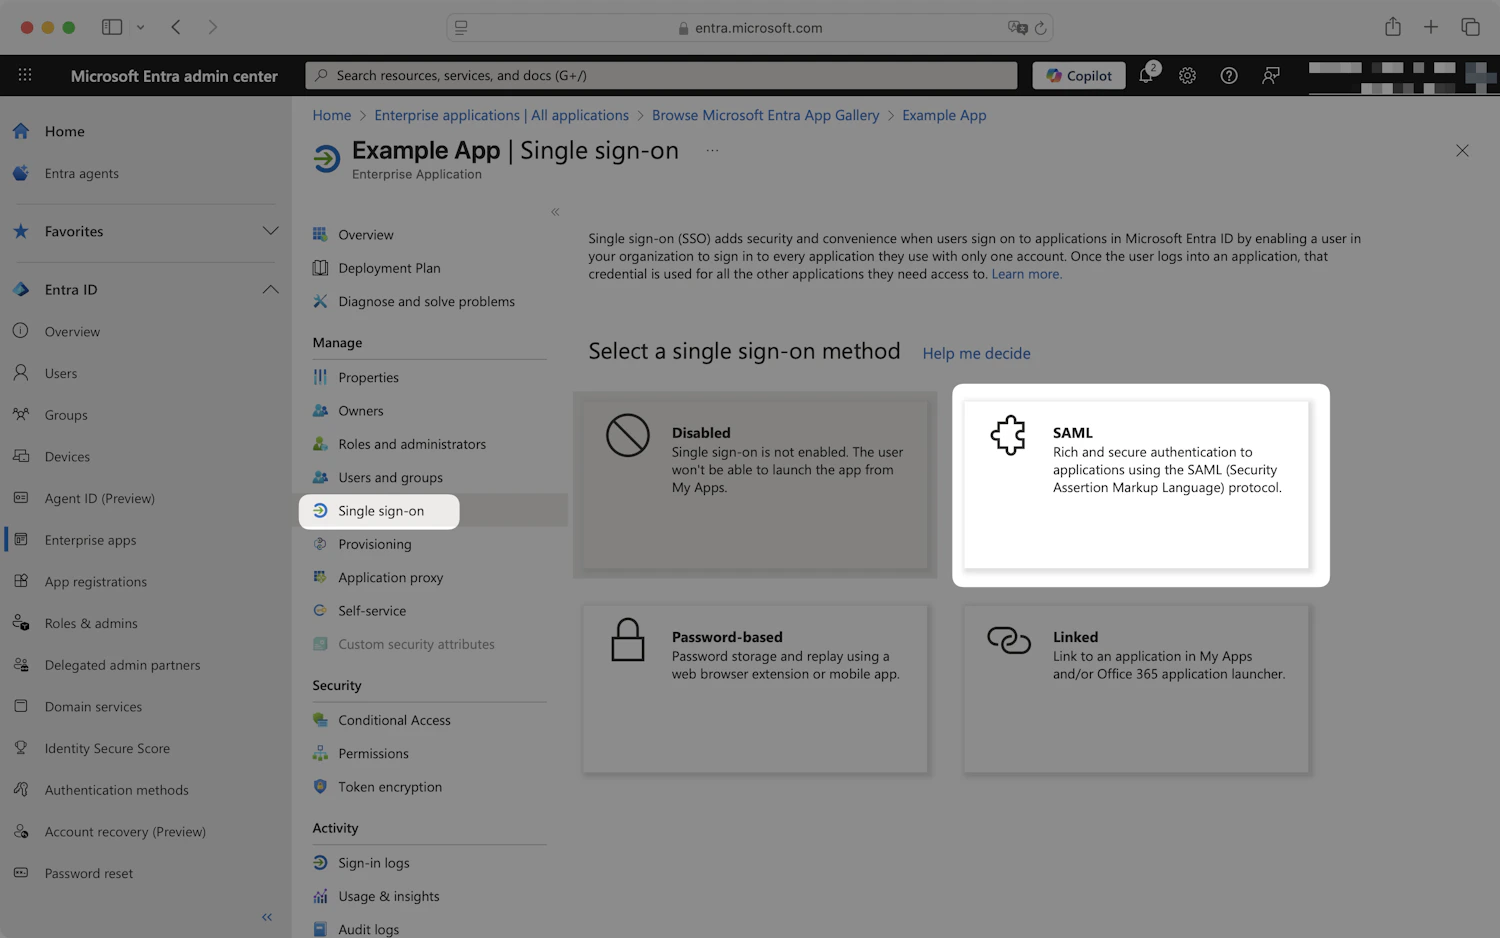
Select a single sign-on method — choose SAML
Step 3 — Enter TrueFoundry’s details into Entra
On the Set up Single Sign-On with SAML page for the application you created in Step 2, edit the Basic SAML Configuration card using the Reply URL, Identifier (Entity ID), and Relay State from Step 1.Edit Basic SAML Configuration
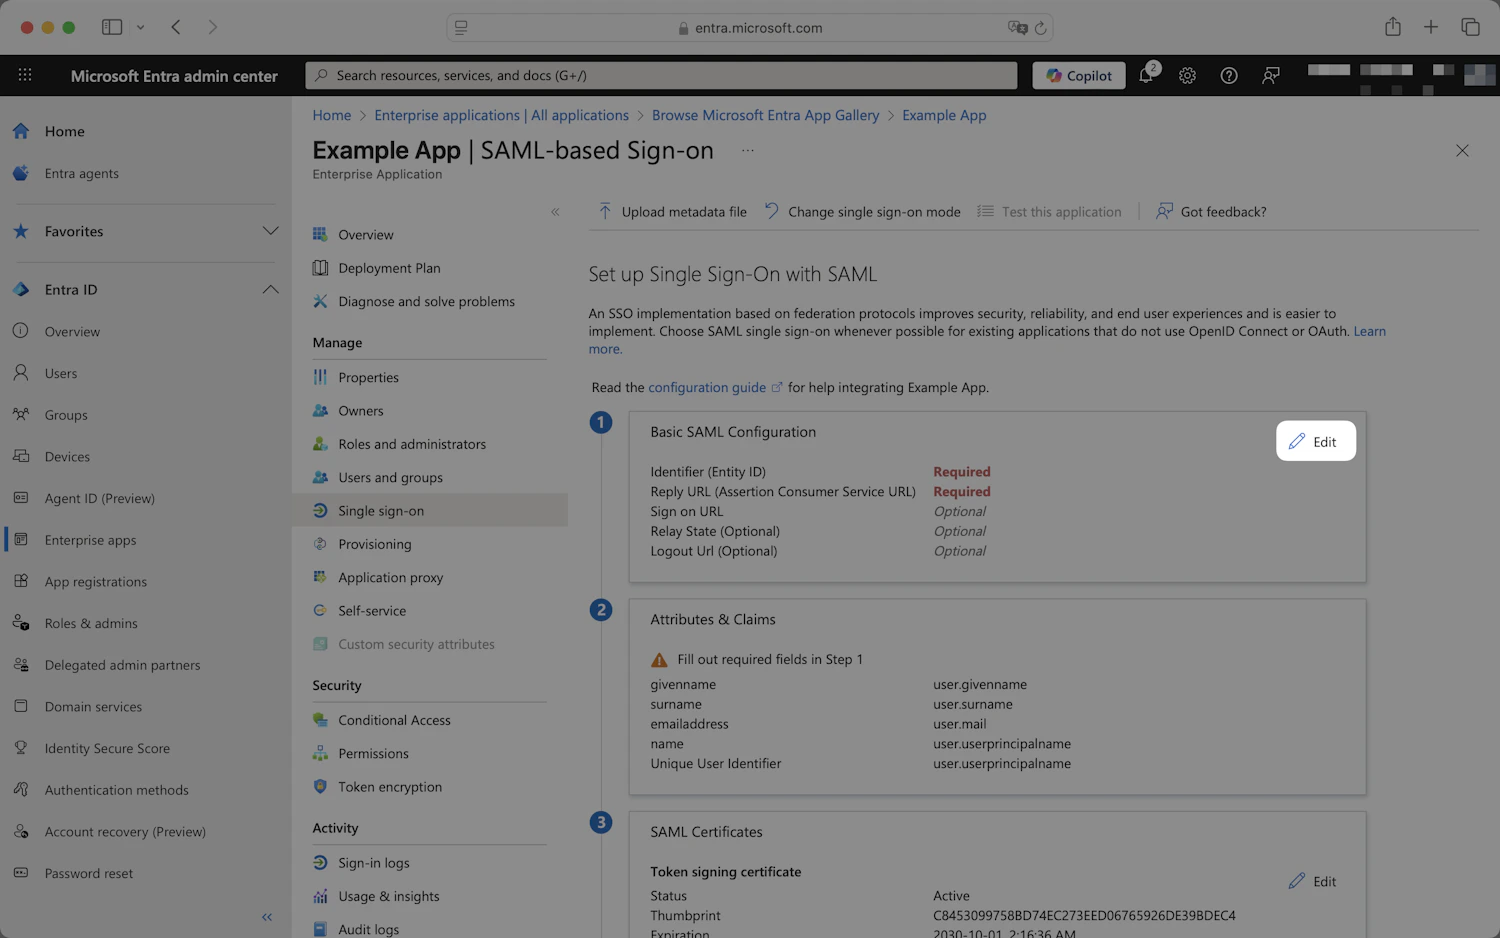
Set up Single Sign-On with SAML page in Entra — click the pencil on Basic SAML Configuration
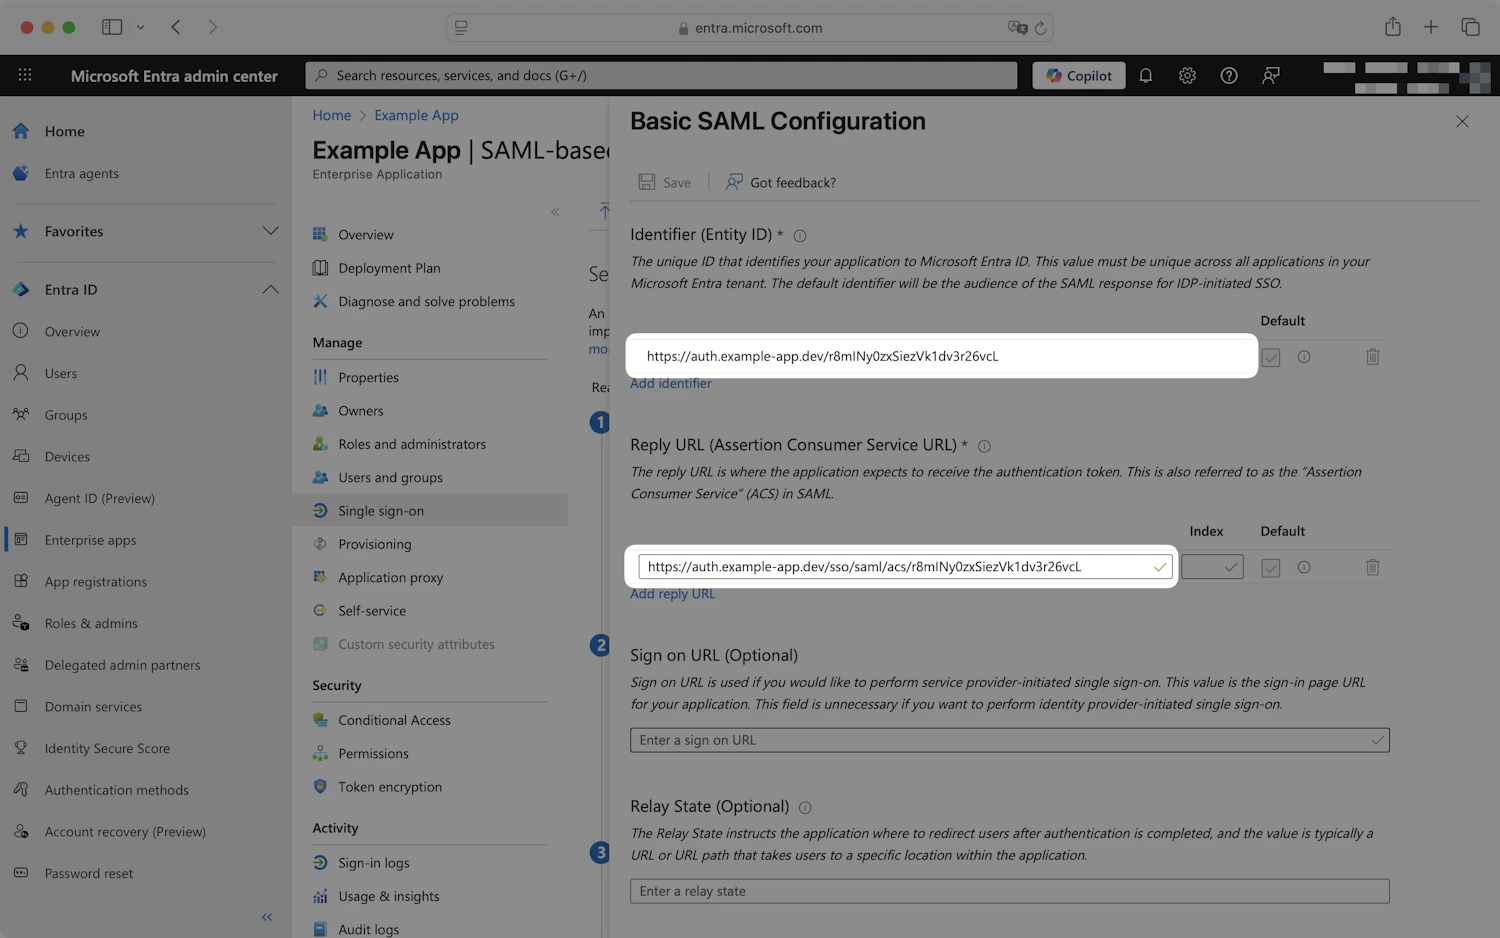
Basic SAML Configuration edit panel — paste the Reply URL, Identifier (Entity ID), and Relay State
Add email and sub claims
Add the email claim
- Click Add new claim.
- Set Name to
email. - Leave Namespace blank and Name format as Omitted (default).
- Under Source, select Attribute and set Source attribute to
user.userprincipalname. - Click Save.
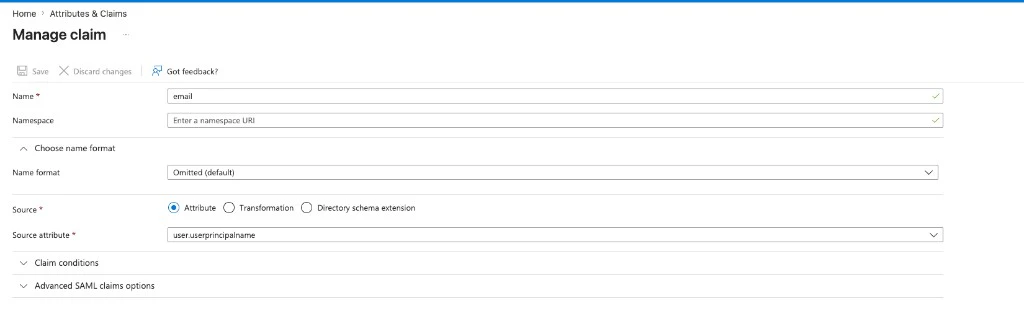
Manage claim — configure the email claim
Add the sub claim
- Click Add new claim again.
- Set Name to
sub. - Leave Namespace blank and Name format as Omitted (default).
- Under Source, select Attribute and set Source attribute to
user.objectid. - Click Save.
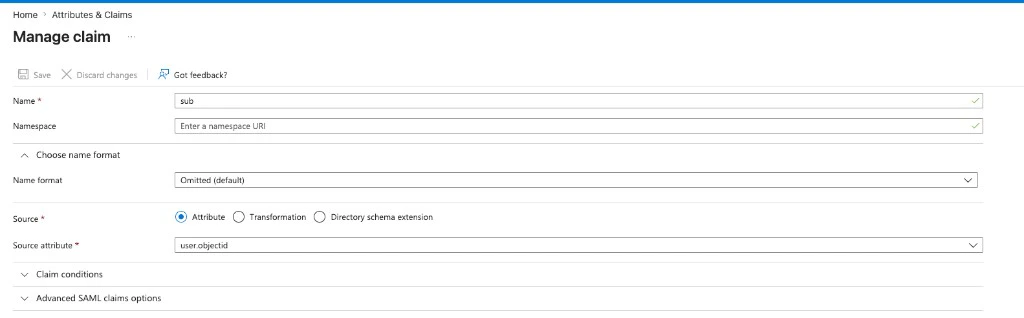
Manage claim — configure the sub claim
email and sub alongside Entra’s default claims: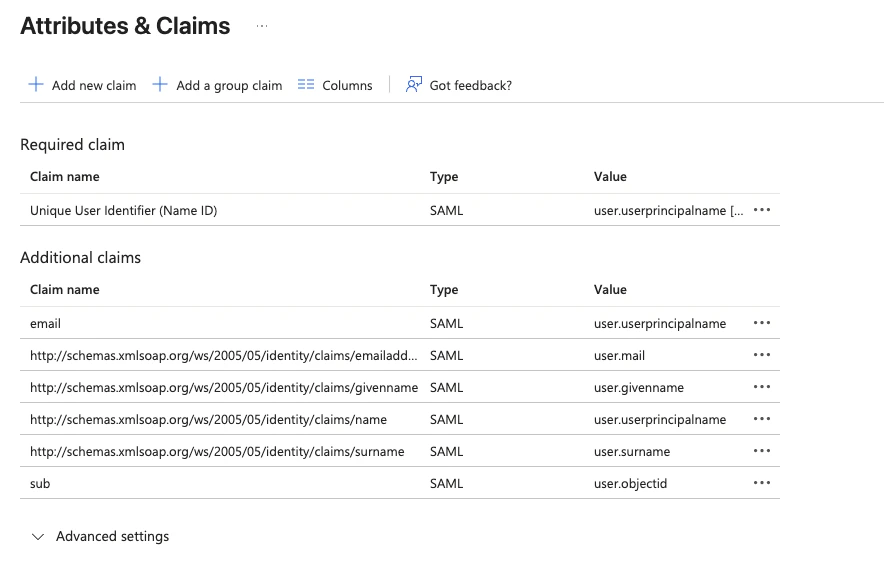
Attributes & Claims — final claim list with email and sub added
Step 4 — Copy Entra’s details back to TrueFoundry
Scroll down on Entra’s Set up Single Sign-On with SAML page to the SAML Certificates and Set up<Your App> cards.
Download the signing certificate
.cer file in a text editor and copy the entire contents — including the -----BEGIN CERTIFICATE----- and -----END CERTIFICATE----- lines.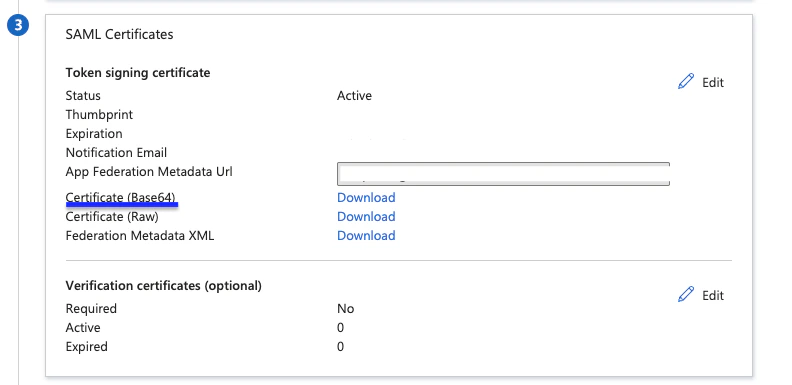
SAML Certificates — download Certificate (Base64)
Copy the Login URL
<Your App> card, copy the Login URL.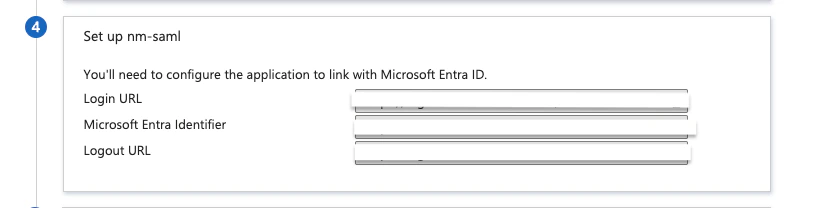
Set up your application — copy the Login URL
Paste into TrueFoundry
- Identity Provider Endpoint → the Login URL from Entra.
- X.509 Certificate → the certificate text you copied from the
.cerfile.
Step 5 — Assign users in Entra
Entra only lets users sign in to applications they’ve been explicitly assigned to.Open Users and groups
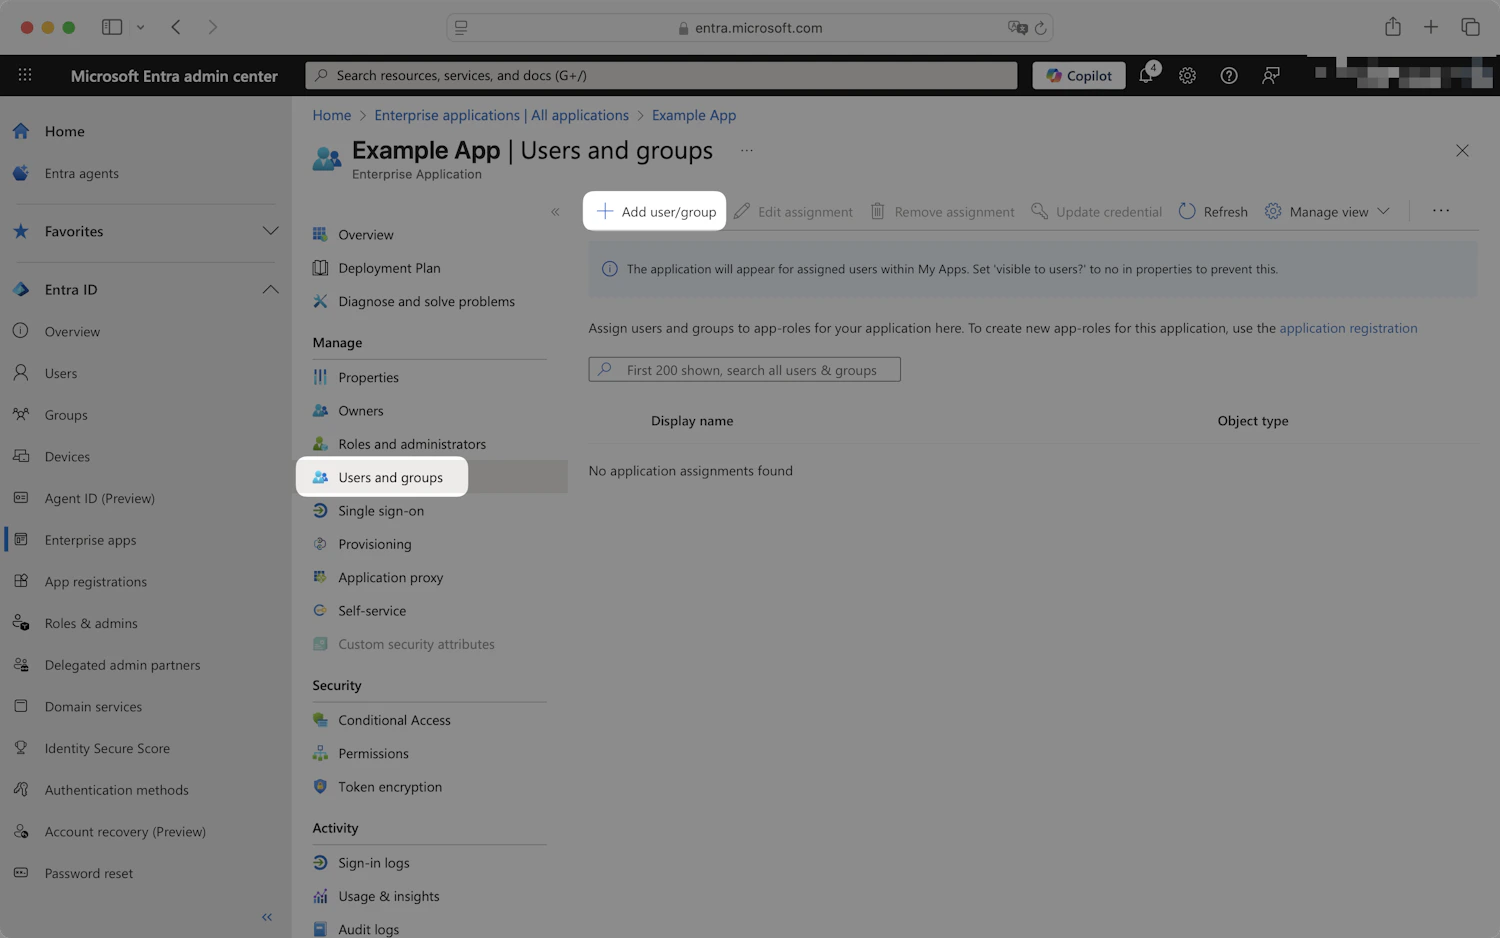
Users and groups page in the Entra application
Select who can sign in
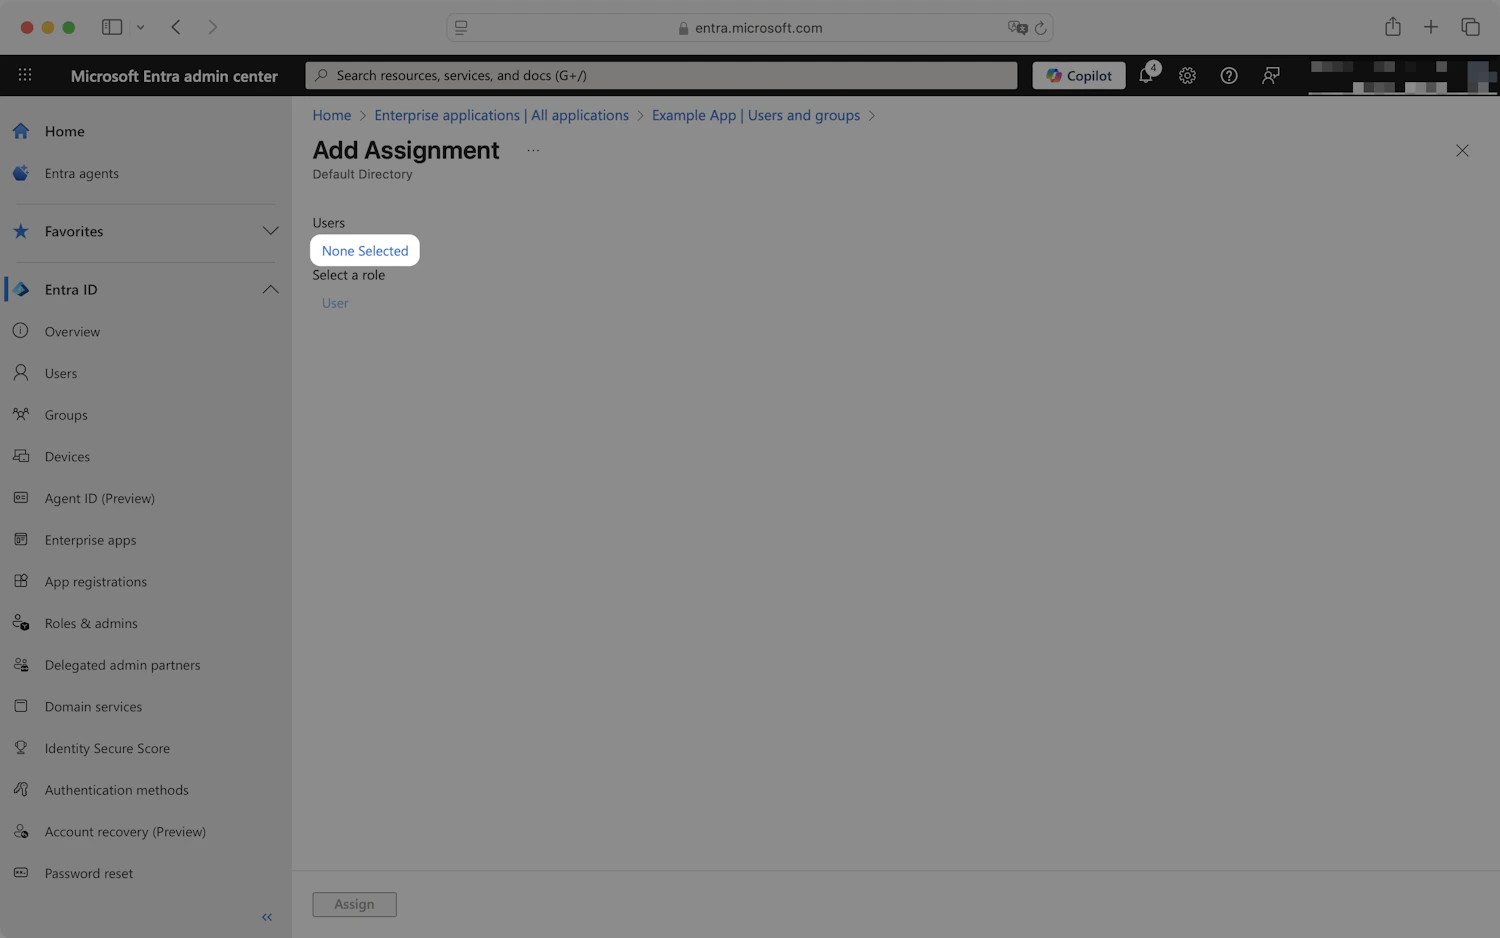
Add Assignment — click Users to open the picker
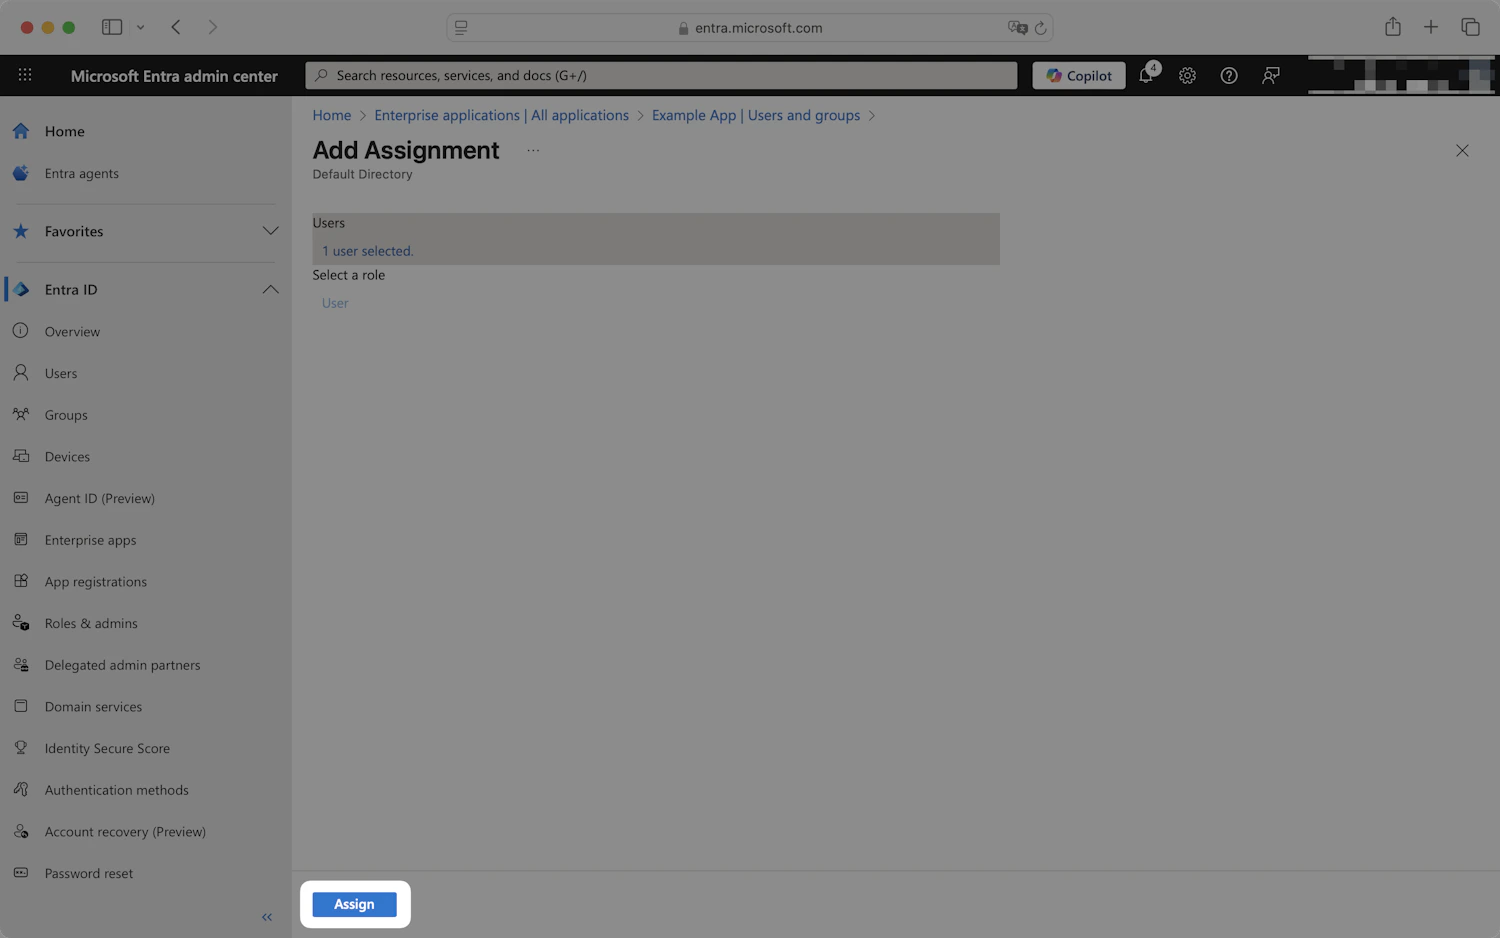
With users selected, click Assign to grant access
Step 6 — Test single sign-on
- Open a private/incognito window and go to your TrueFoundry login page.
- Click Login with Azure AD (or whichever button label you chose under Show advanced fields → Button Text).
- Authenticate with an Entra user that you assigned to the application.
Optional next steps
- Automate user lifecycle with SCIM — see SCIM with Microsoft Entra ID to push users and groups from Entra into TrueFoundry automatically.
- Use OIDC instead of SAML — see OIDC with Microsoft Entra ID for the equivalent OpenID Connect flow.
Troubleshooting
'AADSTS50105: The signed in user is not assigned to a role for the application'
'AADSTS50105: The signed in user is not assigned to a role for the application'
'Invalid Signature' or 'Could not validate SAML response'
'Invalid Signature' or 'Could not validate SAML response'
Users sign in but email or unique ID is empty
Users sign in but email or unique ID is empty
email and sub claims under Attributes & Claims as described in Step 3. If those claims are missing or mapped incorrectly, TrueFoundry cannot read the user’s email or unique ID from the SAML response.