

Prerequisites
- A TrueFoundry tenant with Admin access to Settings → Security & Access → SSO.
- A Microsoft Entra tenant with permission to create App registrations.
Step 1 — Register an application in Entra
Open App registrations
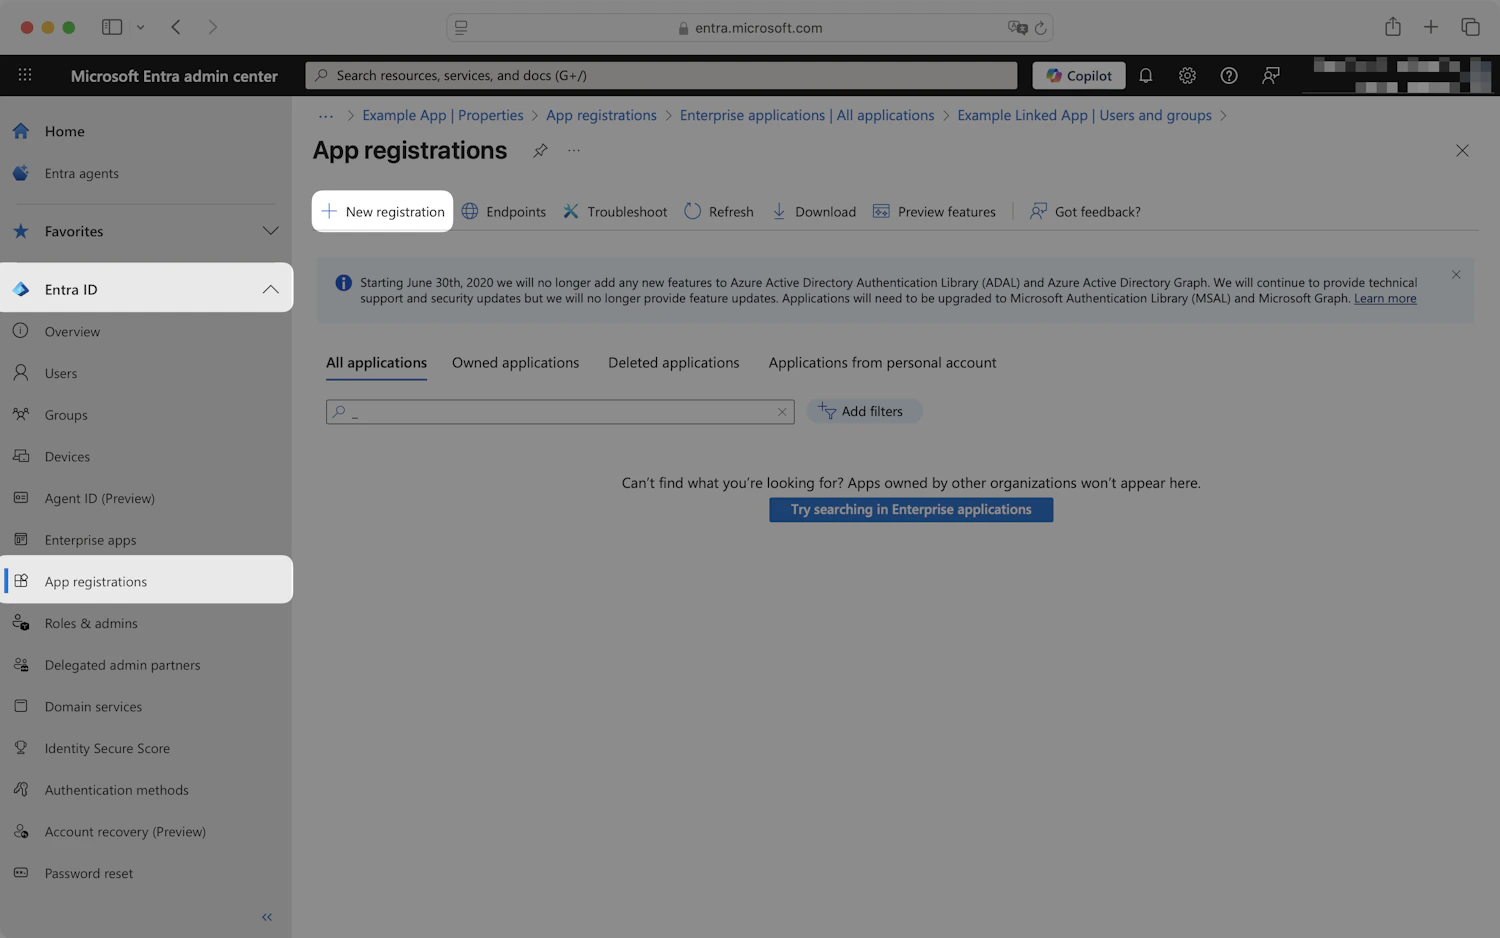
App registrations page in the Microsoft Entra admin center
Configure the registration
-
Name — a lowercase alphanumeric label, for example
truefoundry-oidc. - Supported account types — choose Single tenant only.
-
Redirect URI — set the platform to Web and the URL to:
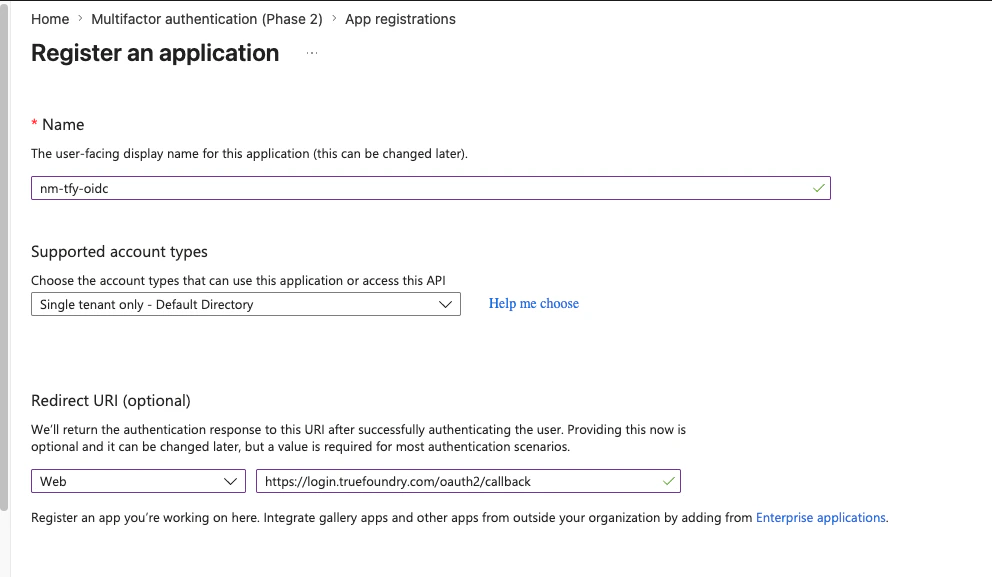
Register an application — Single tenant only and Web redirect URI
Note the Client ID and Tenant ID
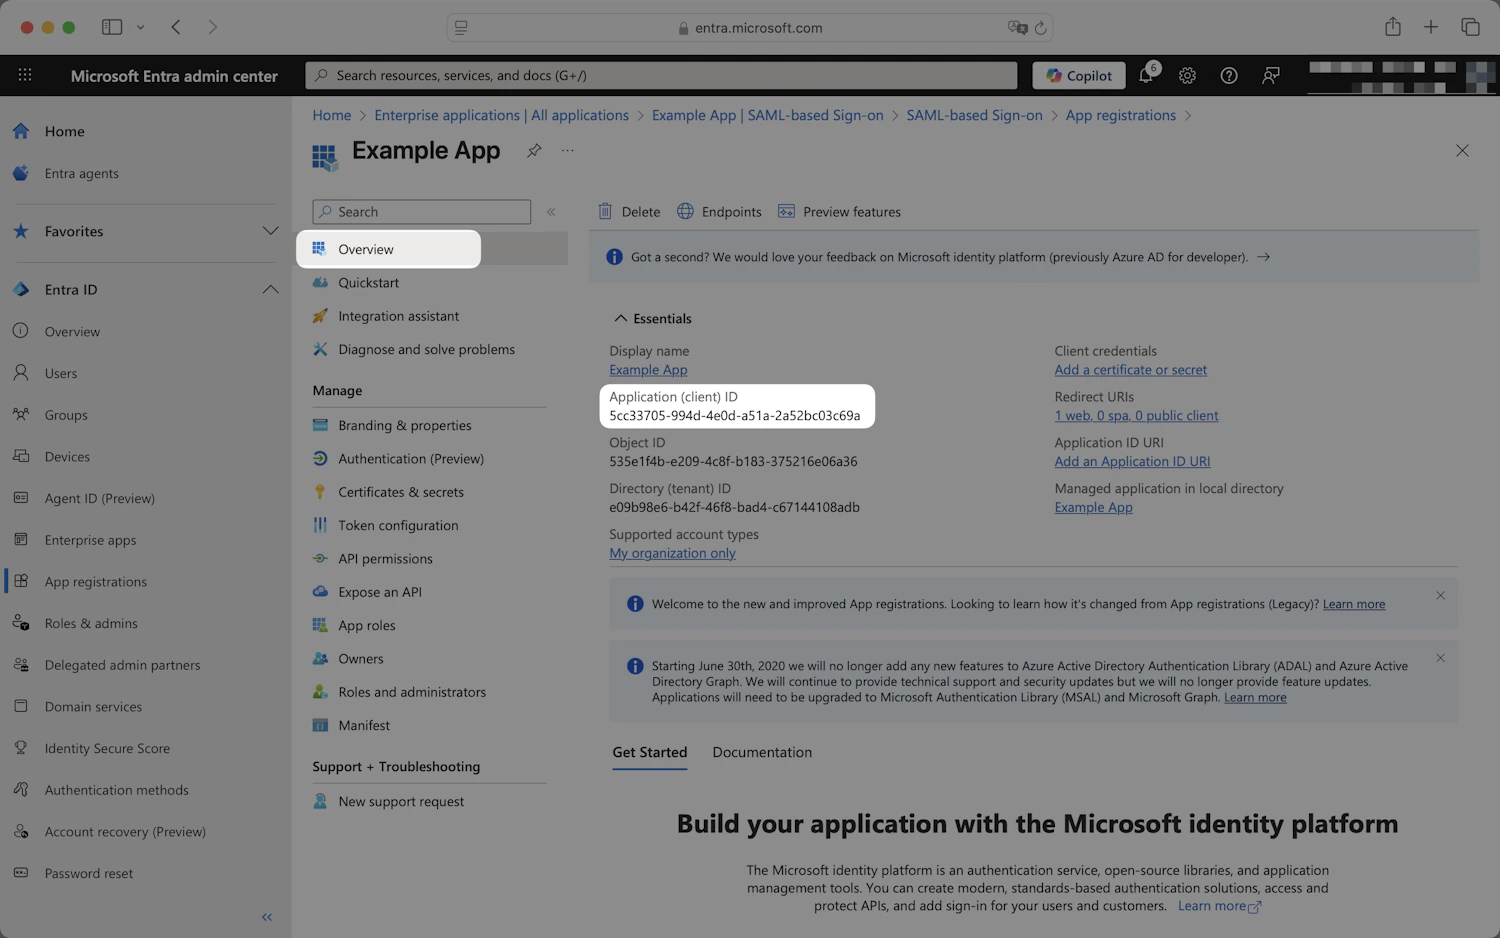
App registration Overview page showing the Application (client) ID and Directory (tenant) ID
Step 2 — Create a client secret
Open Certificates & secrets
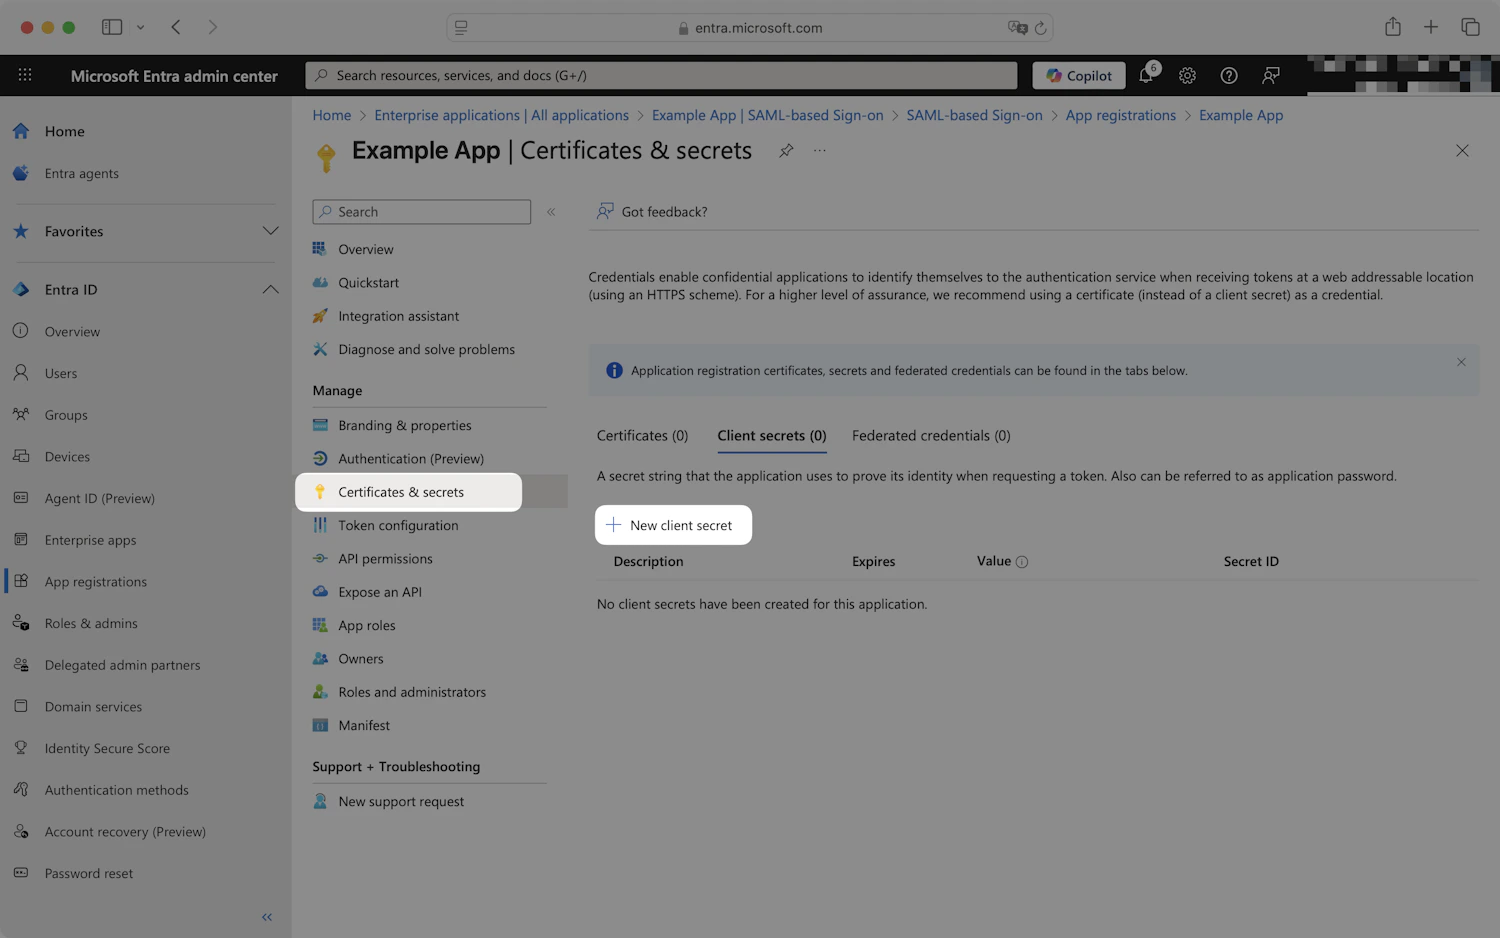
Certificates & secrets page in the Entra app registration
Generate the secret
TrueFoundry SSO), choose an expiry that matches your security policy, and click Add.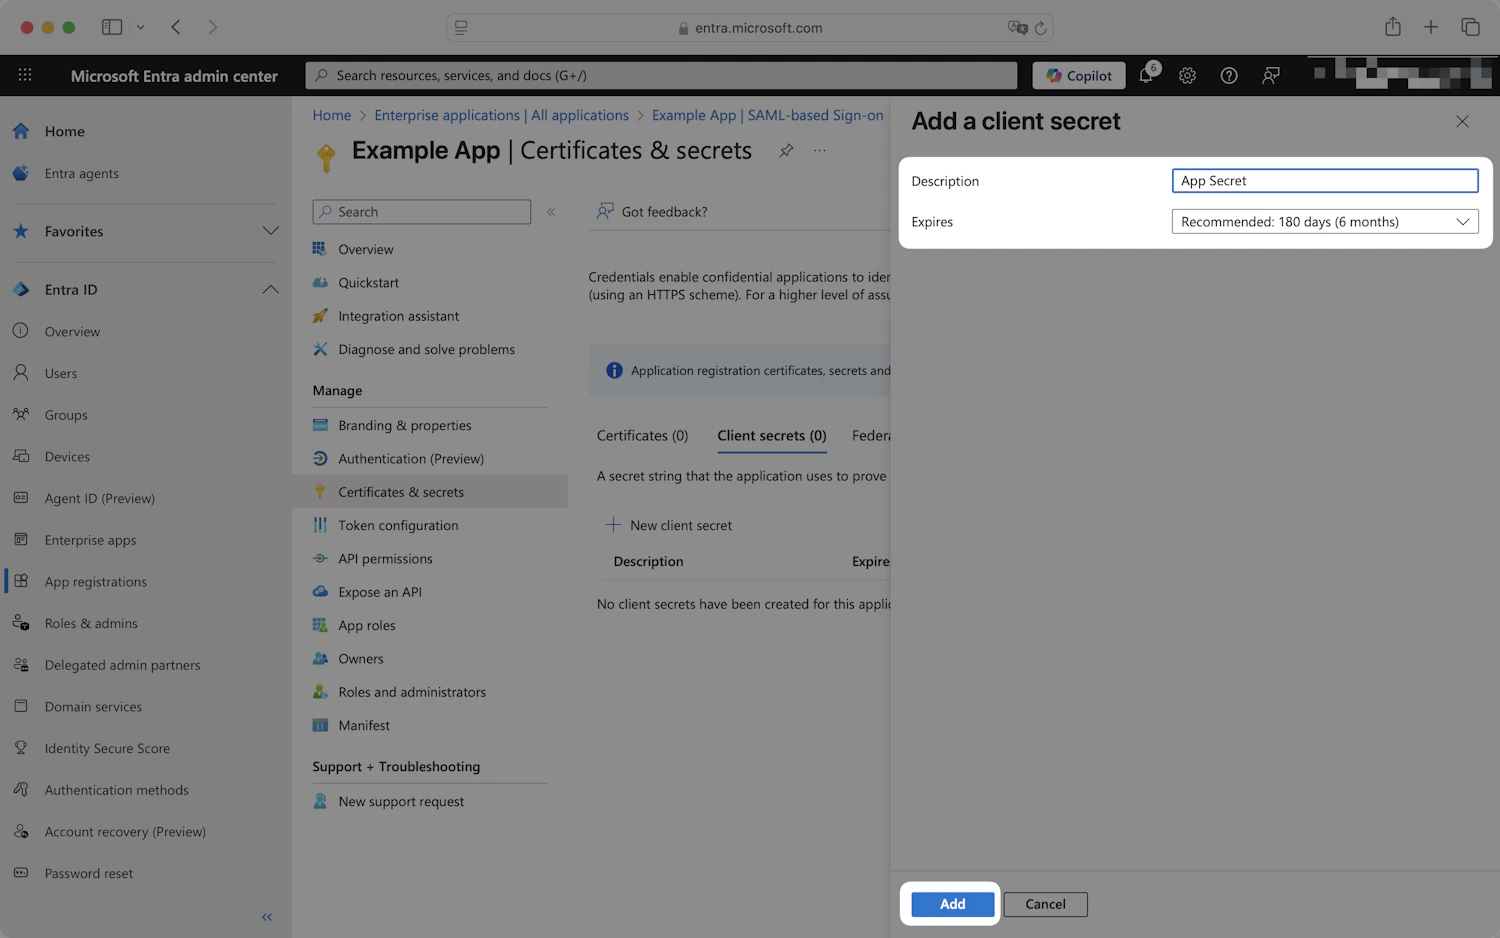
Add a client secret side panel — description and expiry, then Add
Copy the secret value
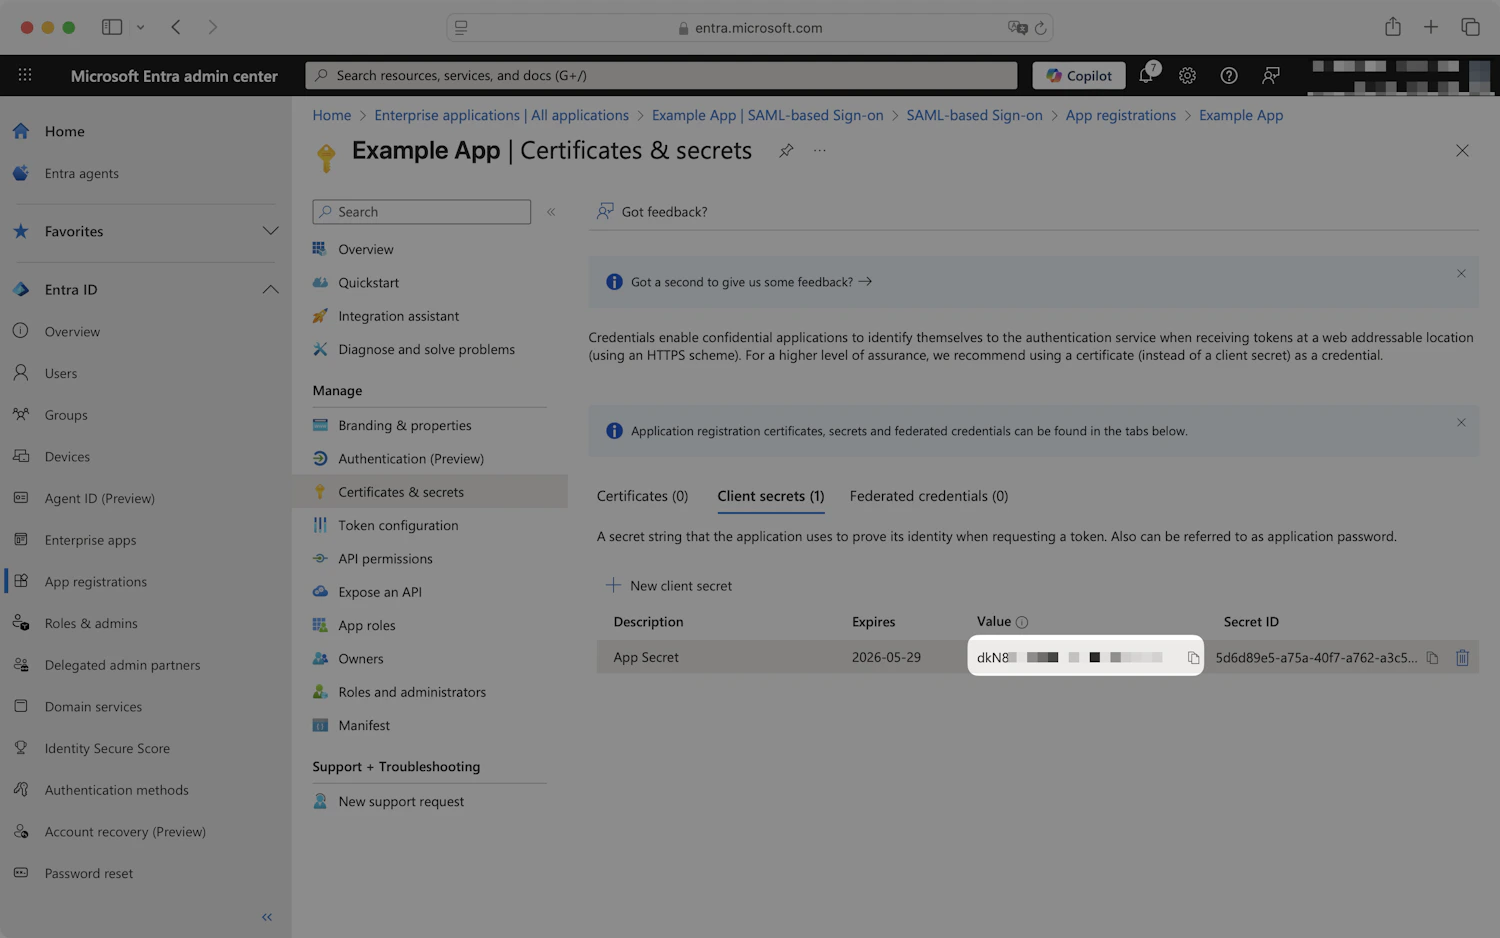
Newly created client secret — copy the Value column, not the Secret ID
Step 3 — Configure token claims (recommended)
By default, Entra issues an ID token that doesn’t include the user’s email address. Adding theemail claim lets TrueFoundry match the user to a TrueFoundry account.
Open Token configuration
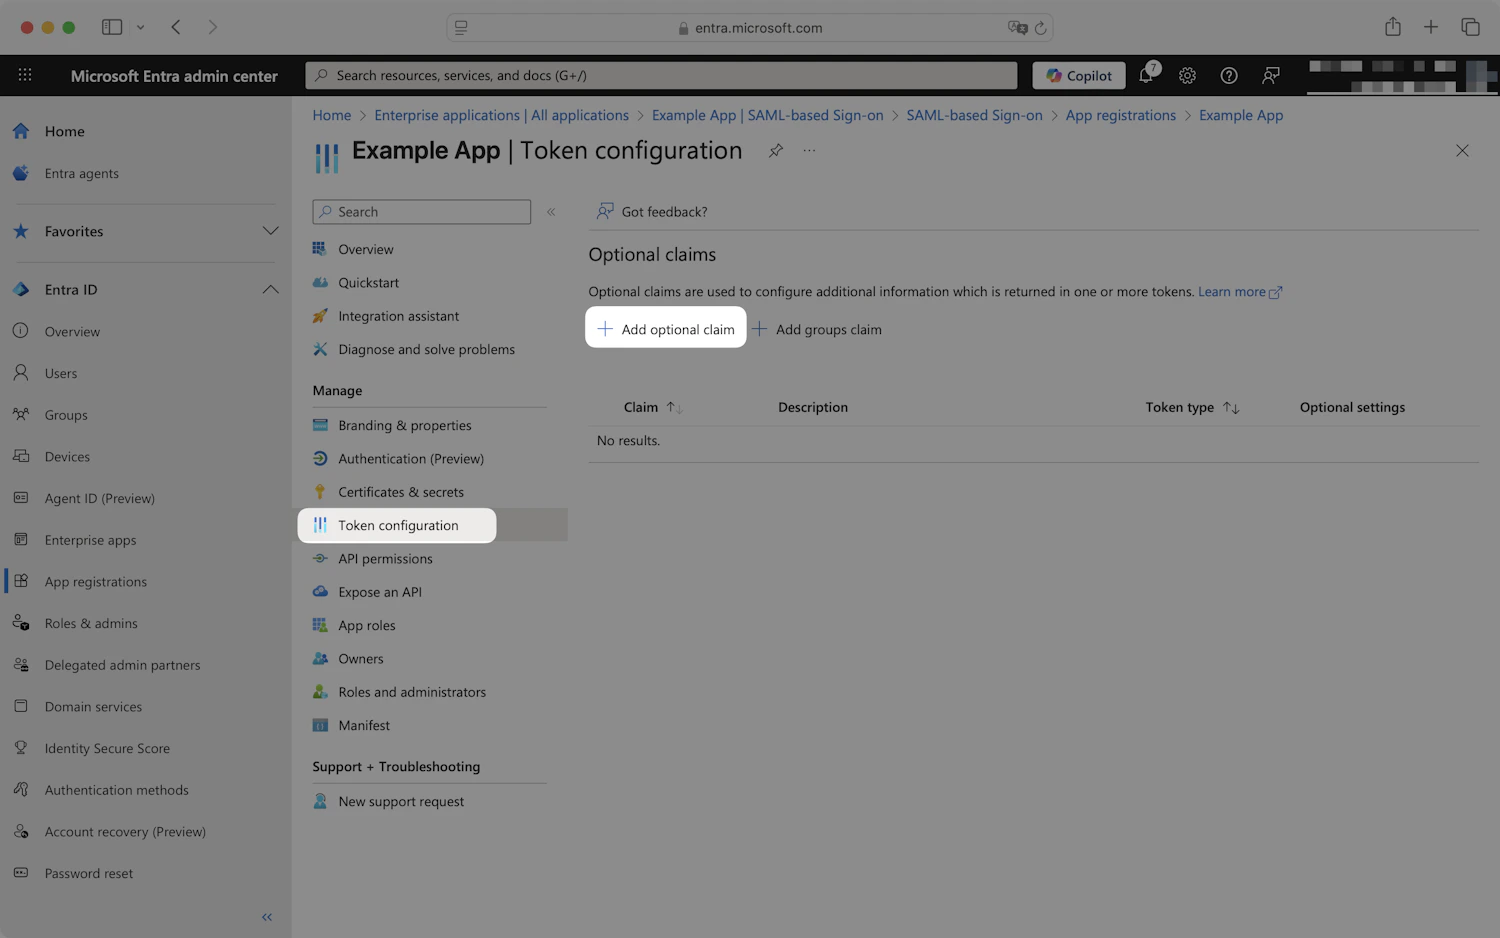
Token configuration page — click Add optional claim
Add ID token claims
emailfamily_namegiven_name
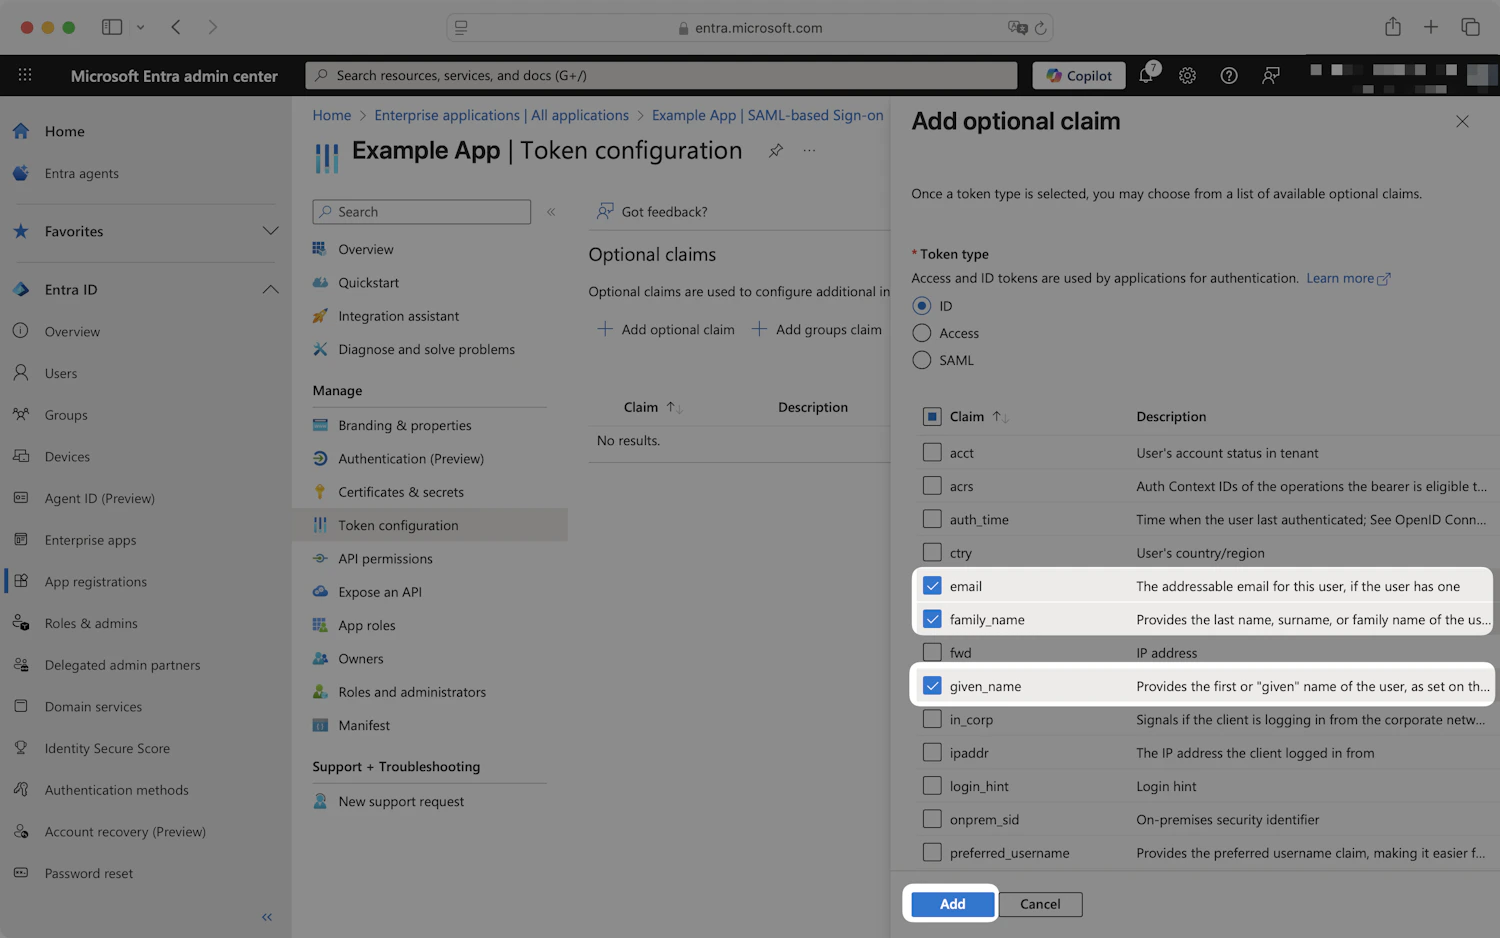
Add optional claim panel — select ID token type and the email, family_name, given_name claims
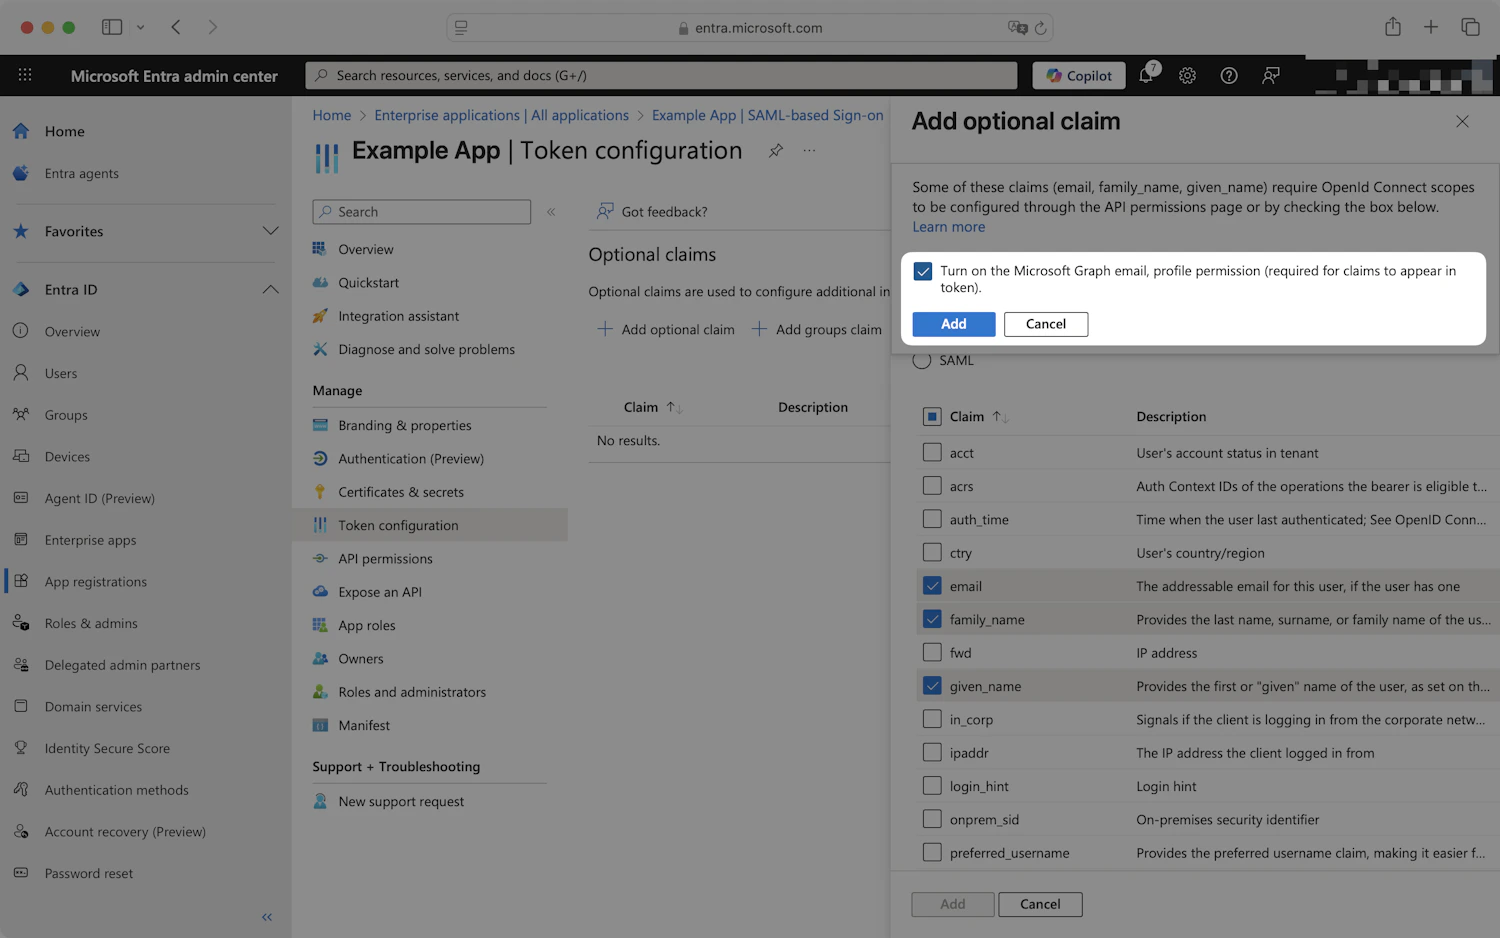
Confirmation prompt — enable the Microsoft Graph email, profile permission
Step 4 — Add the redirect URI again on the Authentication page (if needed)
If you skipped setting Redirect URI during registration:Open Authentication
Add the callback URL
Step 5 — Configure TrueFoundry
Open SSO settings
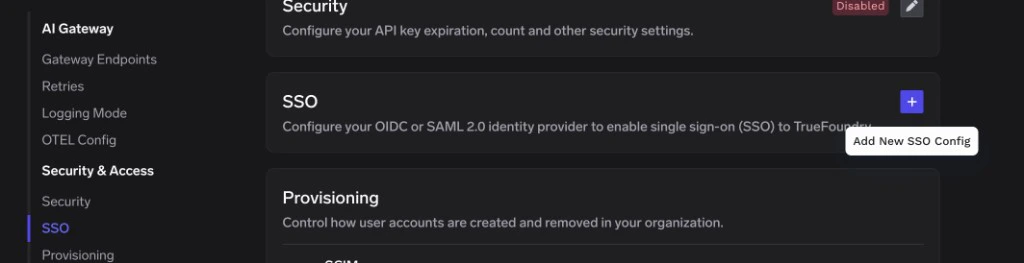
SSO page in TrueFoundry — click the + icon to add a new SSO configuration
Fill in the SSO form
- Enabled: turn this on.
-
Name: a lowercase alphanumeric label — for example,
entraoidc. - SSO Provider: select Azure AD.
- Authentication Configuration: choose OIDC.
- Client ID: the Application (client) ID from Entra.
- Client Secret: the client secret Value from Entra.
- Discover endpoints: leave enabled.
-
Issuer URL:
Replace
<tenant-id>with the Directory (tenant) ID you copied in Step 1. -
Scopes (optional): leave blank to use the default
openid email. Addprofileif you want first and last name in the token.
Save
Step 6 — Assign users in Entra
For single-tenant configurations with Assignment required enabled, Entra only allows assigned users to sign in.Open the enterprise application
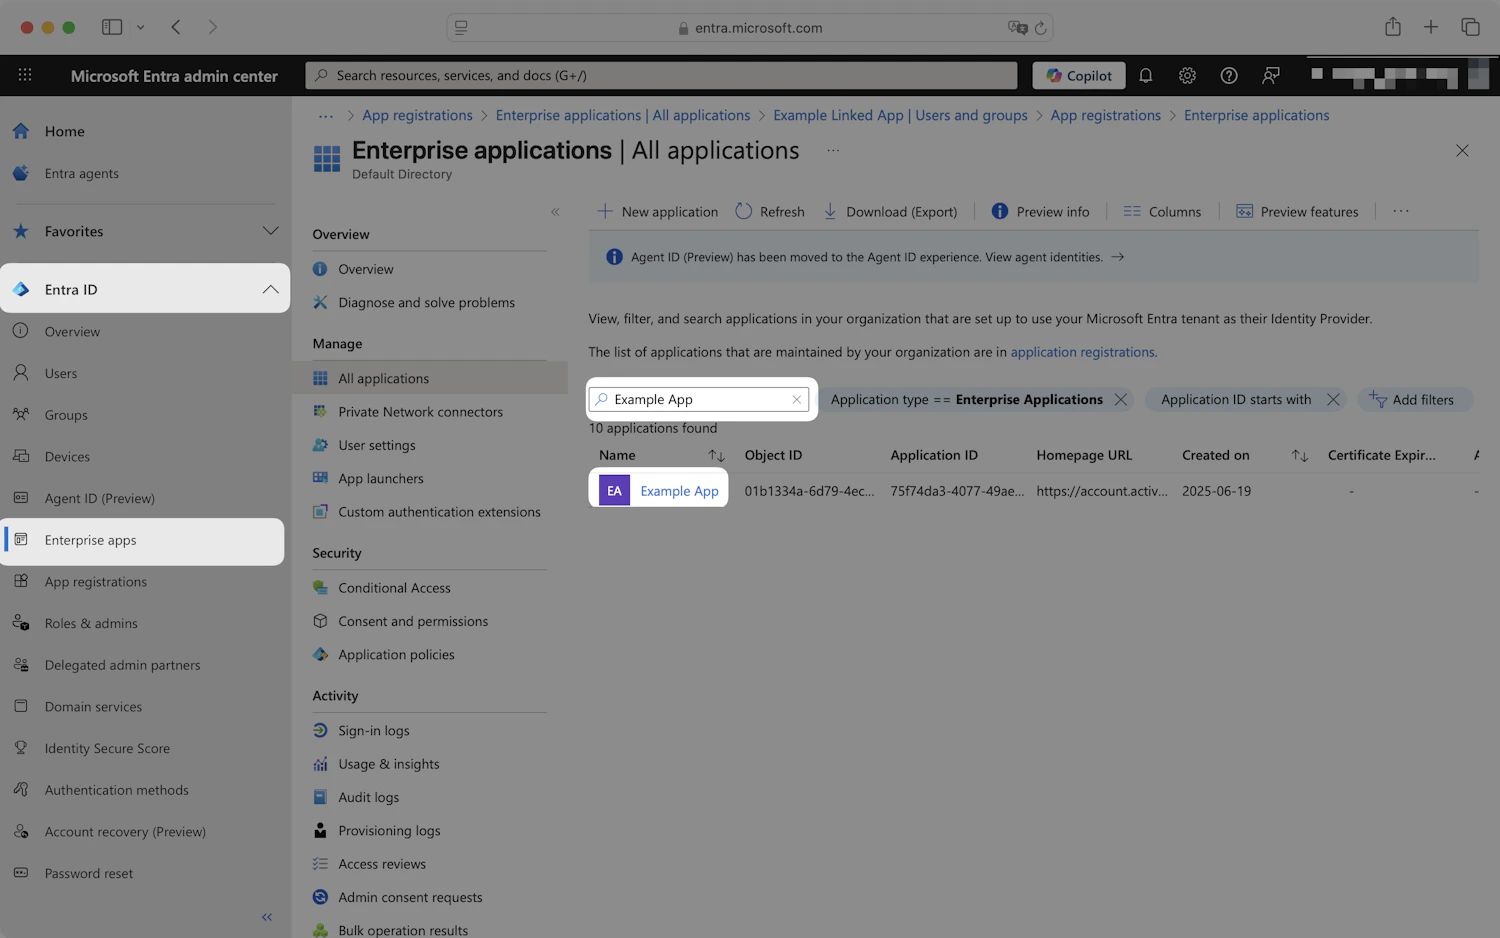
Find your application in Enterprise applications
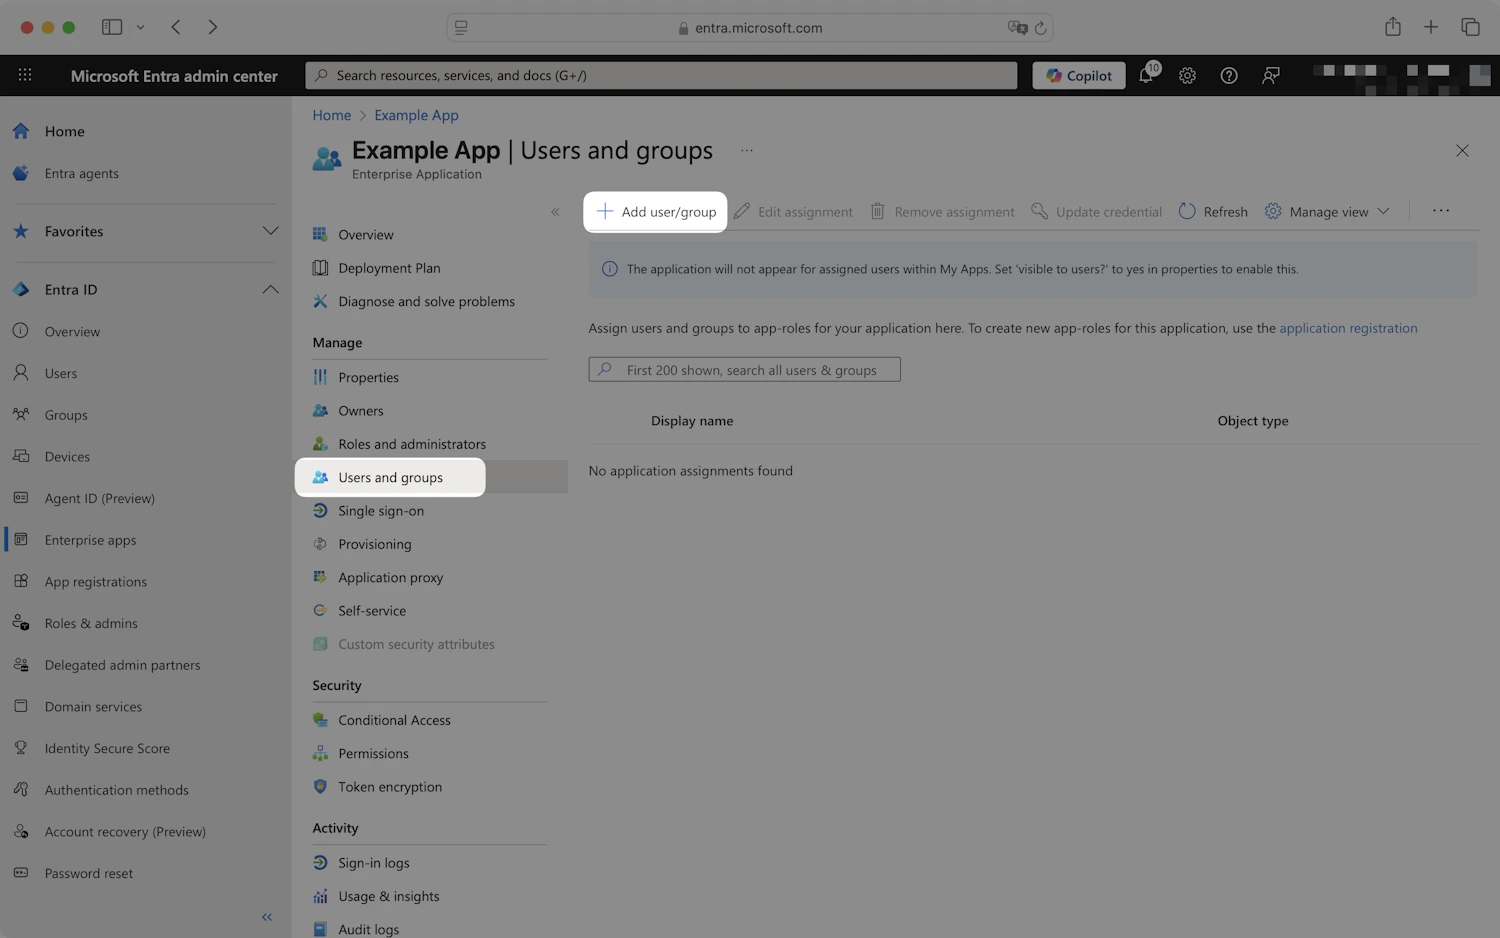
Users and groups tab inside the enterprise application
Add users and groups
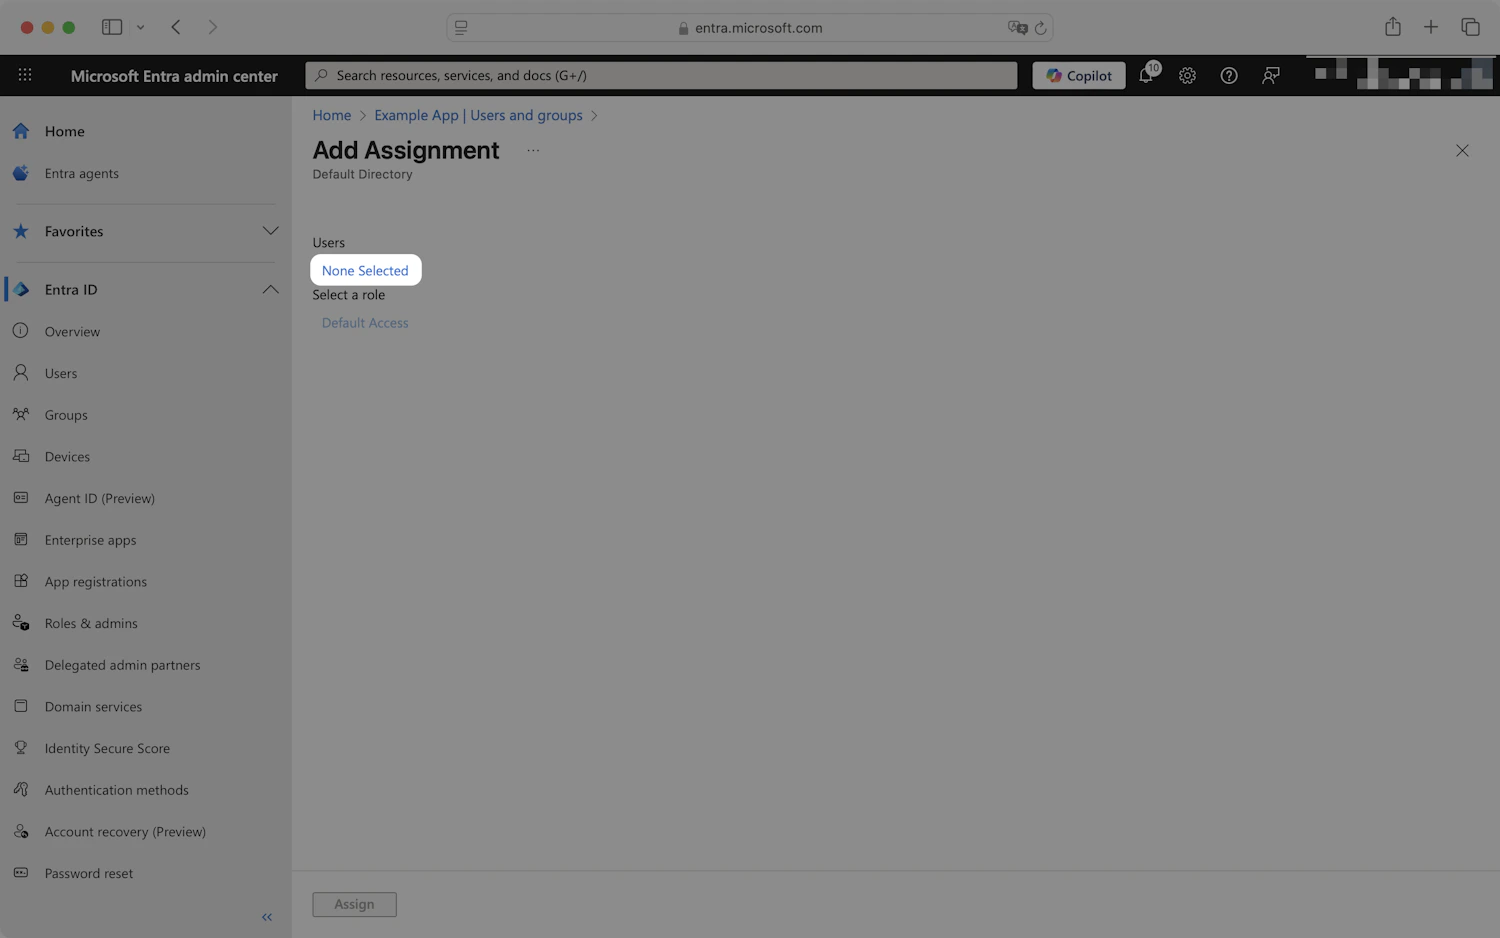
Add Assignment — click Users to open the picker
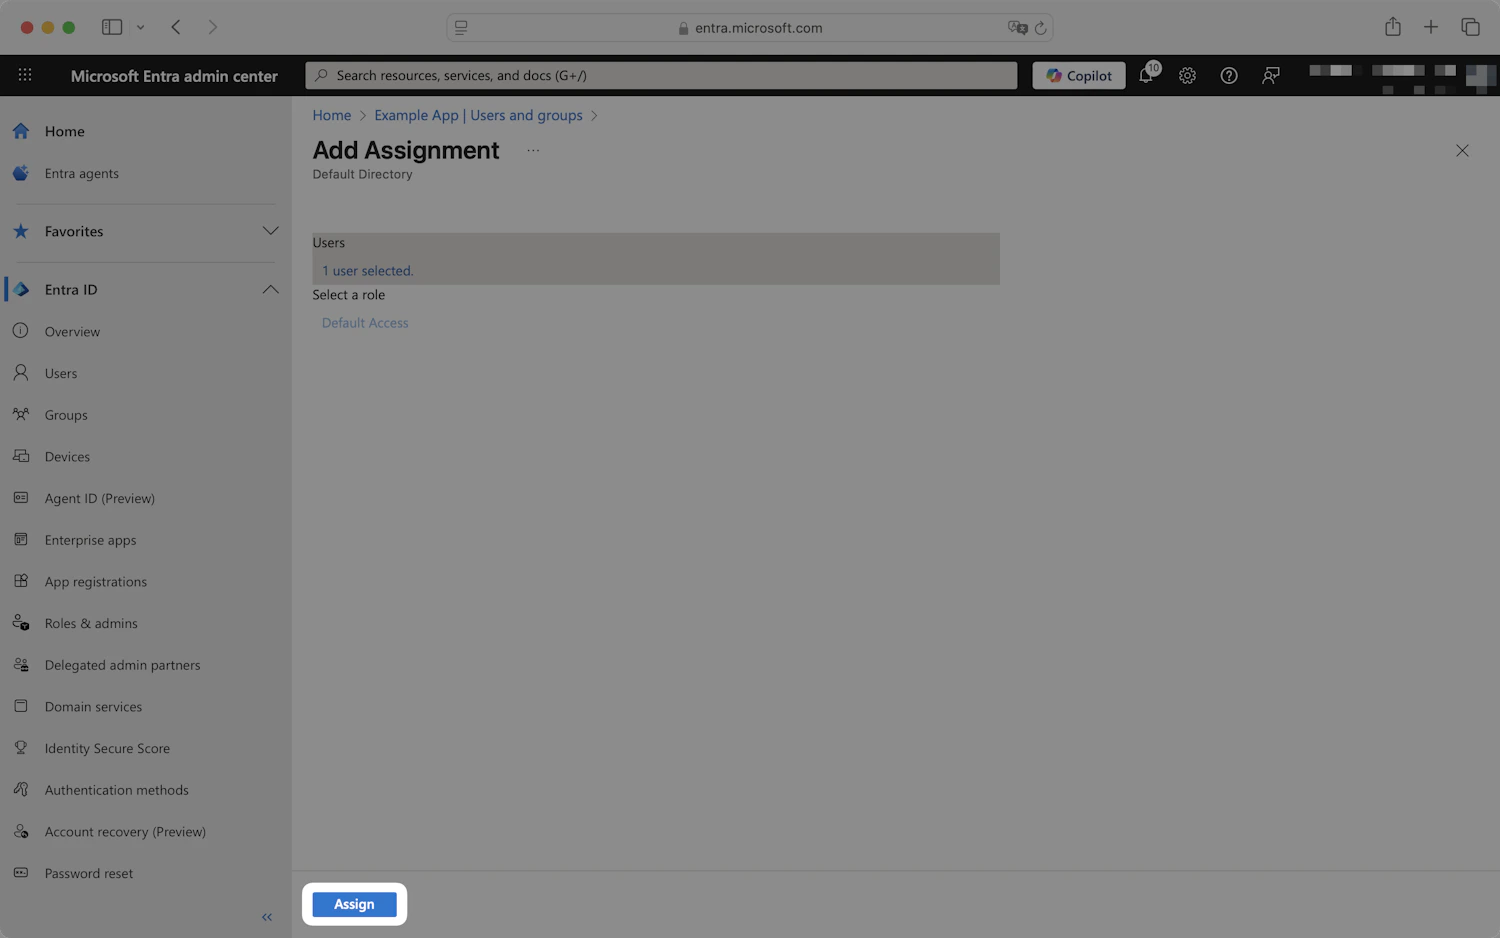
With users selected, click Assign to grant access
Step 7 — Test single sign-on
- Open a private/incognito window and visit your TrueFoundry login page.
- Click Login with Entra ID.
- Authenticate with an assigned user.
Optional next steps
- Sync users and groups automatically — see SCIM with Microsoft Entra ID.
- Use SAML instead — see SAML with Microsoft Entra ID.
Troubleshooting
'AADSTS700016: Application with identifier was not found in the directory'
'AADSTS700016: Application with identifier was not found in the directory'
https://login.microsoftonline.com/<tenant-id>/v2.0.'AADSTS7000215: Invalid client secret provided'
'AADSTS7000215: Invalid client secret provided'
Sign-in works but the user's email is empty
Sign-in works but the user's email is empty
email optional claim in Token configuration and enabled the email, profile Microsoft Graph permission when prompted. Then add profile email to Scopes on the TrueFoundry SSO form.'AADSTS50105: The signed in user is not assigned to a role for the application'
'AADSTS50105: The signed in user is not assigned to a role for the application'