

model/mnist.py: The pytorch model definition.model/mnist_cnn.pt: The trained pytorch model checkpoint.model/mnist_handler.py: Contains the main handler that runs the inference.requirements.txt: Contains the dependencies.config.properties: Contains the configuration for the model server.
How to write the inference function in MMS
MMS Handler
handle that takes in data and context as inputs and returns the inference output.
The function in our code orchestrates the other 4 functions:
initialize: Loads the model and any other resources needed for inference.preprocess: Preprocesses the input data.inference: Runs the inference.postprocess: Postprocesses the output data.
Exporting the model in MAR (model archive) format
MMS neatly packages the model definition, handler and checkpoint into a single file called.mar file
mnist.mar file.
Running the server locally
- Install the dependencies
Shell
- Package the model in MAR format
Shell
- Run the server
Shell
- Test the server
Shell
Deploying the model with TrueFoundry
To deploy the model, we need to package both the model file and the code. To do this, we can follow the steps below:1
Log the MAR Model To Model Registry
Log the 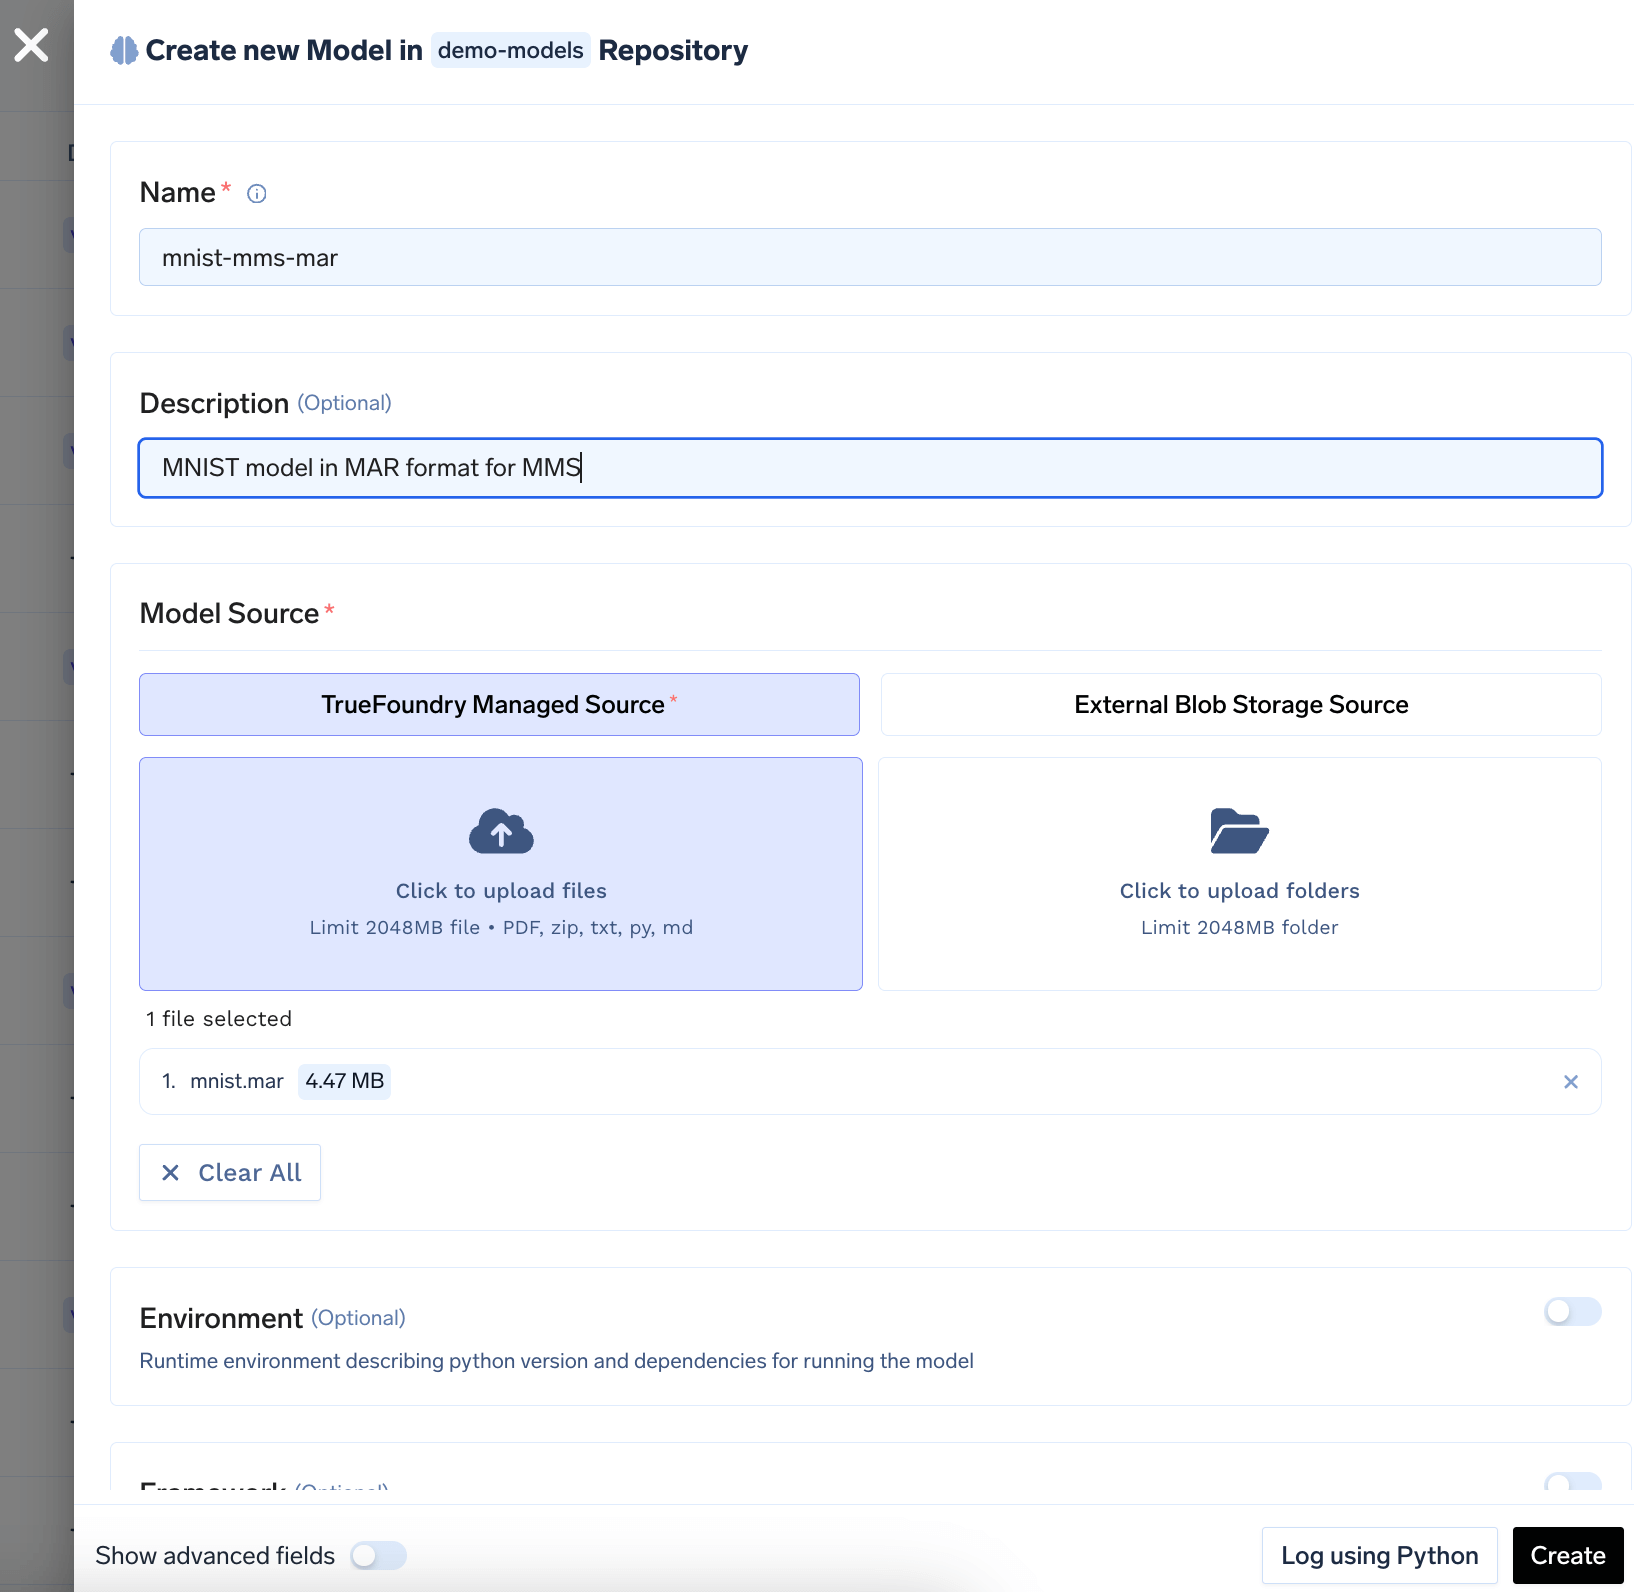
mnist.mar file to the model registry. You can follow the guide here to log the model to the registry.2
Push the code to a Git repository or directly deploy from local machine
Once you have tested your code locally, we highly recommend pushing the code a Git repository. This allows you to version control the code and also makes the deployment process much easier. However, if you don’t have access to a Git repository, or the Git repositories are not integrated with TrueFoundry, you can directly deploy from local laptop.You can follow the guide here to deploy your code.Configure the source code and build settings as follows: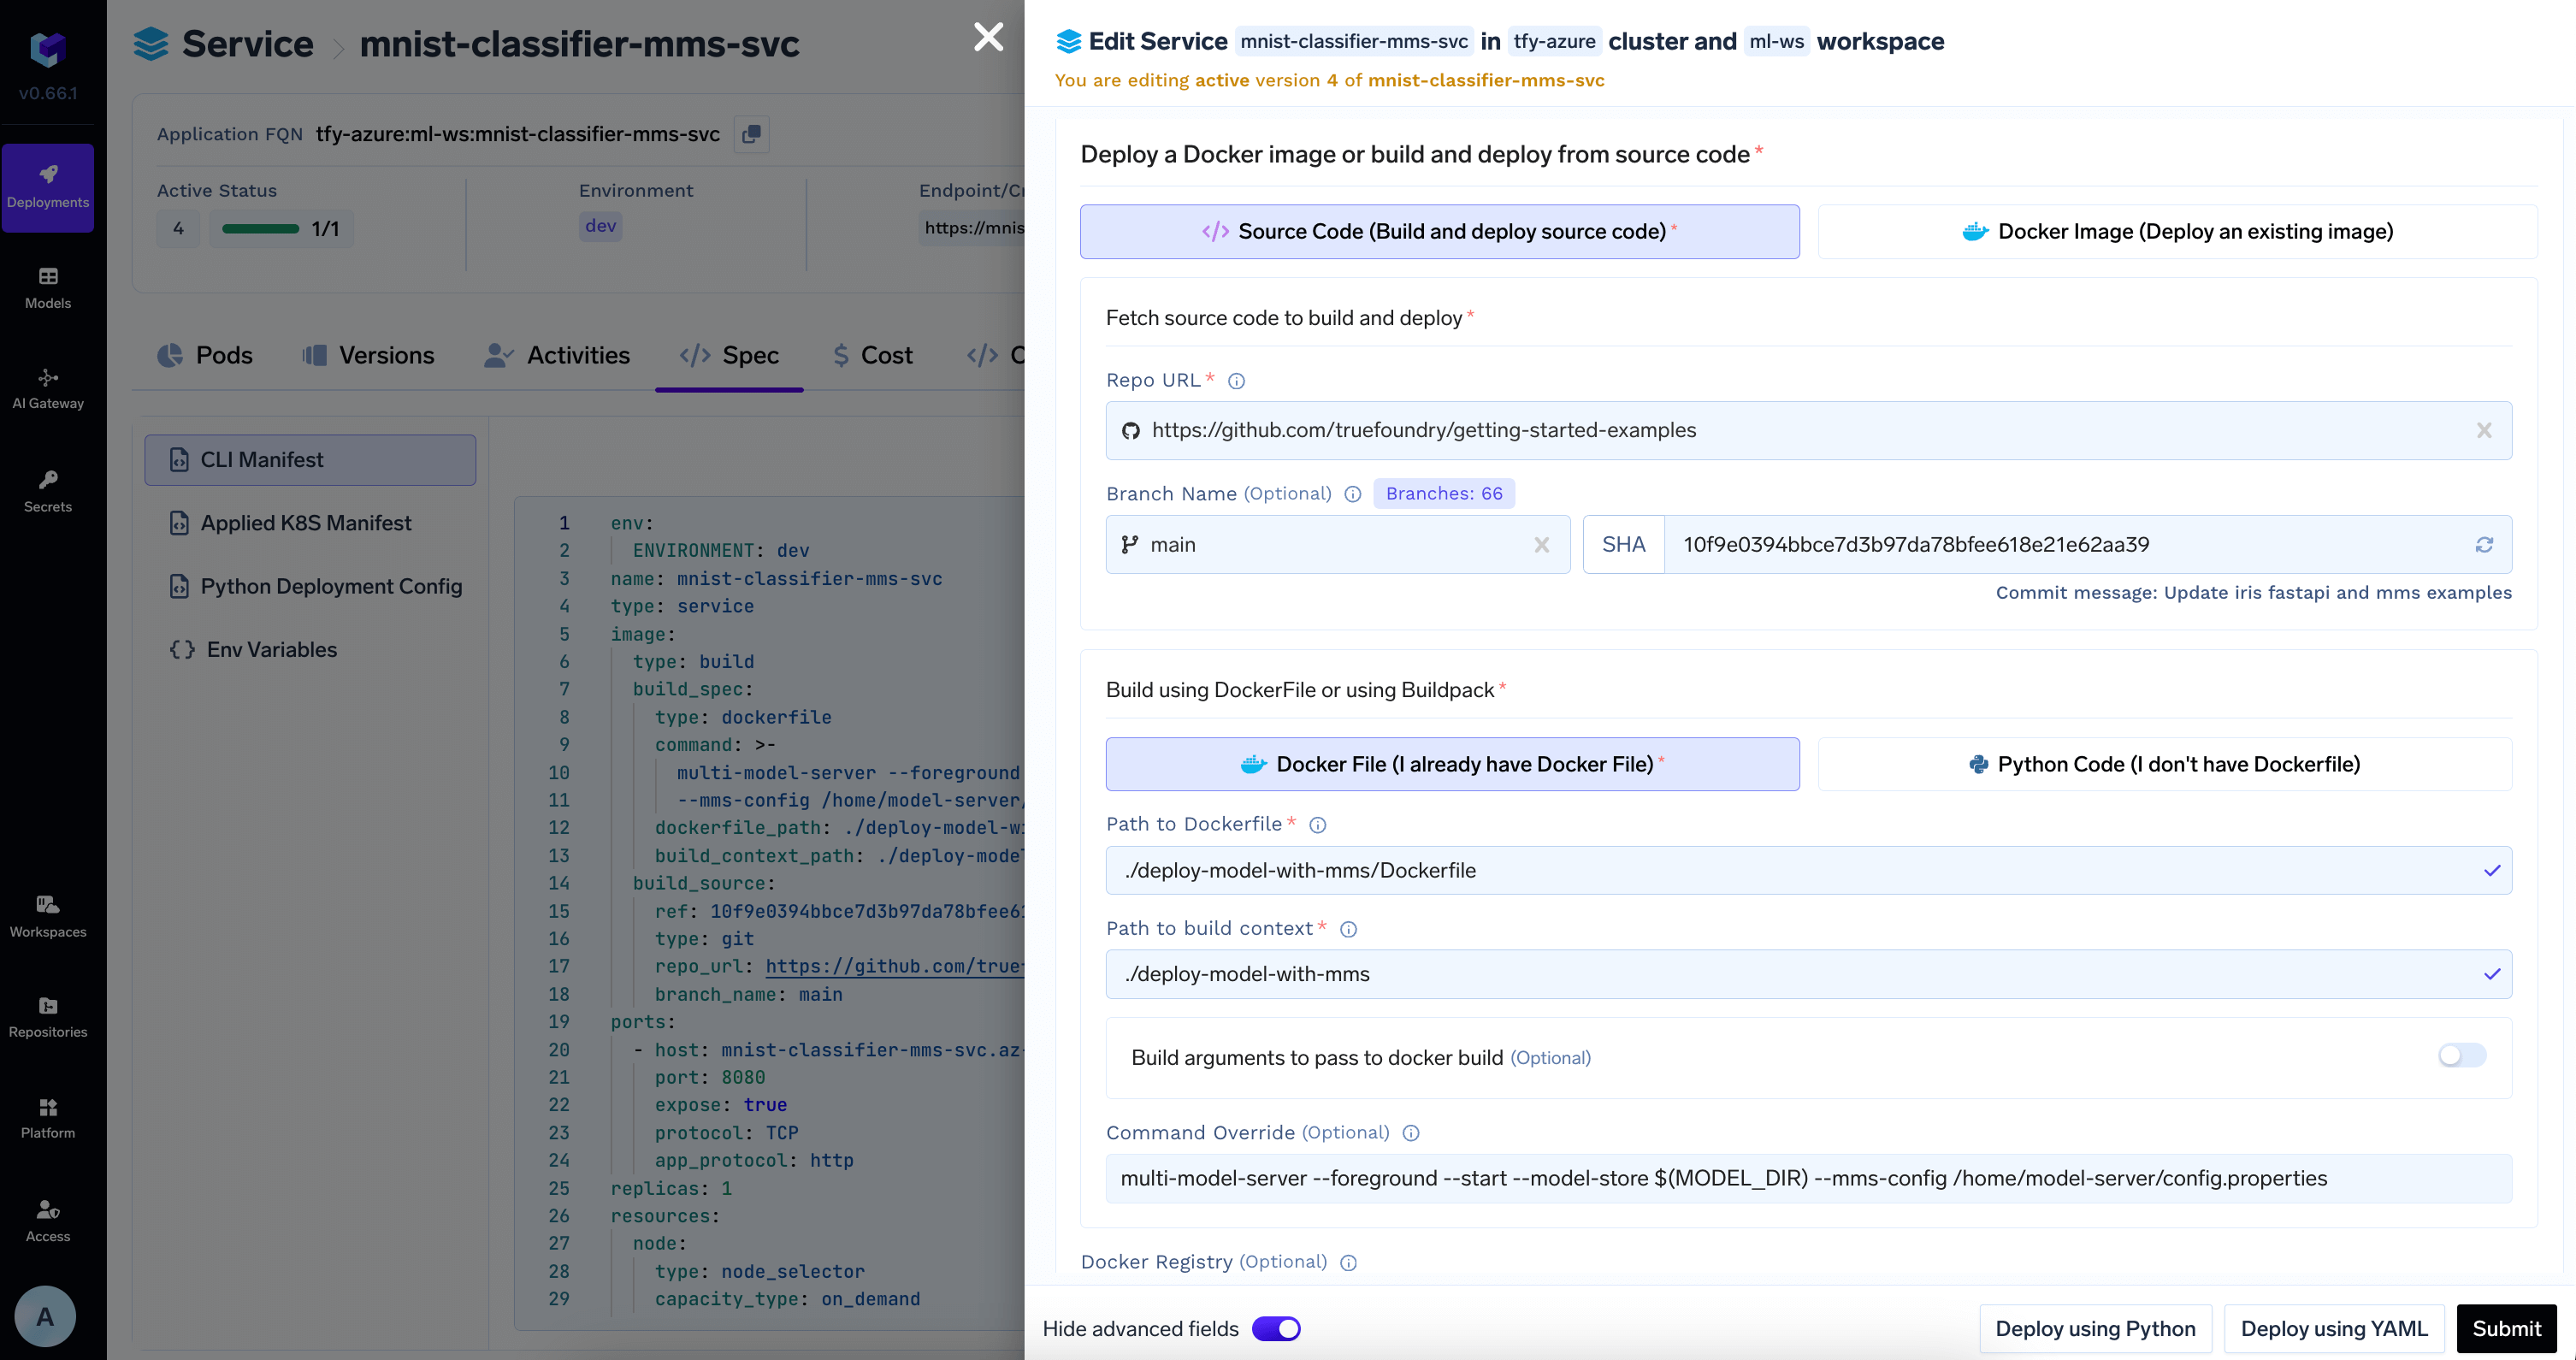
MODEL_DIR environment variable where the model will be downloaded to.3
Download Model from Model Registry in the deployment configuration
TrueFoundry can automatically download the model at the path specified in the 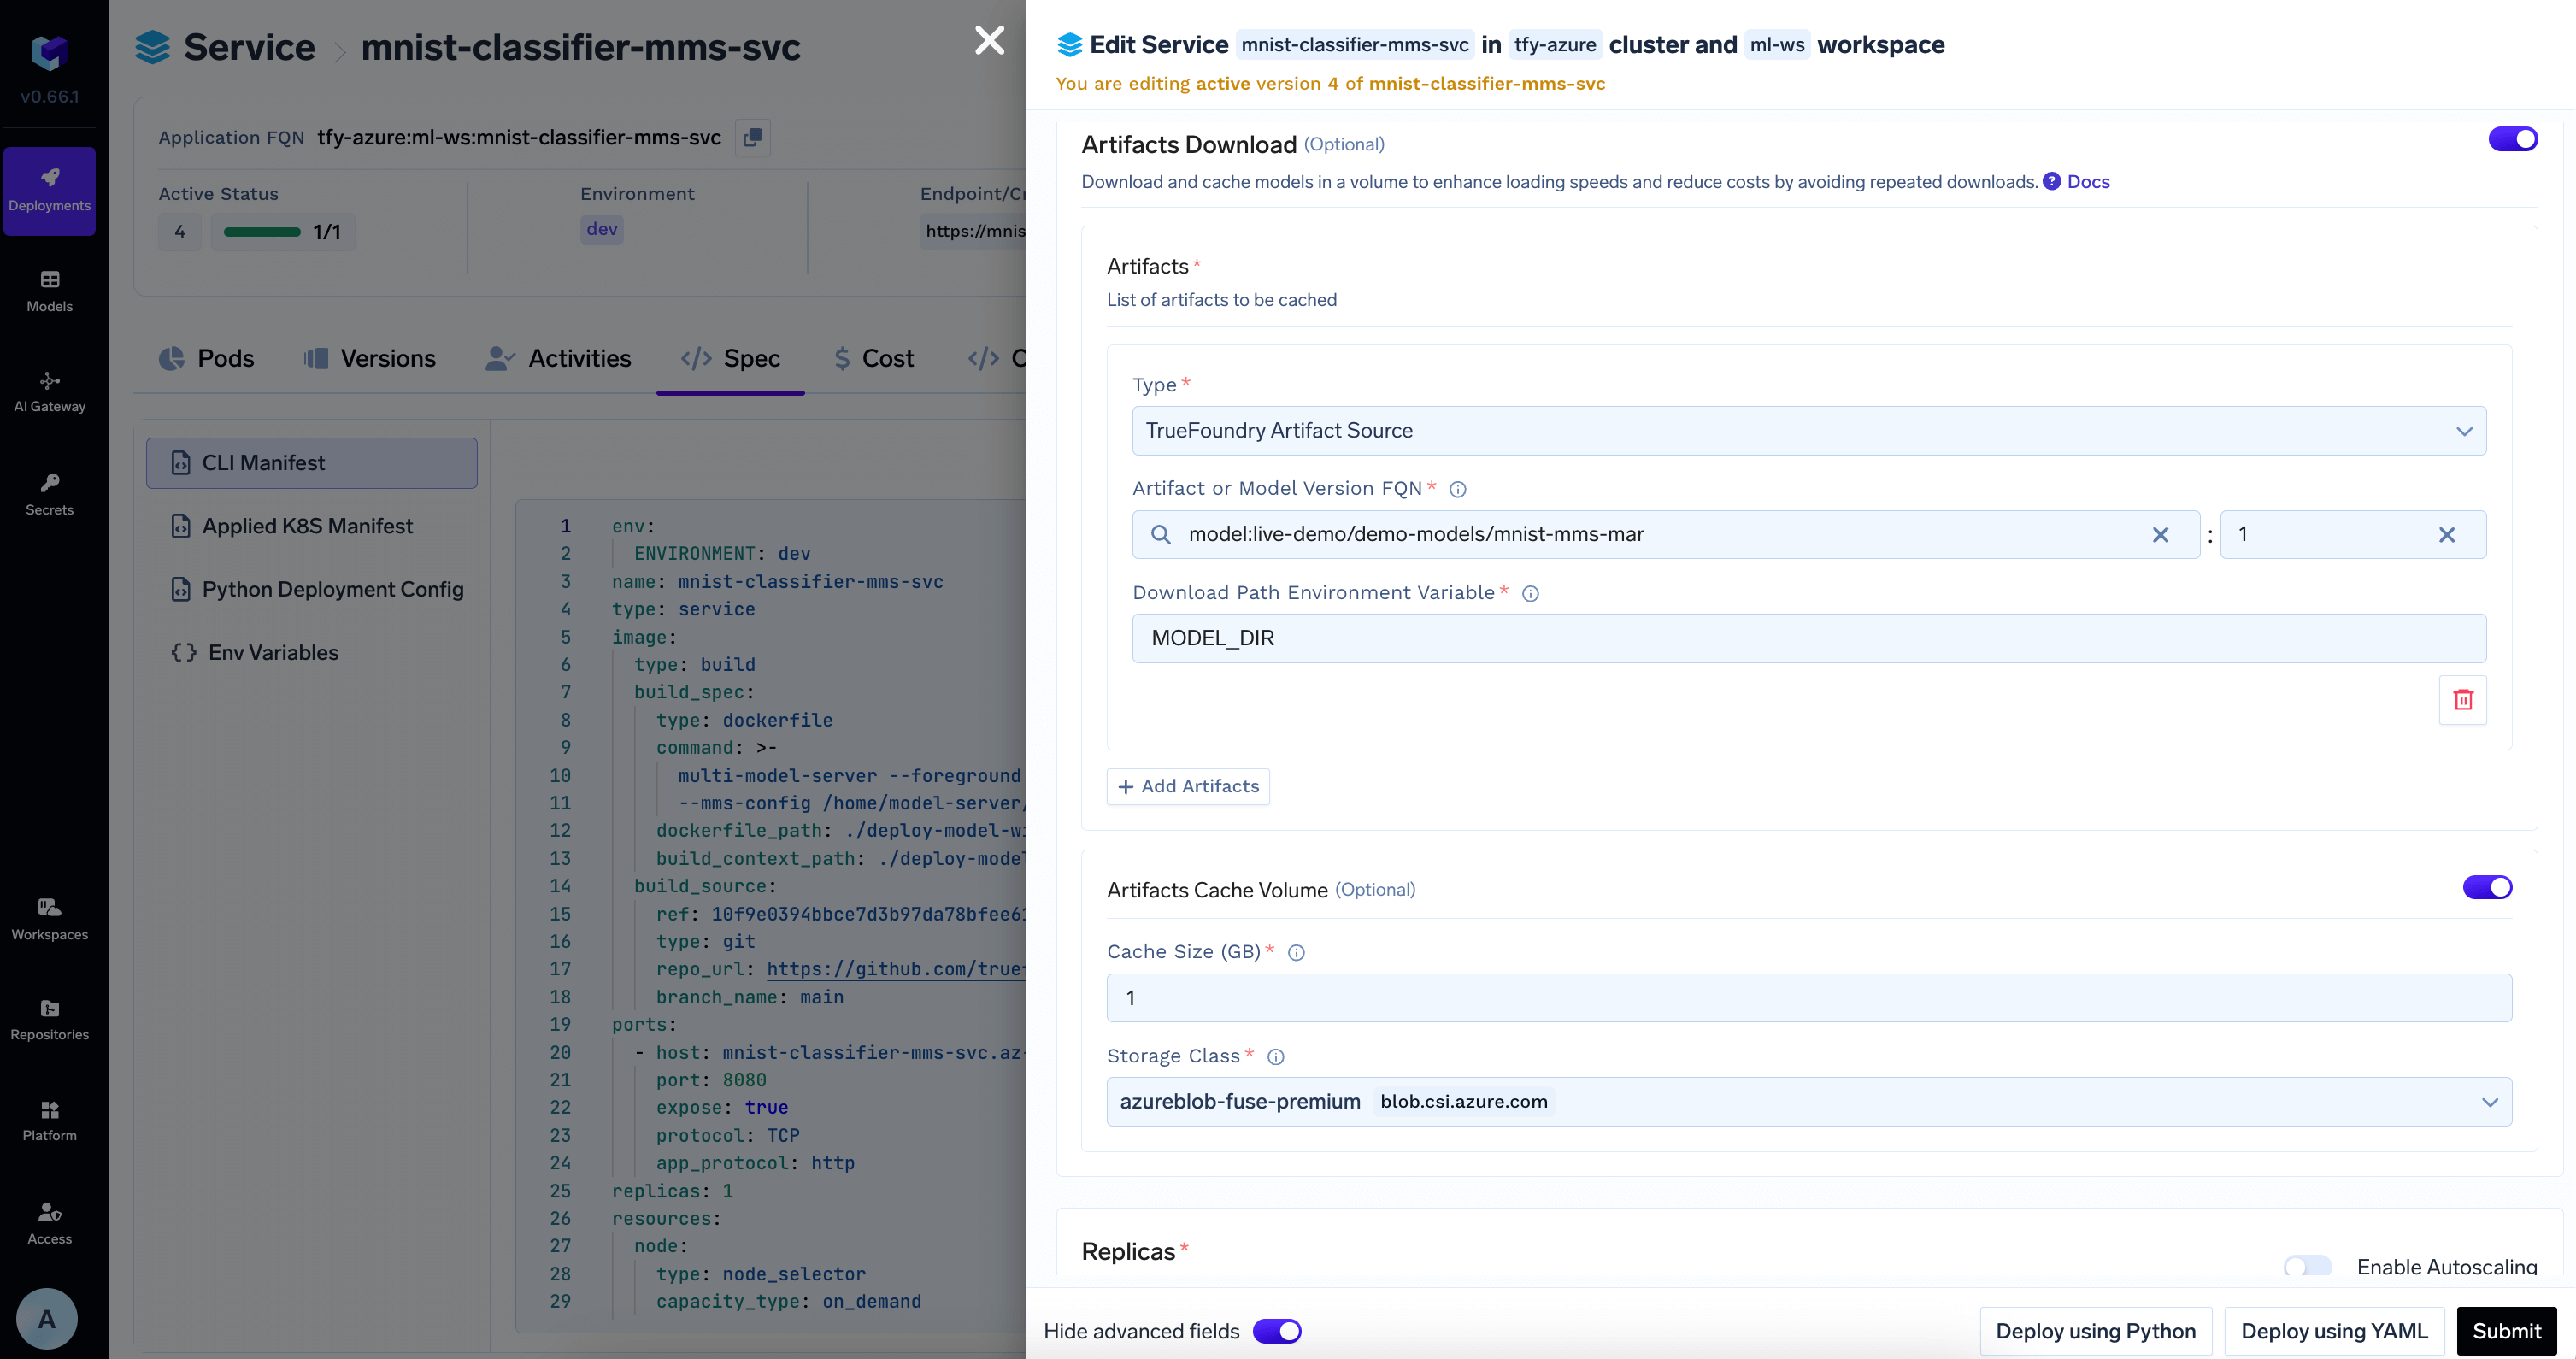
MODEL_DIR environment variable to the deployed service.Add the model id and revision from HuggingFace Hub in Artifacts Download section4
View the deployment, logs and metrics
Once the deployment goes through, you can view the deployment, the pods, logs, metrics and events to debug any issues.