Prerequisites
- A TrueFoundry tenant with Admin access to Settings → Security & Access → SSO.
- A OneLogin account with permission to create new Applications (Super User or Admin).
Configuration overview
Create the SSO configuration in TrueFoundry
Save a SAML SSO configuration in TrueFoundry to surface the ACS URL, Audience (Entity ID), and Relay URL.
Create a custom SAML app in OneLogin
Add the SAML Custom Connector (Advanced) app — this is what TrueFoundry federates with.
Configure the SAML connection on both sides
Paste TrueFoundry’s values into OneLogin, then paste OneLogin’s IdP values back into TrueFoundry.
Step 1 — Create the SSO configuration in TrueFoundry
Open SSO settings
Go to Settings → Security & Access → SSO.Click the + icon labeled Add New SSO Config.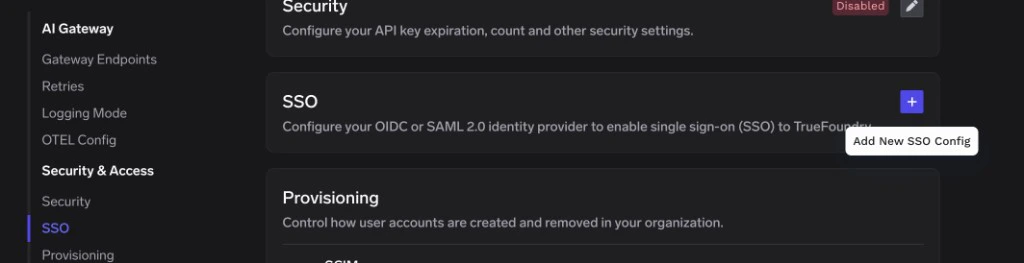
Fill in the basic fields
- Enabled: turn this on.
- Name: a lowercase alphanumeric label — for example,
oneloginsaml. - SSO Provider: choose Custom.
- Authentication Configuration: select SAML v2.
Save to reveal the Single sign-on URL, Audience URI (SP Entity ID), and Relay URL
Click Save. TrueFoundry displays the values you need for OneLogin on the SSO configuration card:
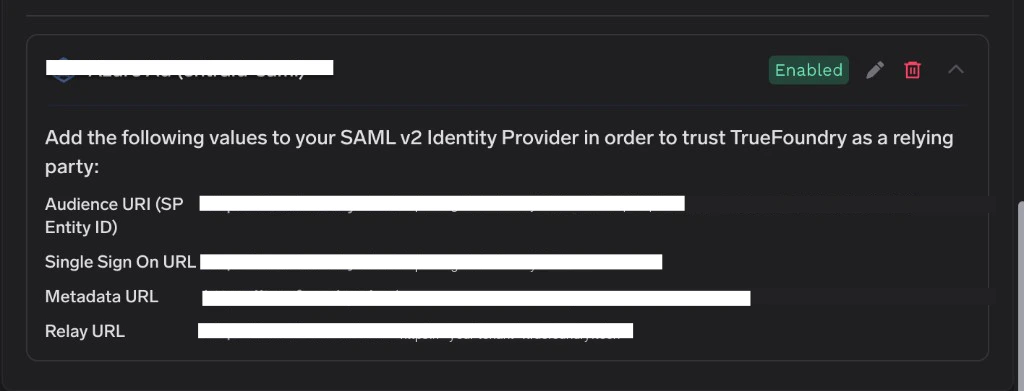
| OneLogin field | Value from TrueFoundry |
|---|---|
| ACS (Consumer) URL | Single Sign On URL |
| Audience (Entity ID) | Audience URI (SP Entity ID) |
| Relay State (if used) | Relay URL |
Step 2 — Create a SAML app in OneLogin
Open Applications
Sign in to the OneLogin admin console as an administrator. In the top navigation, click Applications, then click Applications again in the dropdown.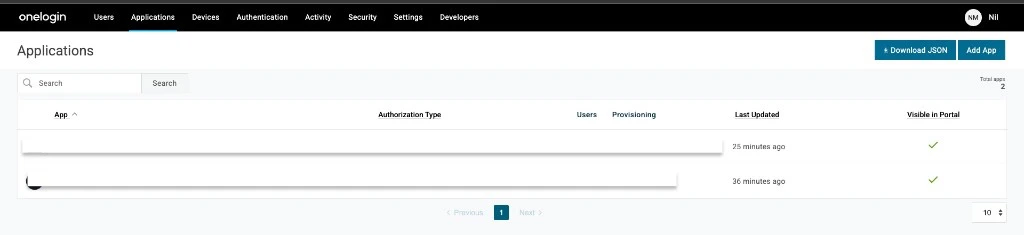
Add a new app
Click Add App in the top right corner. In the Find Applications search bar, type 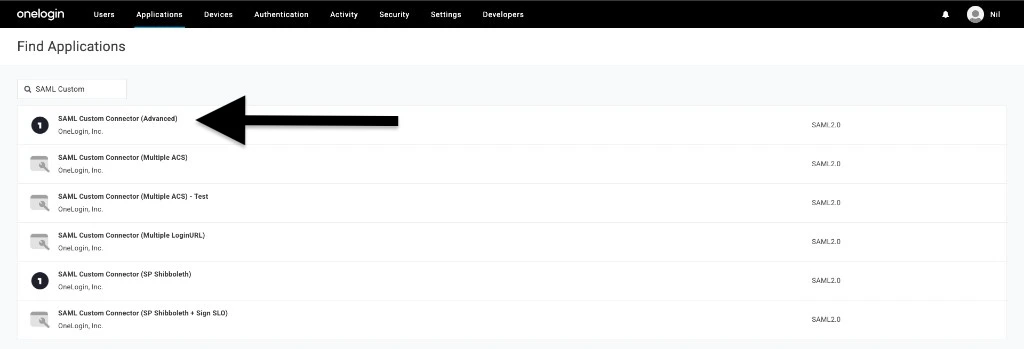
SAML Custom and select SAML Custom Connector (Advanced) from the results.Step 3 — Enter TrueFoundry’s details into OneLogin
Back in OneLogin’s application detail page, switch to the Configuration tab on the left.Fill in the Application details
Paste the TrueFoundry values into the corresponding OneLogin fields:
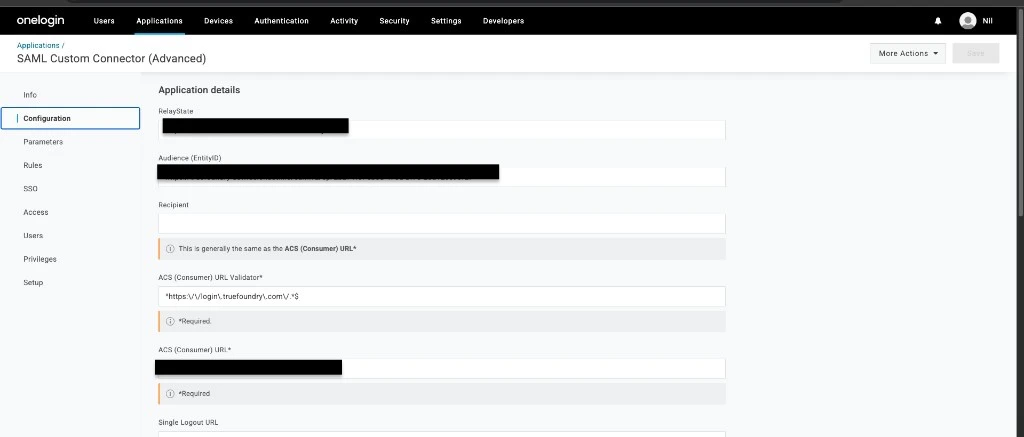
| OneLogin field | Value to paste |
|---|---|
| Audience (Entity ID) | TrueFoundry Audience URI (SP Entity ID) |
| ACS (Consumer) URL Validator | A regex that matches the TrueFoundry Single Sign On URL, for example ^https:\/\/login\.truefoundry\.com\/.*$ |
| ACS (Consumer) URL | TrueFoundry Single Sign On URL |
| Relay State | TrueFoundry Relay URL |
Set the SAML initiator and signature element
Scroll down in the Configuration tab and set: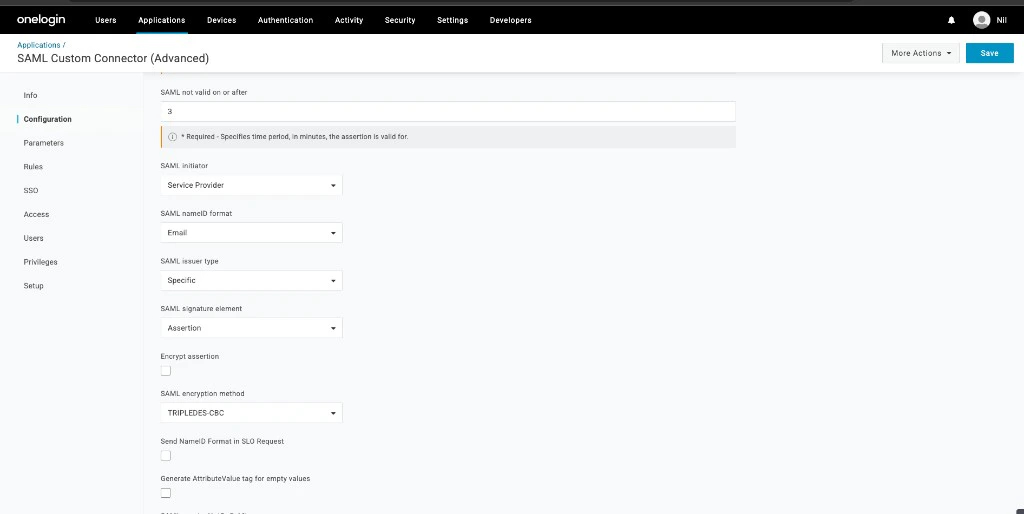
- SAML initiator → Service Provider.
- SAML signature element → Assertion.
- SAML nameID format → Email.
Step 4 — Copy OneLogin’s IdP details back to TrueFoundry
Switch to the SSO tab on the left side of the OneLogin application.Grab the IdP endpoint and certificate
From the SSO tab, collect: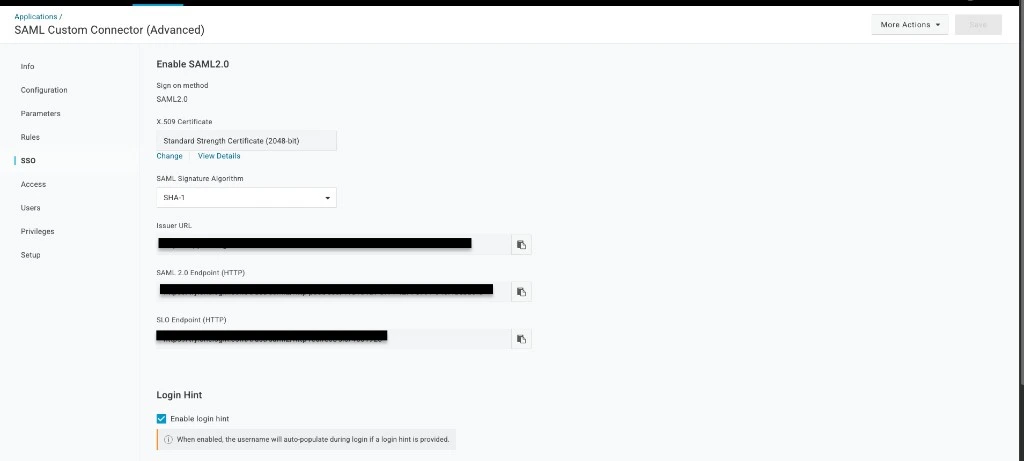
- SAML 2.0 Endpoint (HTTP) — this is the URL TrueFoundry uses to redirect users to OneLogin.
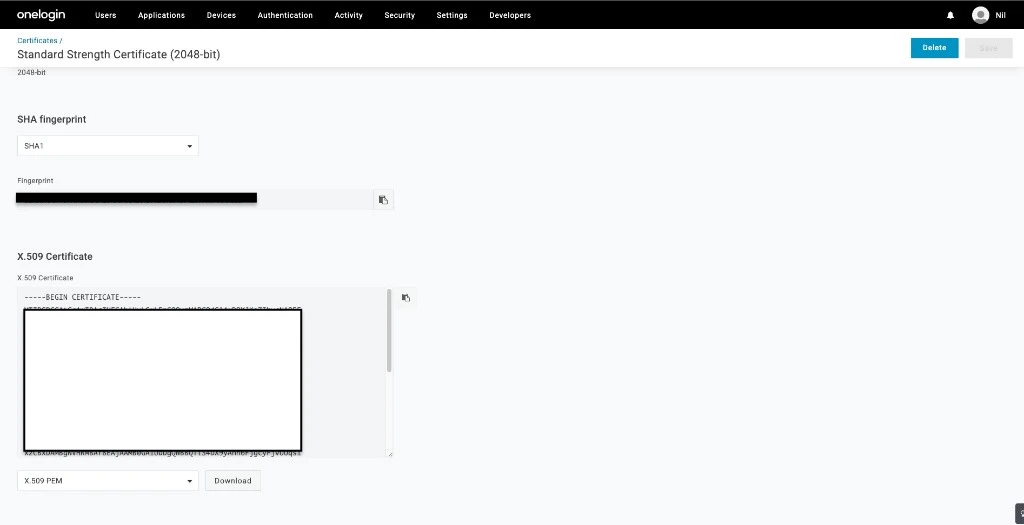
- X.509 Certificate — click View Details under the certificate, then copy the entire PEM, including the
-----BEGIN CERTIFICATE-----and-----END CERTIFICATE-----lines.
Step 5 — Map SAML parameters in OneLogin
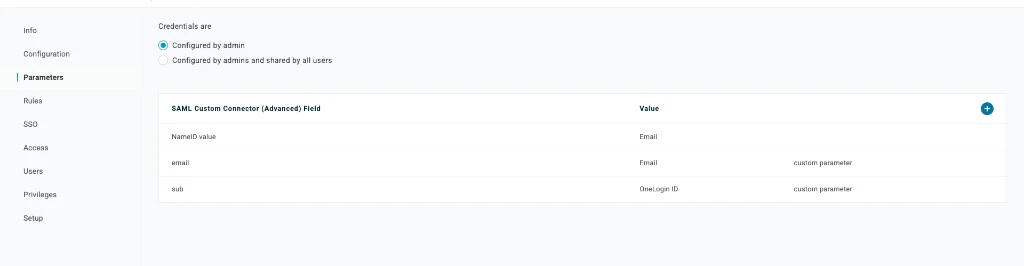
OneLogin doesn’t include user profile attributes in the SAML response by default. You need to add them under the Parameters tab so TrueFoundry can identify the user.Add the required parameters
Click the + icon to add each custom parameter. For every entry, set the Field name, check Include in SAML assertion, then on the next screen set the Value to the OneLogin user attribute listed below.Add the

Add the
Repeat the same flow for
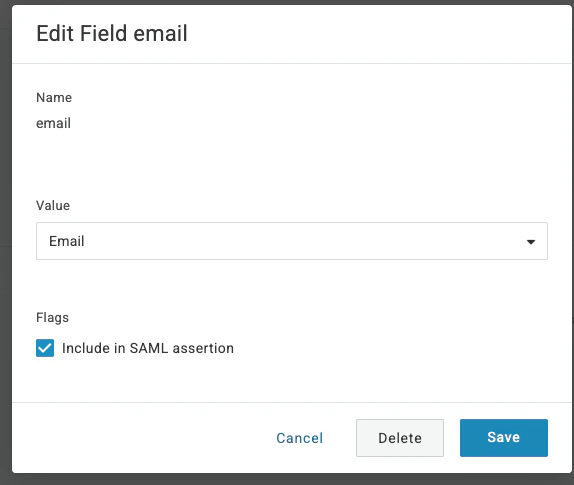
Add the email parameter
- Click + and set Field name to
email. Check Include in SAML assertion, then click Save. - On the edit screen, set Value to Email. Confirm Include in SAML assertion is checked, then click Save.
Add the sub parameter
Repeat the same flow for sub:- Click + and set Field name to
sub. Check Include in SAML assertion, then click Save. - On the edit screen, set Value to OneLogin ID. Confirm Include in SAML assertion is checked, then click Save.
| Field name | Value (OneLogin attribute) |
|---|---|
email | |
sub | OneLogin ID |
email and sub custom parameters. That is the final configuration before you assign users.Step 6 — Assign users in OneLogin
OneLogin only sends SAML responses for users assigned to the application.Open Users
In the OneLogin top navigation, click Users → Users, then open the user you want to grant access to.
Step 7 — Test single sign-on
- Open a private/incognito window and go to your TrueFoundry login page.
- Click Login with OneLogin (or whichever label you set under Show advanced fields → Button Text).
- Authenticate with a OneLogin user that you assigned to the application.
Optional next steps
- Automate user lifecycle with SCIM — see SCIM with OneLogin to push users and groups from OneLogin into TrueFoundry automatically.
- Customize the login button — under Show advanced fields, set Button Text to
Login with OneLoginand Button Image URL to a hosted logo if you’d like a branded button.
Troubleshooting
OneLogin returns 'ACS URL does not match' or 'Invalid ACS URL'
OneLogin returns 'ACS URL does not match' or 'Invalid ACS URL'
The ACS (Consumer) URL Validator regex in OneLogin doesn’t match the ACS (Consumer) URL. Re-open the Configuration tab and confirm that the validator pattern (for example
^https:\/\/login\.truefoundry\.com\/.*$) genuinely matches the Single Sign On URL you copied from TrueFoundry. Don’t forget to escape the slashes in the regex.TrueFoundry sign-in fails with 'no email found in SAML response'
TrueFoundry sign-in fails with 'no email found in SAML response'
The
email parameter isn’t being sent. In OneLogin’s Parameters tab, open the email row and make sure Include in SAML assertion is checked and the value is set to the user’s Email attribute. The parameter name must be exactly email (lower-case) unless you’ve overridden Email Claim under TrueFoundry’s Show advanced fields.'Invalid Signature' or 'Could not validate SAML response'
'Invalid Signature' or 'Could not validate SAML response'
The certificate copied into TrueFoundry doesn’t match OneLogin’s active signing certificate. From OneLogin’s SSO tab, click View Details on the certificate and copy the full PEM again, including the
-----BEGIN CERTIFICATE----- and -----END CERTIFICATE----- lines, then paste it back into TrueFoundry’s X.509 Certificate field.The Login button works but the user gets 'no matching user found'
The Login button works but the user gets 'no matching user found'
'Audience' or 'Entity ID mismatch' errors
'Audience' or 'Entity ID mismatch' errors
The Audience (Entity ID) in OneLogin doesn’t match TrueFoundry’s Audience URI (SP Entity ID). Re-copy the value from the TrueFoundry SSO configuration card and paste it verbatim into OneLogin’s Audience (Entity ID) field (no trailing slashes, no extra whitespace).