Prerequisites
- A TrueFoundry tenant with Admin access to Settings → Security & Access → SSO.
- A Google Workspace account with Super Admin privileges on
admin.google.comso you can create custom SAML apps.
Configuration overview
Create the SSO configuration in TrueFoundry
Save a SAML SSO configuration in TrueFoundry to surface the ACS URL, Entity ID, and Start URL.
Create a custom SAML app in Google
Add a new custom SAML app under Apps → Web and mobile apps in the Google Admin Console.
Configure the SAML connection on both sides
Paste TrueFoundry’s values into Google’s Service Provider Details, then paste Google’s IdP values back into TrueFoundry.
Step 1 — Create the SSO configuration in TrueFoundry
Open SSO settings
Go to Settings → Security & Access → SSO.Click the + icon labeled Add New SSO Config.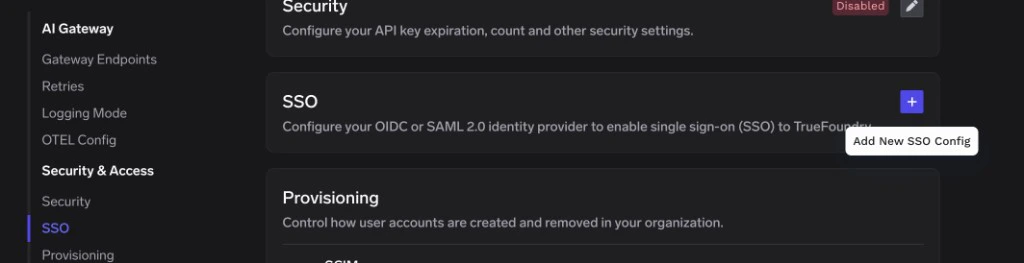
Fill in the basic fields
- Enabled: turn this on.
- Name: a lowercase alphanumeric label — for example,
googleworkspacesaml. - SSO Provider: select Google.
- Authentication Configuration: choose SAML v2.
Save to reveal the Single sign-on URL, Audience URI (SP Entity ID), and Relay URL
Click Save. TrueFoundry displays the values you need for Google on the SSO configuration card:
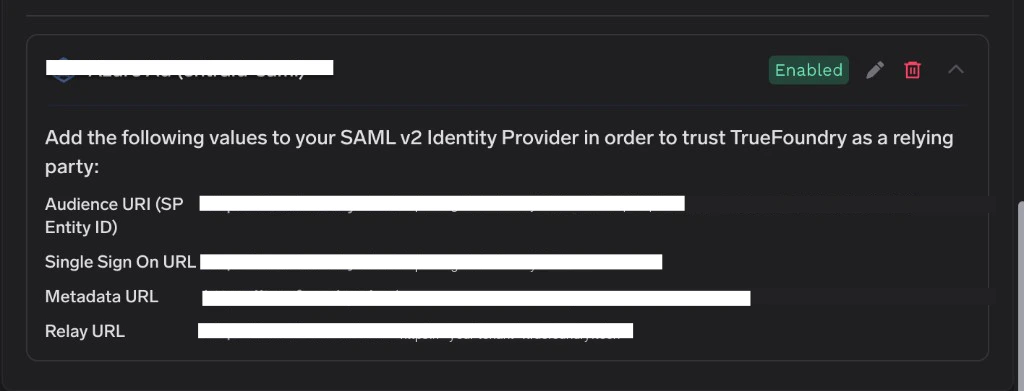
| Google field | Value from TrueFoundry |
|---|---|
| ACS URL | Single Sign On URL |
| Entity ID | Audience URI (SP Entity ID) |
| Start URL / Relay State (if used) | Relay URL |
Step 2 — Create a custom SAML app in Google
Open the Google Admin Console
Sign in to admin.google.com as a Super Admin.In the left sidebar, expand Apps and click Web and mobile apps.
Add a custom SAML app
Click Add app → Add custom SAML app.On the App details screen, enter an App name (for example
TrueFoundry). Optionally upload an app icon, then click Continue.Continue past Google Identity Provider details
On the Google Identity Provider details screen, click Continue without copying anything yet — you’ll paste the SSO URL and certificate into TrueFoundry in Step 5.
Step 3 — Enter TrueFoundry’s details into Google
On the Service Provider Details step of the wizard, paste the values from Step 1.Paste the Service Provider URLs
| Google field | Value from TrueFoundry |
|---|---|
| ACS URL | Single Sign On URL |
| Entity ID | Audience URI (SP Entity ID) |
Step 4 — Map directory attributes
On the Attributes step, add mappings for the claims TrueFoundry expects:Add email and sub
Under Attributes, click Add mapping for each row:
| Google directory attribute | App attribute |
|---|---|
| Primary email | email |
| Primary email | sub |
Step 5 — Paste Google’s IdP details into TrueFoundry
Open Google Identity Provider details
From the app’s overview page, click Download metadata or open the SAML app setup flow again and navigate to Google Identity Provider details. Copy the SSO URL and click Download under Certificate to save the
.pem file.Paste into TrueFoundry
Return to Settings → Security & Access → SSO in TrueFoundry and edit the SSO configuration you created in Step 1. Set:
- Identity Provider Endpoint → Google’s SSO URL.
- X.509 Certificate → the full contents of the downloaded
.pemfile, including the-----BEGIN CERTIFICATE-----and-----END CERTIFICATE-----lines.
Step 6 — Enable user access in Google
Newly-created custom SAML apps are turned OFF for the entire Workspace. You must explicitly enable the app for the users who should be able to sign in.Open User access
From the new app’s overview page, click the User access card on the right (it shows as OFF for everyone).
Step 7 — Test single sign-on
- Open a private/incognito window and visit your TrueFoundry login page.
- Click Login with Google (or whichever Button Text you chose under Show advanced fields).
- Authenticate with a Google Workspace user that the app is enabled for.
Optional next steps
- Use OIDC instead — if you don’t need SAML, the OAuth 2.0 flow against Google is simpler. Configure a Google Cloud OAuth client and switch Authentication Configuration to OIDC in TrueFoundry.
- Use a different IdP — see SAML with Microsoft Entra ID for the equivalent flow against Entra.
Troubleshooting
'Invalid Signature' or 'Could not validate SAML response'
'Invalid Signature' or 'Could not validate SAML response'
The certificate pasted into TrueFoundry doesn’t match the active signing certificate on Google’s app. Re-download the
.pem from the Google Identity Provider details screen of your custom SAML app and paste the entire contents — including the -----BEGIN CERTIFICATE----- and -----END CERTIFICATE----- lines — into TrueFoundry’s X.509 Certificate field.Users see 'app_not_configured_for_user' after clicking Login with Google
Users see 'app_not_configured_for_user' after clicking Login with Google
The Google org unit they belong to isn’t enabled for the SAML app yet, or Google hasn’t finished propagating the change. Confirm under Apps → Web and mobile apps → <your app> → User access that the OU is ON, then wait up to 24 hours for propagation.
Sign-in works but the user's email or unique ID is empty
Sign-in works but the user's email or unique ID is empty
The
email and sub attribute mappings weren’t saved. Edit the SAML app in Google, open Attribute mapping, and confirm Primary email maps to both email and sub (or Employee ID → sub if you use that pattern).'SAML Response is not signed' or 'Signature required'
'SAML Response is not signed' or 'Signature required'
Google signs SAML assertions by default but does not sign the SAML response envelope unless asked to. If your security policy requires a signed response, edit the SAML app in Google, return to Service Provider Details, and check Signed response. Then re-test.