> ## Documentation Index
> Fetch the complete documentation index at: https://www.truefoundry.com/llms.txt
> Use this file to discover all available pages before exploring further.
# Manage Multi-Tenancy on the Control Plane
> Enable multi-tenant mode on a self-hosted TrueFoundry control plane and manage tenants from the admin dashboard.
**This guide is applicable only if you are self-hosting the control plane.** On the TrueFoundry-hosted control plane, multi-tenancy is already enabled and managed by TrueFoundry — you can [create additional tenants](https://app.truefoundry.com) directly from the UI without any infrastructure changes.
A single TrueFoundry control plane can host multiple isolated **tenants**. Each tenant has its own users, teams, virtual accounts, SSO configuration, identity providers, and resources — see [Identity and Access Management Overview](/docs/platform/user-team-account-management) for the full mental model.
By default, a self-hosted control plane runs in **single-tenant** mode. This guide explains how to switch it to **multi-tenant** mode and then create and manage tenants from the admin dashboard.
Multi-tenancy on a self-hosted control plane is part of TrueFoundry's higher-tier enterprise plan. Reach out to the TrueFoundry team before enabling it on your deployment.
## Architecture
In multi-tenant mode, the control plane serves each tenant on its own subdomain under a shared `base_domain`:
| Domain | Purpose |
| ------------------------ | ------------------------------------------------------------------------------------------------------------------------ |
| `` | Reserved for the control plane host. The admin dashboard at `/admin/` is used to create and manage tenants. |
| `.` | Tenant-specific URL where users of that tenant log in and operate. Each tenant gets its own subdomain. |
Every other component of the control plane — `servicefoundryServer`, `tfy-llm-gateway`, `tfyK8sController`, and `mlfoundryServer` — must be told that it is running in multi-tenant mode through the `MULTITENANT` flag.
## Enable multi-tenant mode
Multi-tenancy is enabled by updating your `truefoundry-values.yaml` (the values file passed to the `truefoundry` Helm chart) and upgrading the release.
Choose a base domain that is dedicated to your control plane, for example `app.example.com`. Every tenant will be hosted on a subdomain of this domain (for example `team-a.app.example.com`, `team-b.app.example.com`).
You must own this domain and be able to create a wildcard DNS record (`*.`) pointing to the control plane's load balancer or ingress, along with a wildcard TLS certificate that covers `*.`.
Add the multi-tenant flags to each microservice and configure the virtual service to accept the wildcard host:
```yaml truefoundry-values.yaml theme={"dark"}
base_domain: app.example.com
global:
virtualservice:
hosts:
- "*."
servicefoundryServer:
env:
MULTITENANT: true
FE_MULTITENANT_ENABLED: true
TENANT_HOST_CONTROL_PLANE_BASE_DOMAIN:
FE_TENANT_BASE_DOMAIN:
tfy-llm-gateway:
env:
MULTITENANT: true
tfyK8sController:
env:
MULTITENANT: true
mlfoundryServer:
env:
MULTITENANT: true
```
| Variable | Component | Purpose |
| --------------------------------------- | -------------------------- | ------------------------------------------------------------------------------------------ |
| `base_domain` | Helm values | Base domain used to derive per-tenant subdomains. |
| `global.virtualservice.hosts` | Istio virtual service | Routes all traffic for `*.` to the control plane. |
| `MULTITENANT` | All control plane services | Switches each backend service into multi-tenant mode so it scopes data and APIs by tenant. |
| `FE_MULTITENANT_ENABLED` | `servicefoundryServer` | Enables multi-tenant UI flows, including the admin dashboard at `/admin/`. |
| `TENANT_HOST_CONTROL_PLANE_BASE_DOMAIN` | `servicefoundryServer` | Base domain used by the backend to construct tenant URLs. |
| `FE_TENANT_BASE_DOMAIN` | `servicefoundryServer` | Base domain used by the frontend when redirecting users to their tenant. |
Apply the updated values:
```bash theme={"dark"}
helm upgrade --install truefoundry oci://tfy.jfrog.io/tfy-helm/truefoundry \
-n truefoundry --create-namespace \
-f truefoundry-values.yaml
```
Once the rollout completes, the control plane is running in multi-tenant mode and the admin dashboard becomes available.
Once a control plane is switched to multi-tenant mode, it cannot be reverted to single-tenant mode. Make sure you intend to run multiple tenants on this control plane before enabling it.
## Manage tenants from the admin dashboard
Once multi-tenancy is enabled, the parent admin can create and manage tenants from the **Tenants Dashboard** at `/admin/`.
The **parent (admin) tenant** is the tenant defined by `global.tenantName` in your `truefoundry-values.yaml` when the control plane was first installed (see [Deploy Control Plane and Gateway Plane](/docs/platform/deploy-control-plane-and-gateway-plane)). Only admins of this tenant can access `/admin/` and create or manage other tenants. Admins of any other tenant only have admin rights inside their own tenant.
### Create a new tenant
Log in to the **parent (admin) tenant** and navigate to:
```
https:///admin/
```
The **Tenants Dashboard** lists every tenant on the control plane along with its endpoint, tenant admins, user count, virtual accounts, teams, and creation date.
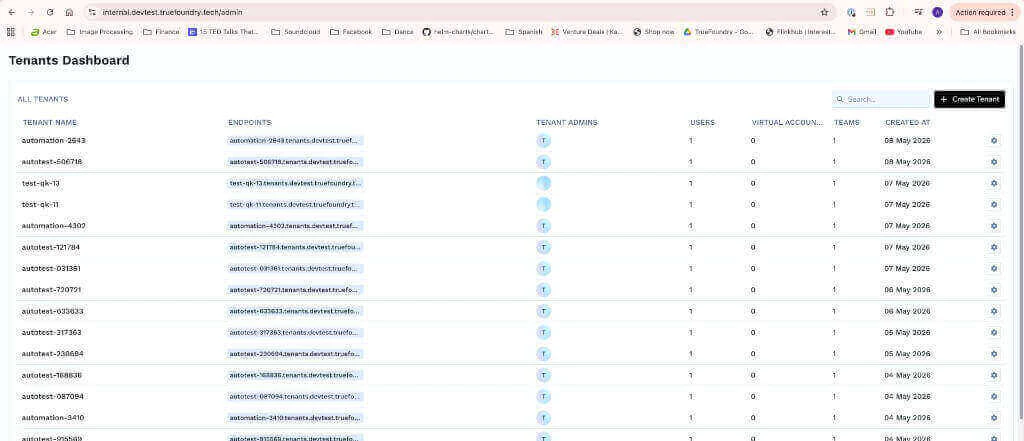 Click **Create Tenant** in the top-right corner of the Tenants Dashboard.
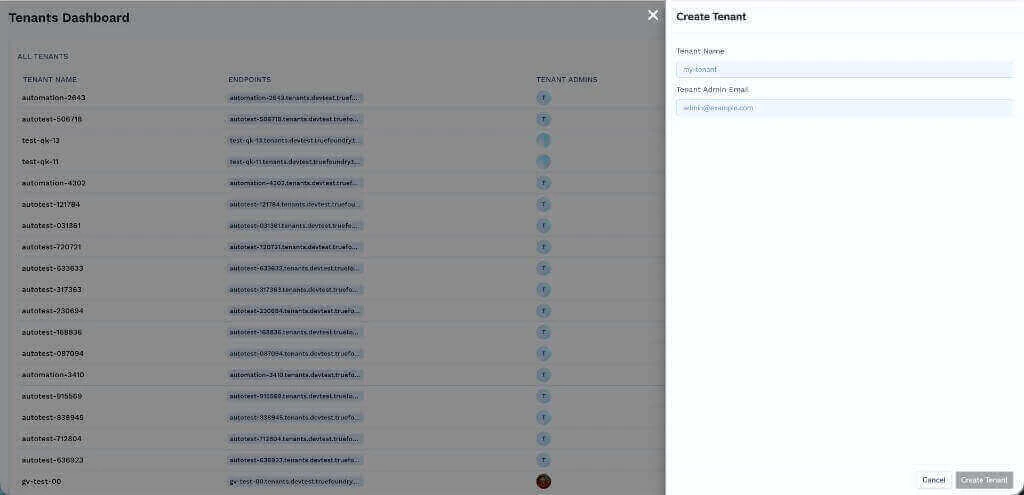 Fill in:
* **Tenant Name** — used to construct the tenant URL as `.`. Use lowercase letters, numbers, and hyphens only.
* **Tenant Admin Email** — the email address of the first user who will administer this tenant. They will receive the invite email and become the tenant's first admin.
Click **Create Tenant** to provision the tenant. The new tenant immediately appears on the Tenants Dashboard.
The tenant admin receives a `Welcome to TrueFoundry` email with a **Setup Your Account** button.
Fill in:
* **Tenant Name** — used to construct the tenant URL as `.`. Use lowercase letters, numbers, and hyphens only.
* **Tenant Admin Email** — the email address of the first user who will administer this tenant. They will receive the invite email and become the tenant's first admin.
Click **Create Tenant** to provision the tenant. The new tenant immediately appears on the Tenants Dashboard.
The tenant admin receives a `Welcome to TrueFoundry` email with a **Setup Your Account** button.
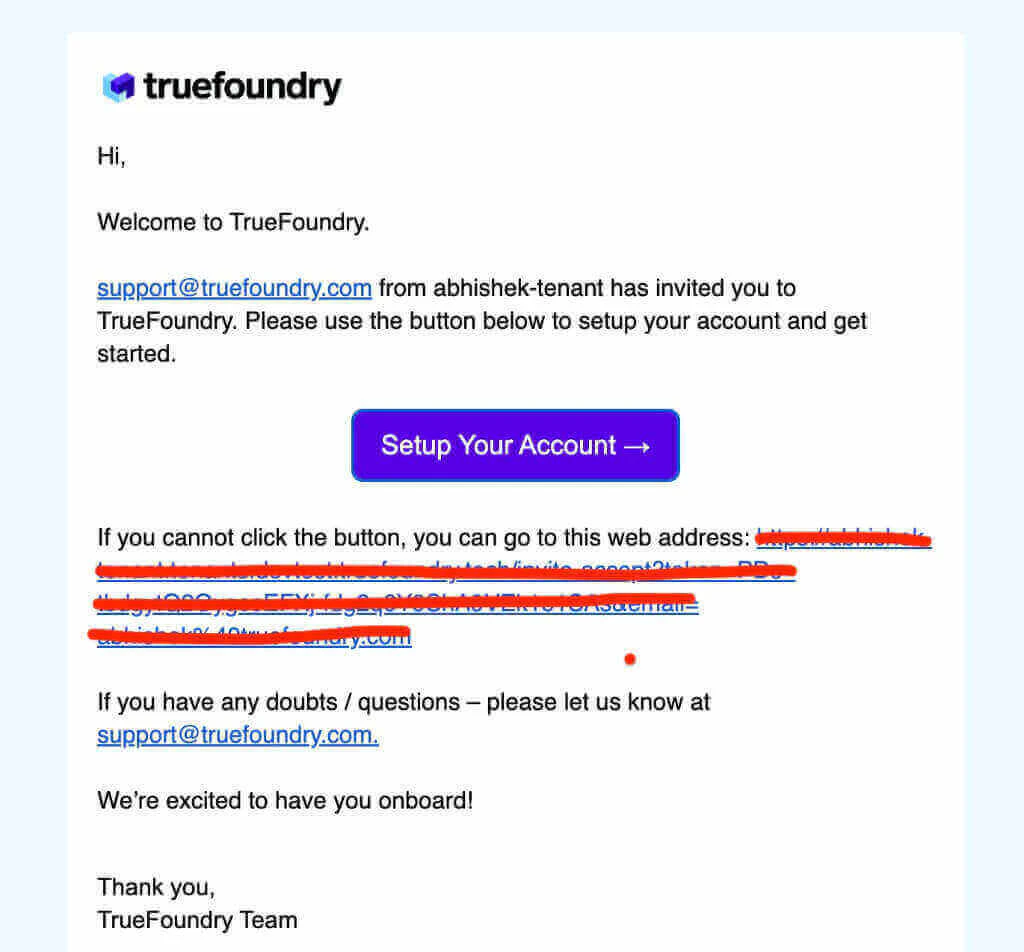 Clicking **Setup Your Account** opens the activation page on the new tenant's URL. The admin sets their first name, last name, and password, then signs in to the new tenant.
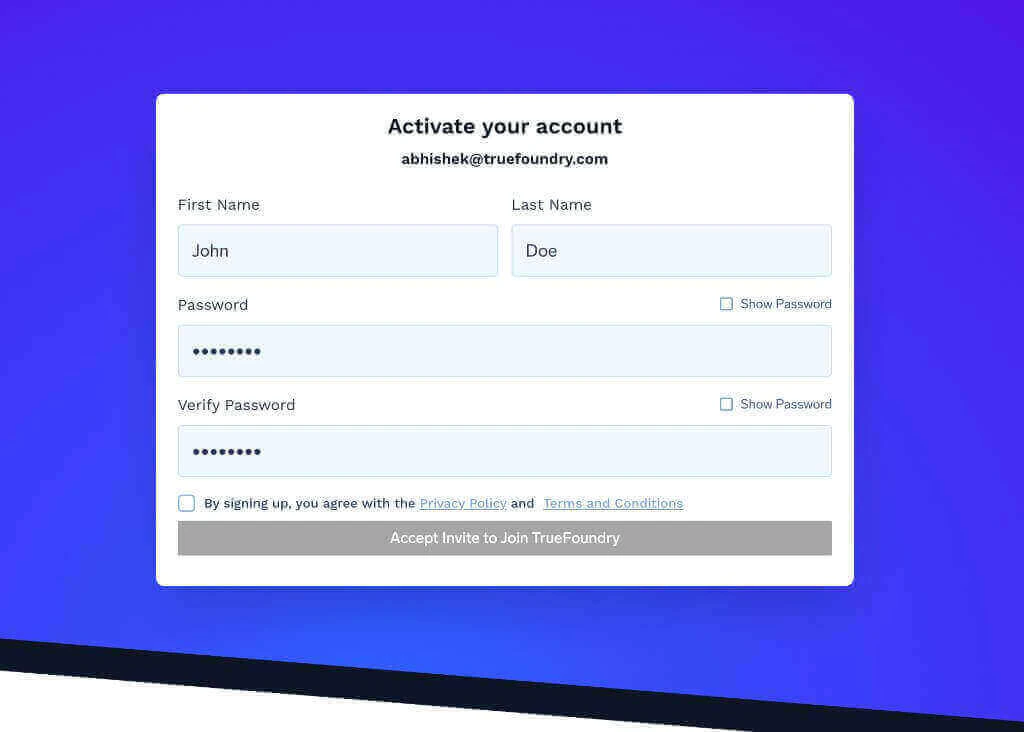 This password flow is only used for the initial tenant admin login. Once they are in, the tenant admin can set up SSO and switch the tenant to SCIM, JIT, or invite-only provisioning — see [Manage Users](/docs/platform/user-management).
Once logged in, the tenant admin can:
* Set up [SSO](/docs/sso) for the tenant (each tenant has its own SSO settings).
* Choose a [user provisioning mode](/docs/platform/user-management#user-provisioning) — SCIM, JIT, or invite-only.
* Invite additional users and create [teams](/docs/platform/team-management) and [virtual accounts](/docs/platform/virtual-account-management).
* Connect compute planes and start deploying workloads.
### Manage existing tenants
From the **Tenants Dashboard**, platform admins can:
* **Open a tenant** by clicking its endpoint to navigate to the tenant URL.
* **Search** for a tenant by name using the search box in the top-right.
* **Inspect tenant metadata** — admins, user count, virtual accounts, teams, and creation date — directly from the table.
* **Update tenant settings** using the gear icon at the end of each row.
Tenants are designed to be fully isolated. Users, teams, virtual accounts, and resources cannot be shared across tenants. If multiple groups need to share resources, they should operate inside the same tenant and use teams and roles to scope access.
## FAQ
No. Once a control plane is switched to multi-tenant mode, it cannot be reverted to single-tenant mode. Confirm that you intend to host multiple tenants before enabling multi-tenancy.
Yes. SSO, provisioning mode, identity providers, roles, users, and teams are all scoped to the tenant. Each tenant admin configures these independently from their tenant URL.
Compute planes are connected per tenant. Two tenants on the same control plane do not automatically share clusters or workloads — each tenant connects its own compute planes and manages its own resources.
Only users who are admins on the **parent tenant** — the tenant set as `global.tenantName` in your control plane Helm values — can access `/admin/`. Admins of any other tenant only have admin rights inside their own tenant.
This password flow is only used for the initial tenant admin login. Once they are in, the tenant admin can set up SSO and switch the tenant to SCIM, JIT, or invite-only provisioning — see [Manage Users](/docs/platform/user-management).
Once logged in, the tenant admin can:
* Set up [SSO](/docs/sso) for the tenant (each tenant has its own SSO settings).
* Choose a [user provisioning mode](/docs/platform/user-management#user-provisioning) — SCIM, JIT, or invite-only.
* Invite additional users and create [teams](/docs/platform/team-management) and [virtual accounts](/docs/platform/virtual-account-management).
* Connect compute planes and start deploying workloads.
### Manage existing tenants
From the **Tenants Dashboard**, platform admins can:
* **Open a tenant** by clicking its endpoint to navigate to the tenant URL.
* **Search** for a tenant by name using the search box in the top-right.
* **Inspect tenant metadata** — admins, user count, virtual accounts, teams, and creation date — directly from the table.
* **Update tenant settings** using the gear icon at the end of each row.
Tenants are designed to be fully isolated. Users, teams, virtual accounts, and resources cannot be shared across tenants. If multiple groups need to share resources, they should operate inside the same tenant and use teams and roles to scope access.
## FAQ
No. Once a control plane is switched to multi-tenant mode, it cannot be reverted to single-tenant mode. Confirm that you intend to host multiple tenants before enabling multi-tenancy.
Yes. SSO, provisioning mode, identity providers, roles, users, and teams are all scoped to the tenant. Each tenant admin configures these independently from their tenant URL.
Compute planes are connected per tenant. Two tenants on the same control plane do not automatically share clusters or workloads — each tenant connects its own compute planes and manages its own resources.
Only users who are admins on the **parent tenant** — the tenant set as `global.tenantName` in your control plane Helm values — can access `/admin/`. Admins of any other tenant only have admin rights inside their own tenant.