> ## Documentation Index
> Fetch the complete documentation index at: https://www.truefoundry.com/llms.txt
> Use this file to discover all available pages before exploring further.
# Bitbucket Integration using PAT
> Connect Bitbucket Data Center to TrueFoundry using a Personal Access Token for repository access and deployments.
## Prerequisites
Before you begin, make sure you have:
* Access to your Bitbucket Data Center instance with permission to create HTTP access tokens or personal access tokens
* Permission to manage Git integrations in your TrueFoundry tenant
* A Personal Access Token from your Bitbucket Data Center instance (see [Create a Personal Access Token](#create-a-personal-access-token) at the end of this page)
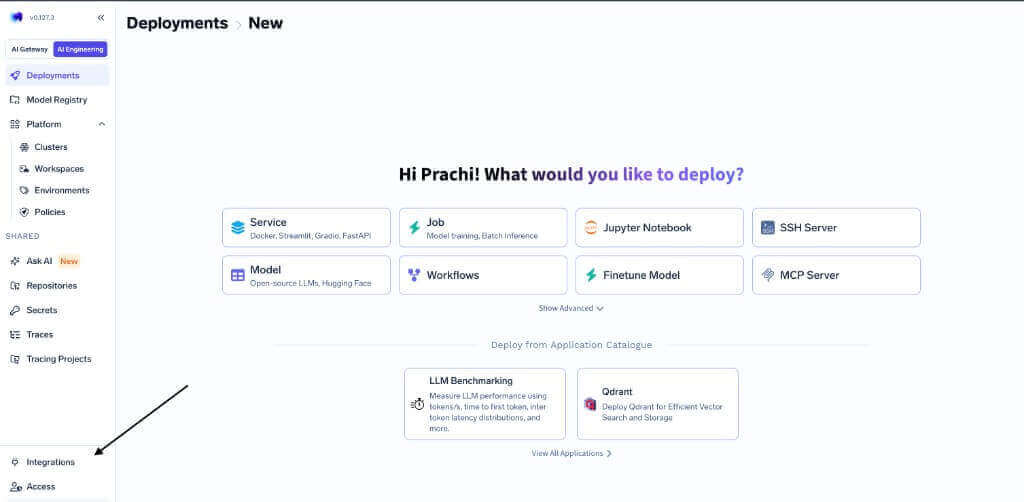
## Step 1: Navigate to Integrations
In the TrueFoundry dashboard, select **Integrations** from the left sidebar.
 ## Step 2: Open Git Integrations
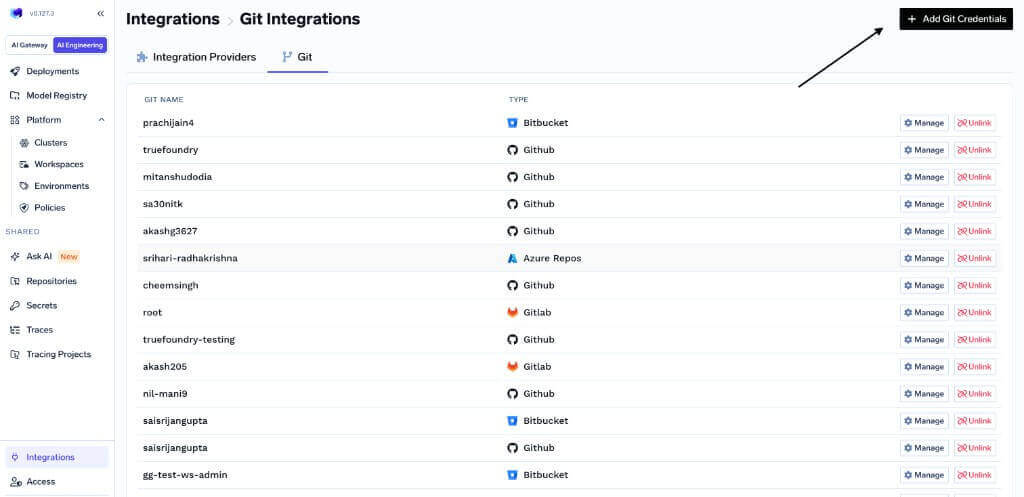
On the **Integrations** page, open the **Git** tab and click **+ Add Git Credentials**.
## Step 2: Open Git Integrations
On the **Integrations** page, open the **Git** tab and click **+ Add Git Credentials**.
 ## Step 3: Select Bitbucket Data Center
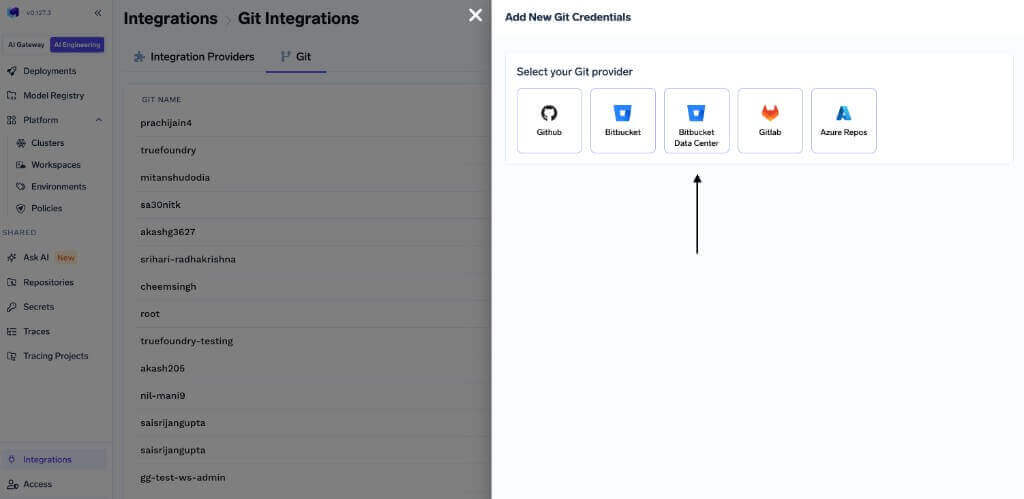
In the **Add New Git Credentials** panel, select **Bitbucket Data Center** as your Git provider.
## Step 3: Select Bitbucket Data Center
In the **Add New Git Credentials** panel, select **Bitbucket Data Center** as your Git provider.
 ## Step 4: Select Personal Access Token
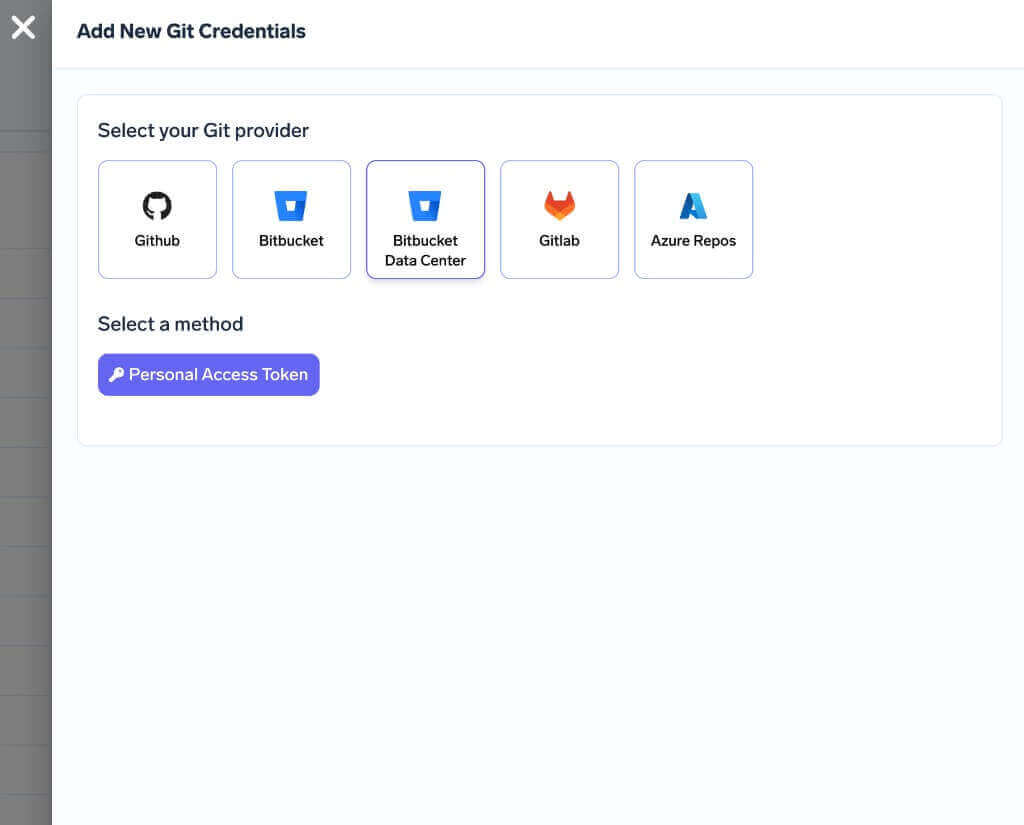
Under **Select a method**, choose **Personal Access Token**.
## Step 4: Select Personal Access Token
Under **Select a method**, choose **Personal Access Token**.
 ## Step 5: Add credentials and submit
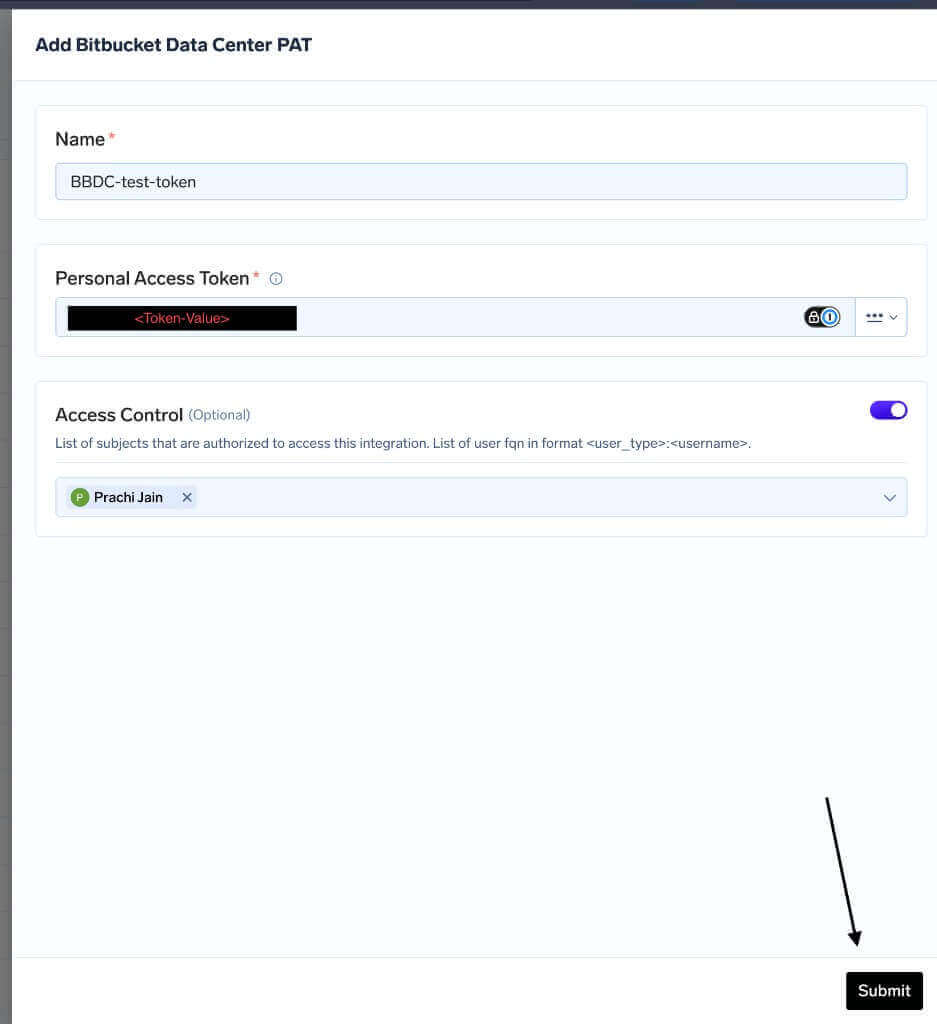
Fill in the **Add Bitbucket Data Center PAT** form:
* **Name** (required): A descriptive name for this integration, such as `BBDC-test-token`.
* **Personal Access Token** (required): Paste your Bitbucket Data Center PAT.
* **Access Control** (optional): Restrict which users can use this integration. Add user FQNs in the format `:` — for example, `user:prachi-jain`.
Click **Submit** to save the integration.
## Step 5: Add credentials and submit
Fill in the **Add Bitbucket Data Center PAT** form:
* **Name** (required): A descriptive name for this integration, such as `BBDC-test-token`.
* **Personal Access Token** (required): Paste your Bitbucket Data Center PAT.
* **Access Control** (optional): Restrict which users can use this integration. Add user FQNs in the format `:` — for example, `user:prachi-jain`.
Click **Submit** to save the integration.
 After submission, your Bitbucket Data Center credentials appear on the **Git Integrations** page. You can use **Manage** to view connected repositories or **Unlink** to remove the integration.
## Next steps
Once the integration is linked, you can deploy services from Bitbucket Data Center repositories and set up [GitOps CI/CD](/docs/setup-gitops-using-truefoundry) for your workloads.
### Create a Personal Access Token
If you do not already have a PAT, create one in your Bitbucket Data Center instance:
1. Sign in to your Bitbucket Data Center instance.
2. Open your profile settings and navigate to **HTTP access tokens** or **Personal access tokens** (the label depends on your Bitbucket Data Center version).
3. Create a new token with a descriptive name.
4. Grant the token permissions to read repositories. If you plan to use CI/CD features that open pull requests, also grant write access to repositories and pull requests.
5. Copy the token value and store it securely. You will not be able to view it again after you leave the page.
For more details, see the [Atlassian documentation on HTTP access tokens](https://confluence.atlassian.com/bitbucketserver/personal-access-tokens-939515499.html).
After submission, your Bitbucket Data Center credentials appear on the **Git Integrations** page. You can use **Manage** to view connected repositories or **Unlink** to remove the integration.
## Next steps
Once the integration is linked, you can deploy services from Bitbucket Data Center repositories and set up [GitOps CI/CD](/docs/setup-gitops-using-truefoundry) for your workloads.
### Create a Personal Access Token
If you do not already have a PAT, create one in your Bitbucket Data Center instance:
1. Sign in to your Bitbucket Data Center instance.
2. Open your profile settings and navigate to **HTTP access tokens** or **Personal access tokens** (the label depends on your Bitbucket Data Center version).
3. Create a new token with a descriptive name.
4. Grant the token permissions to read repositories. If you plan to use CI/CD features that open pull requests, also grant write access to repositories and pull requests.
5. Copy the token value and store it securely. You will not be able to view it again after you leave the page.
For more details, see the [Atlassian documentation on HTTP access tokens](https://confluence.atlassian.com/bitbucketserver/personal-access-tokens-939515499.html).