> ## Documentation Index
> Fetch the complete documentation index at: https://www.truefoundry.com/llms.txt
> Use this file to discover all available pages before exploring further.
# Open WebUI
> Learn how to use open webui with TrueFoundry AI Gateway, including setup steps, use cases, and production-ready examples.
This guide provides instructions for integrating [Open WebUI](https://openwebui.com/) with the Truefoundry AI Gateway.
## What is Open WebUI?
Open WebUI is an open-source LLM application interface that enables users to interact with large language models through a user-friendly web UI. With Truefoundry AI Gateway integration, you can route all Open WebUI LLM requests through TrueFoundry's Gateway for enhanced security, routing, rate limiting, cost management, and access controls while benefiting from all the Gateway's built-in features.
## Prerequisites
Before integrating Open WebUI with TrueFoundry, ensure you have:
1. **TrueFoundry Account**: Create a [Truefoundry account](https://www.truefoundry.com/register) and follow the instructions in our [Gateway Quick Start Guide](https://docs.truefoundry.com/gateway/quick-start)
2. **Open WebUI Instance**: Deploy Open WebUI by following the [official documentation](https://github.com/open-webui/open-webui) for local or cloud deployment
## Configuration Steps
This guide assumes you have an active Open WebUI instance and have obtained your TrueFoundry AI Gateway base URL.
### Step 1: Configure Open WebUI to Use TrueFoundry Gateway
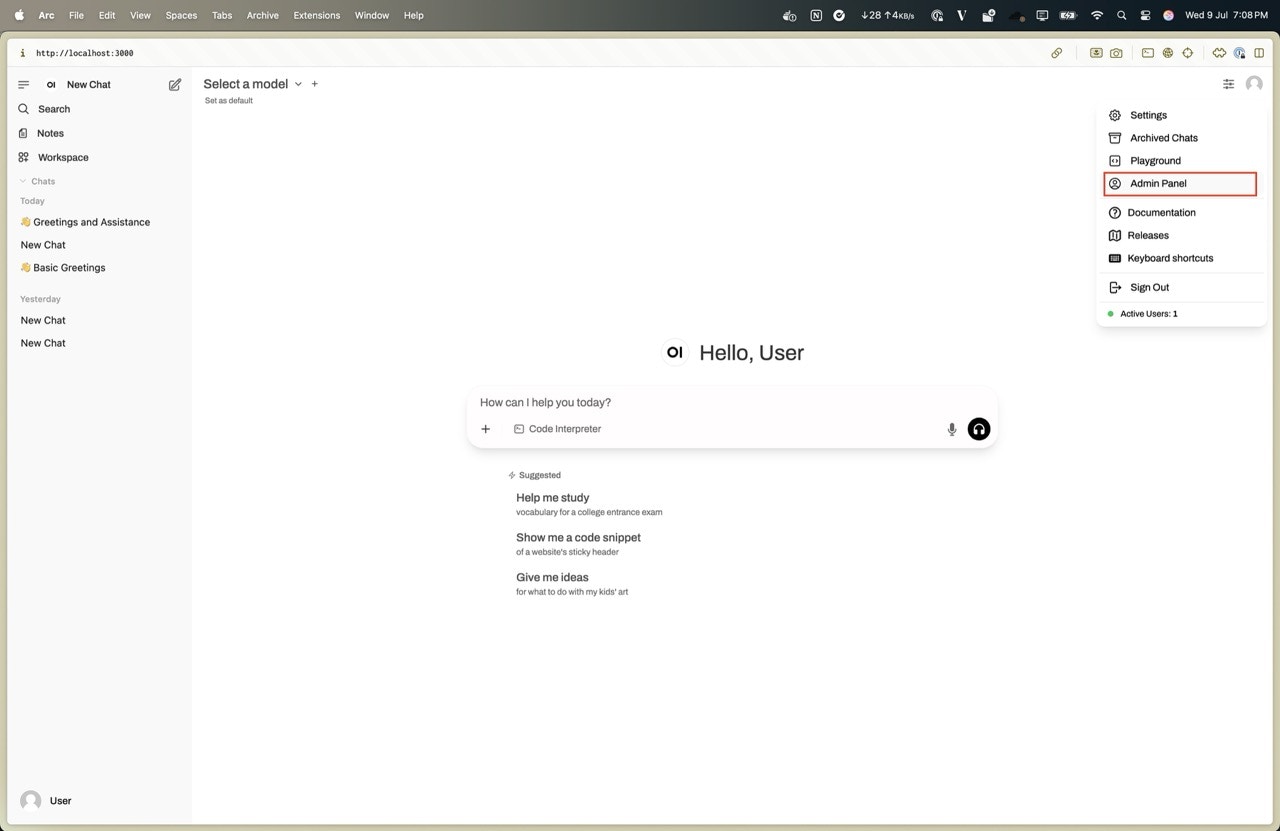
1. Open the Open WebUI settings page.
2. Navigate to the "Admin Panel" section from the top right icon.
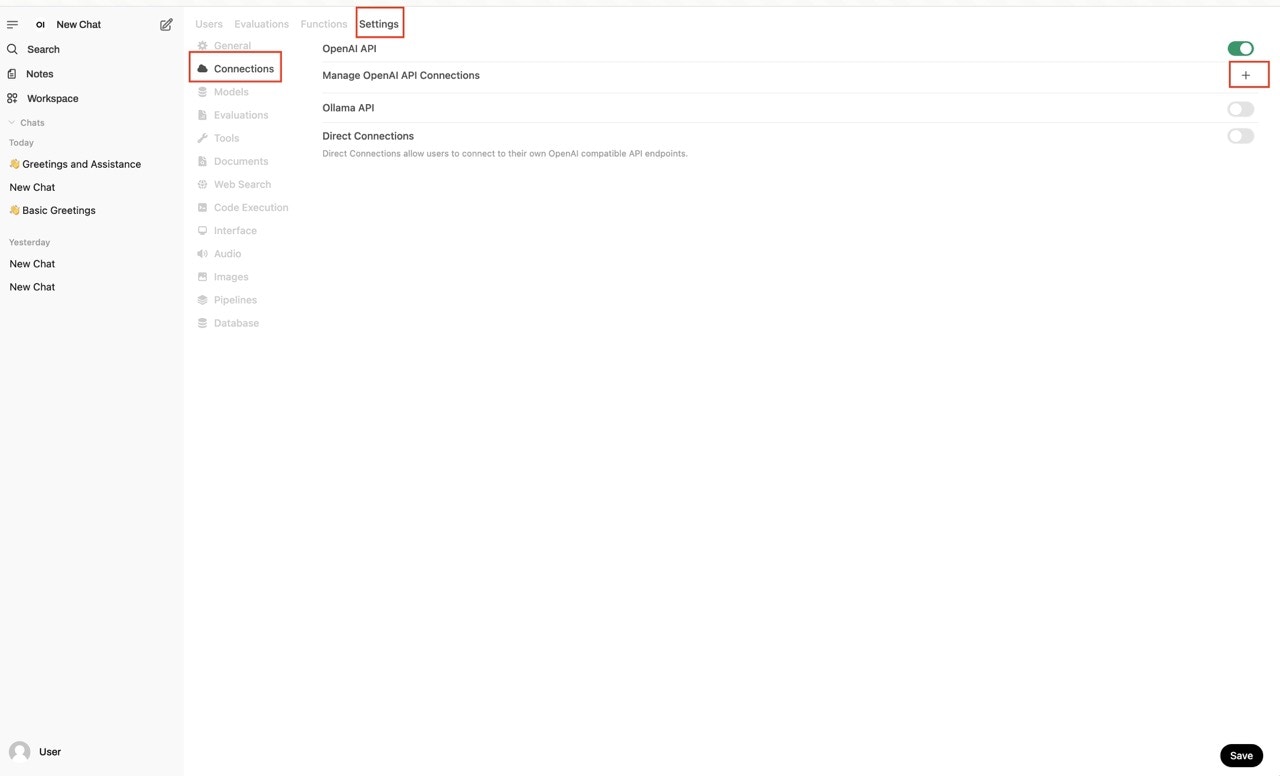
 3. Add a new connection from Settings → Connections → Manage OpenAI API Connections (+).
 4. Add the following details:
* **Base URL and Model ID**: You will get both the base URL and model name from the unified code snippet
4. Add the following details:
* **Base URL and Model ID**: You will get both the base URL and model name from the unified code snippet
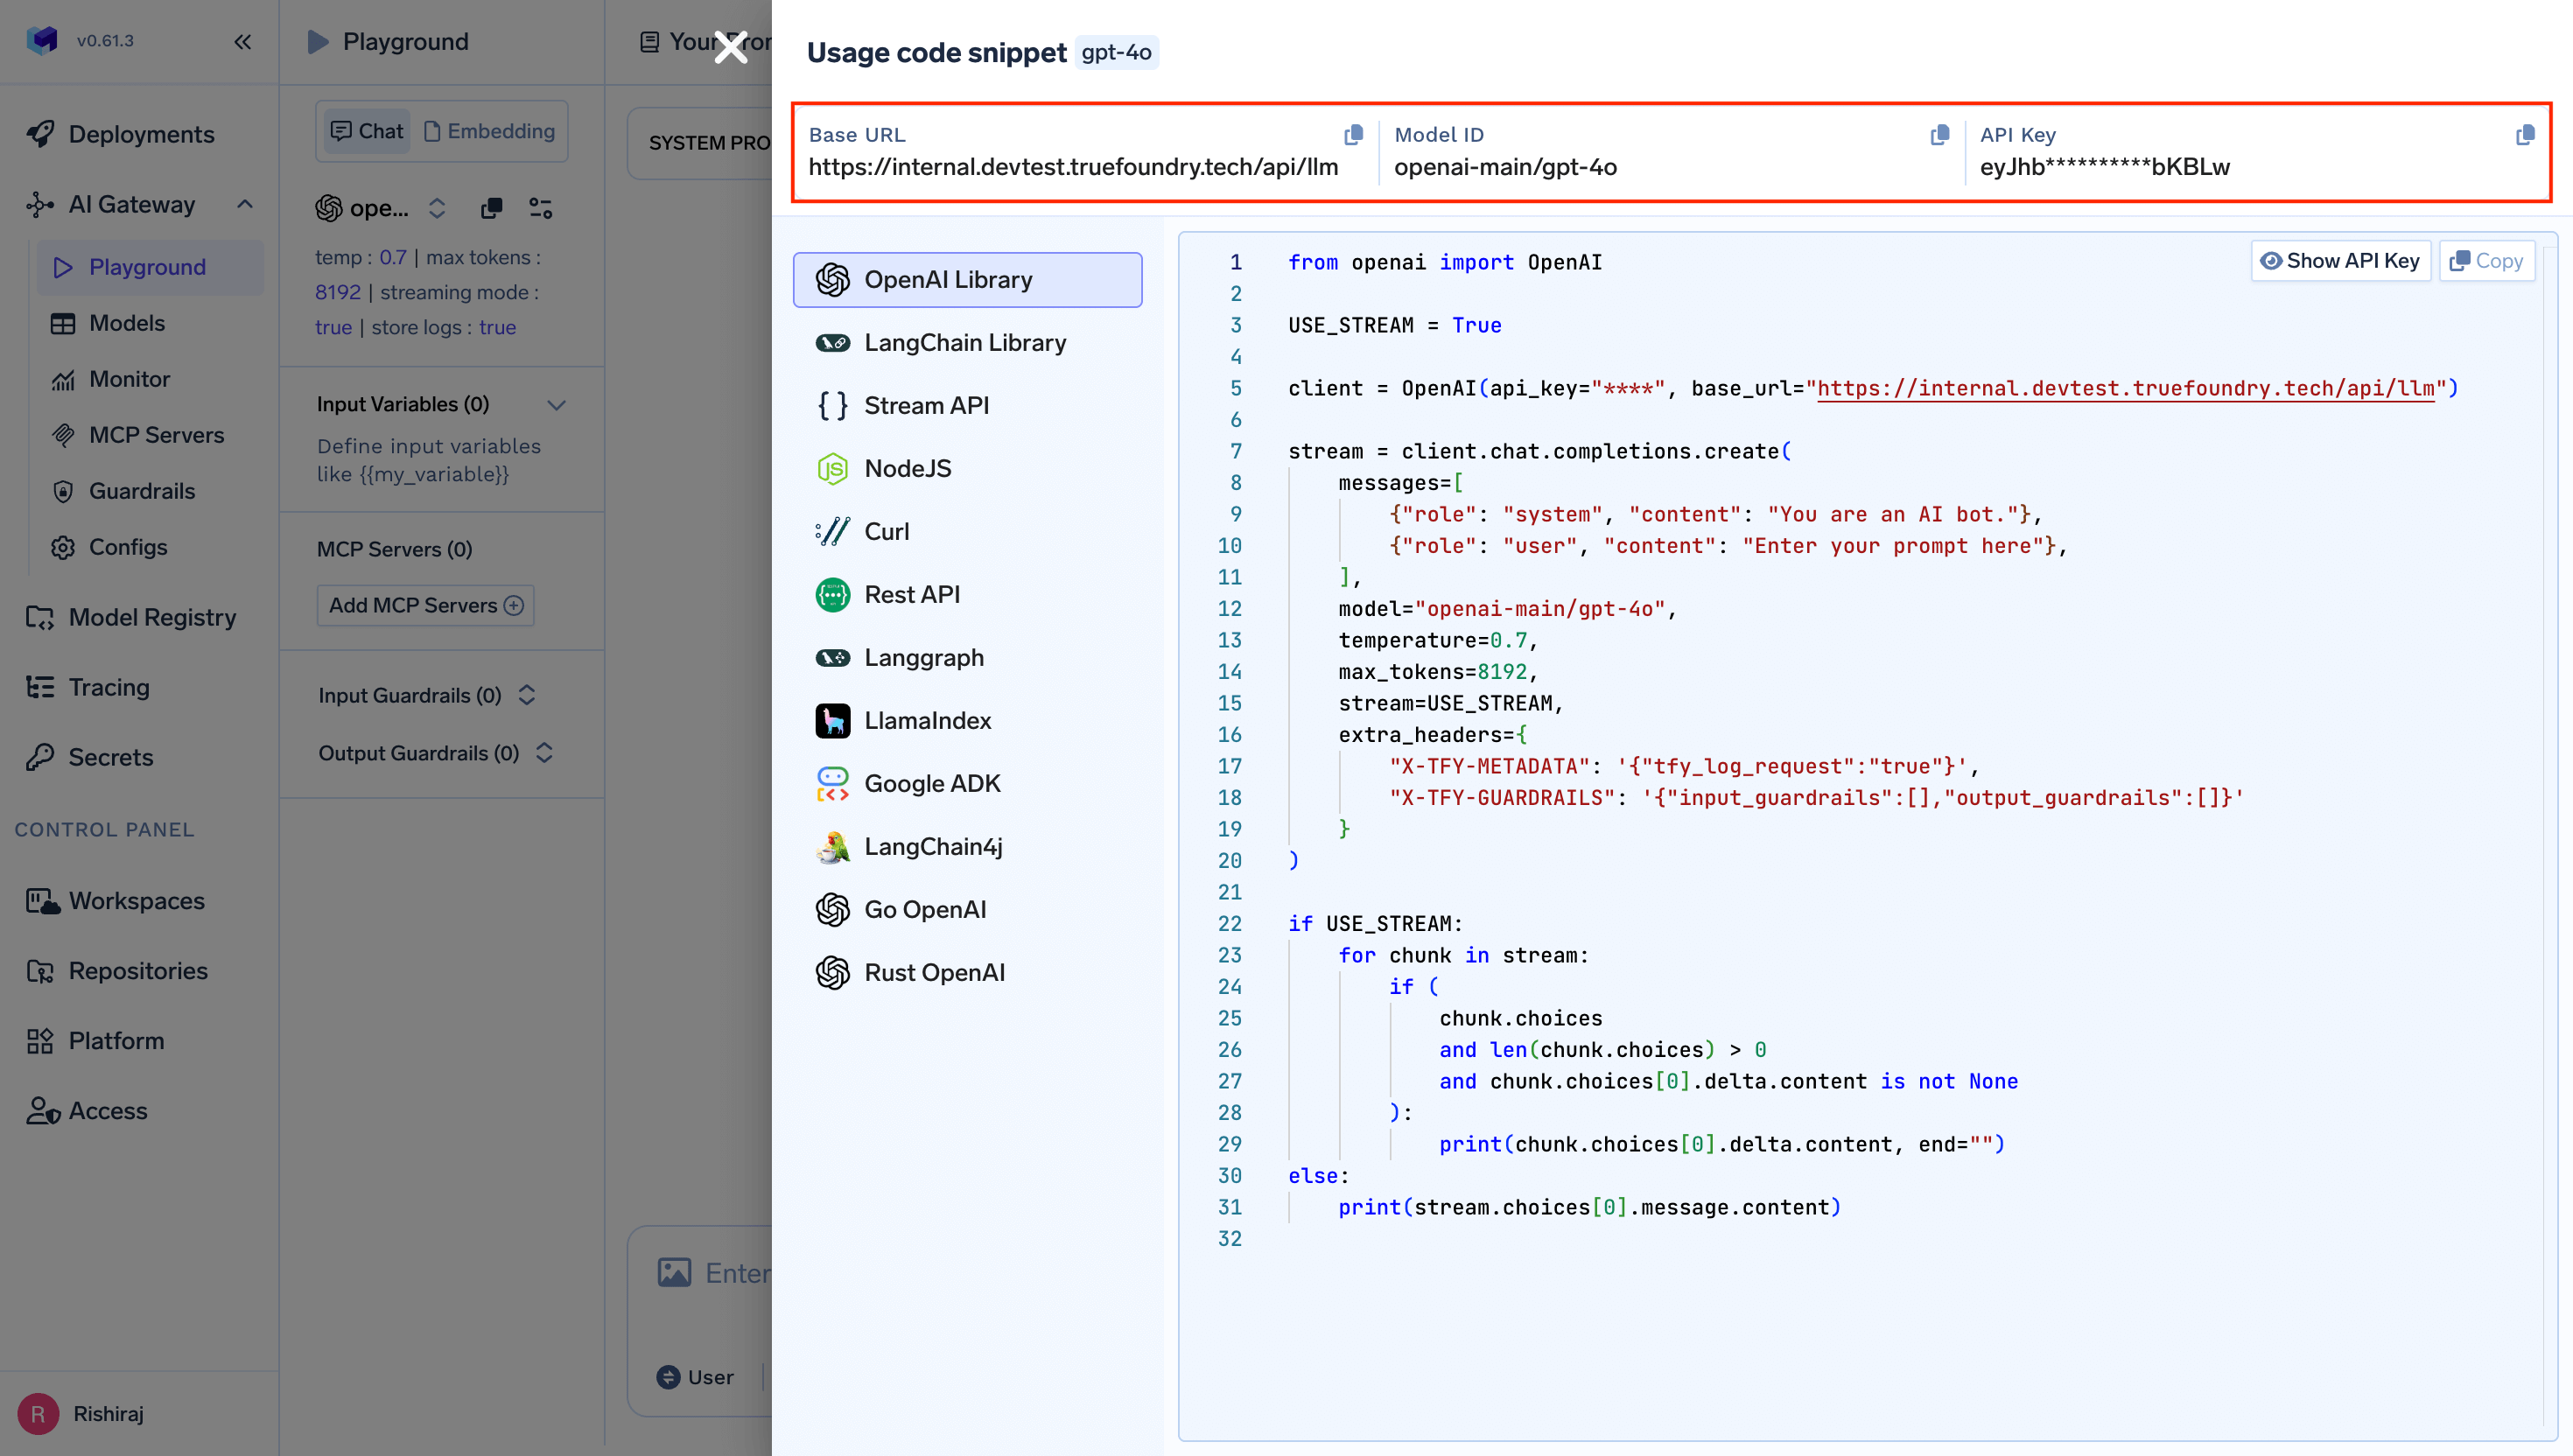 * **Model ID**: Add the model IDs from the unified code snippet (Press the + button on the right side to add a model.)
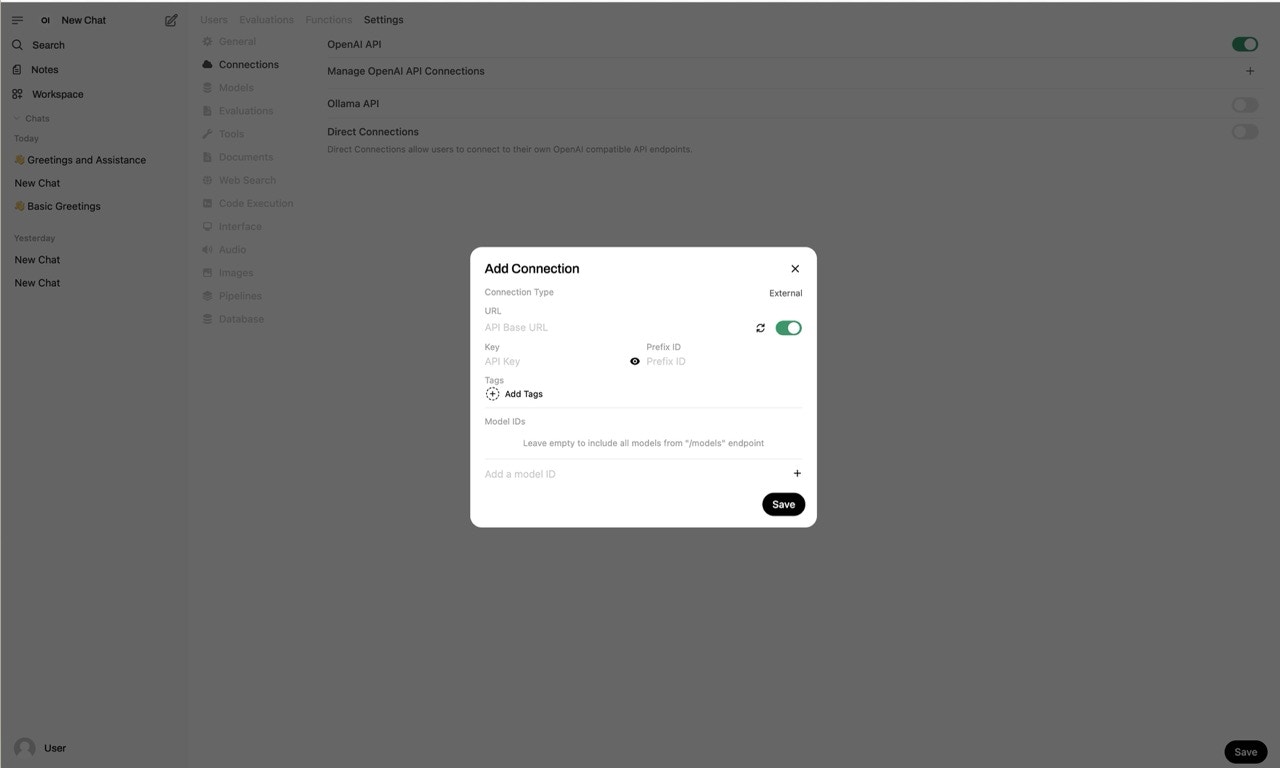 5. Click the "Save" button.
### Step 2: Test the Integration
1. Open a new chat in Open WebUI.
2. Select the model you want to use from the dropdown on the top left corner.
3. Send a prompt to verify that requests are routed through TrueFoundry's Gateway.
Your Open WebUI instance is now integrated with TrueFoundry's AI Gateway and ready for secure, compliant LLM usage.
5. Click the "Save" button.
### Step 2: Test the Integration
1. Open a new chat in Open WebUI.
2. Select the model you want to use from the dropdown on the top left corner.
3. Send a prompt to verify that requests are routed through TrueFoundry's Gateway.
Your Open WebUI instance is now integrated with TrueFoundry's AI Gateway and ready for secure, compliant LLM usage.