> ## Documentation Index
> Fetch the complete documentation index at: https://www.truefoundry.com/llms.txt
> Use this file to discover all available pages before exploring further.
# Goose
> Learn how to use goose with TrueFoundry AI Gateway, including setup steps, use cases, and production-ready examples.
This guide provides instructions for integrating [Goose](https://github.com/block/goose) with the TrueFoundry AI Gateway.
## What is Goose?
Goose is an open-source, extensible AI agent developed by Block that goes beyond code suggestions. It can install, execute, edit, and test code with any LLM provider, making it a powerful autonomous coding assistant for developers.
### Key Features of Goose
* **[Autonomous Task Execution](https://github.com/block/goose)**: Capable of automating complex development tasks from start to finish, including building entire projects from scratch, writing and executing code, debugging failures, and orchestrating workflows
* **[Multi-LLM Support](https://block.github.io/goose/)**: Works with any LLM provider and supports multi-model configuration to optimize performance and cost
* **[MCP Integration](https://github.com/block/goose)**: Seamlessly integrates with MCP (Model Context Protocol) servers for extended functionality and tool access
* **[Desktop and CLI](https://github.com/block/goose)**: Available as both a desktop application and command-line interface, adapting to your preferred workflow
## Prerequisites
Before integrating Goose with TrueFoundry, ensure you have:
1. **TrueFoundry Account**: Create a [TrueFoundry account](https://www.truefoundry.com/register) and follow the instructions in our [Gateway Quick Start Guide](https://docs.truefoundry.com/docs/ai-gateway/quick-start)
2. **Goose Installation**: Download and install Goose
3. **TrueFoundry API Key**: Generate an API key from your TrueFoundry account
## Integration Guide
### Step 1: Get TrueFoundry Gateway Configuration
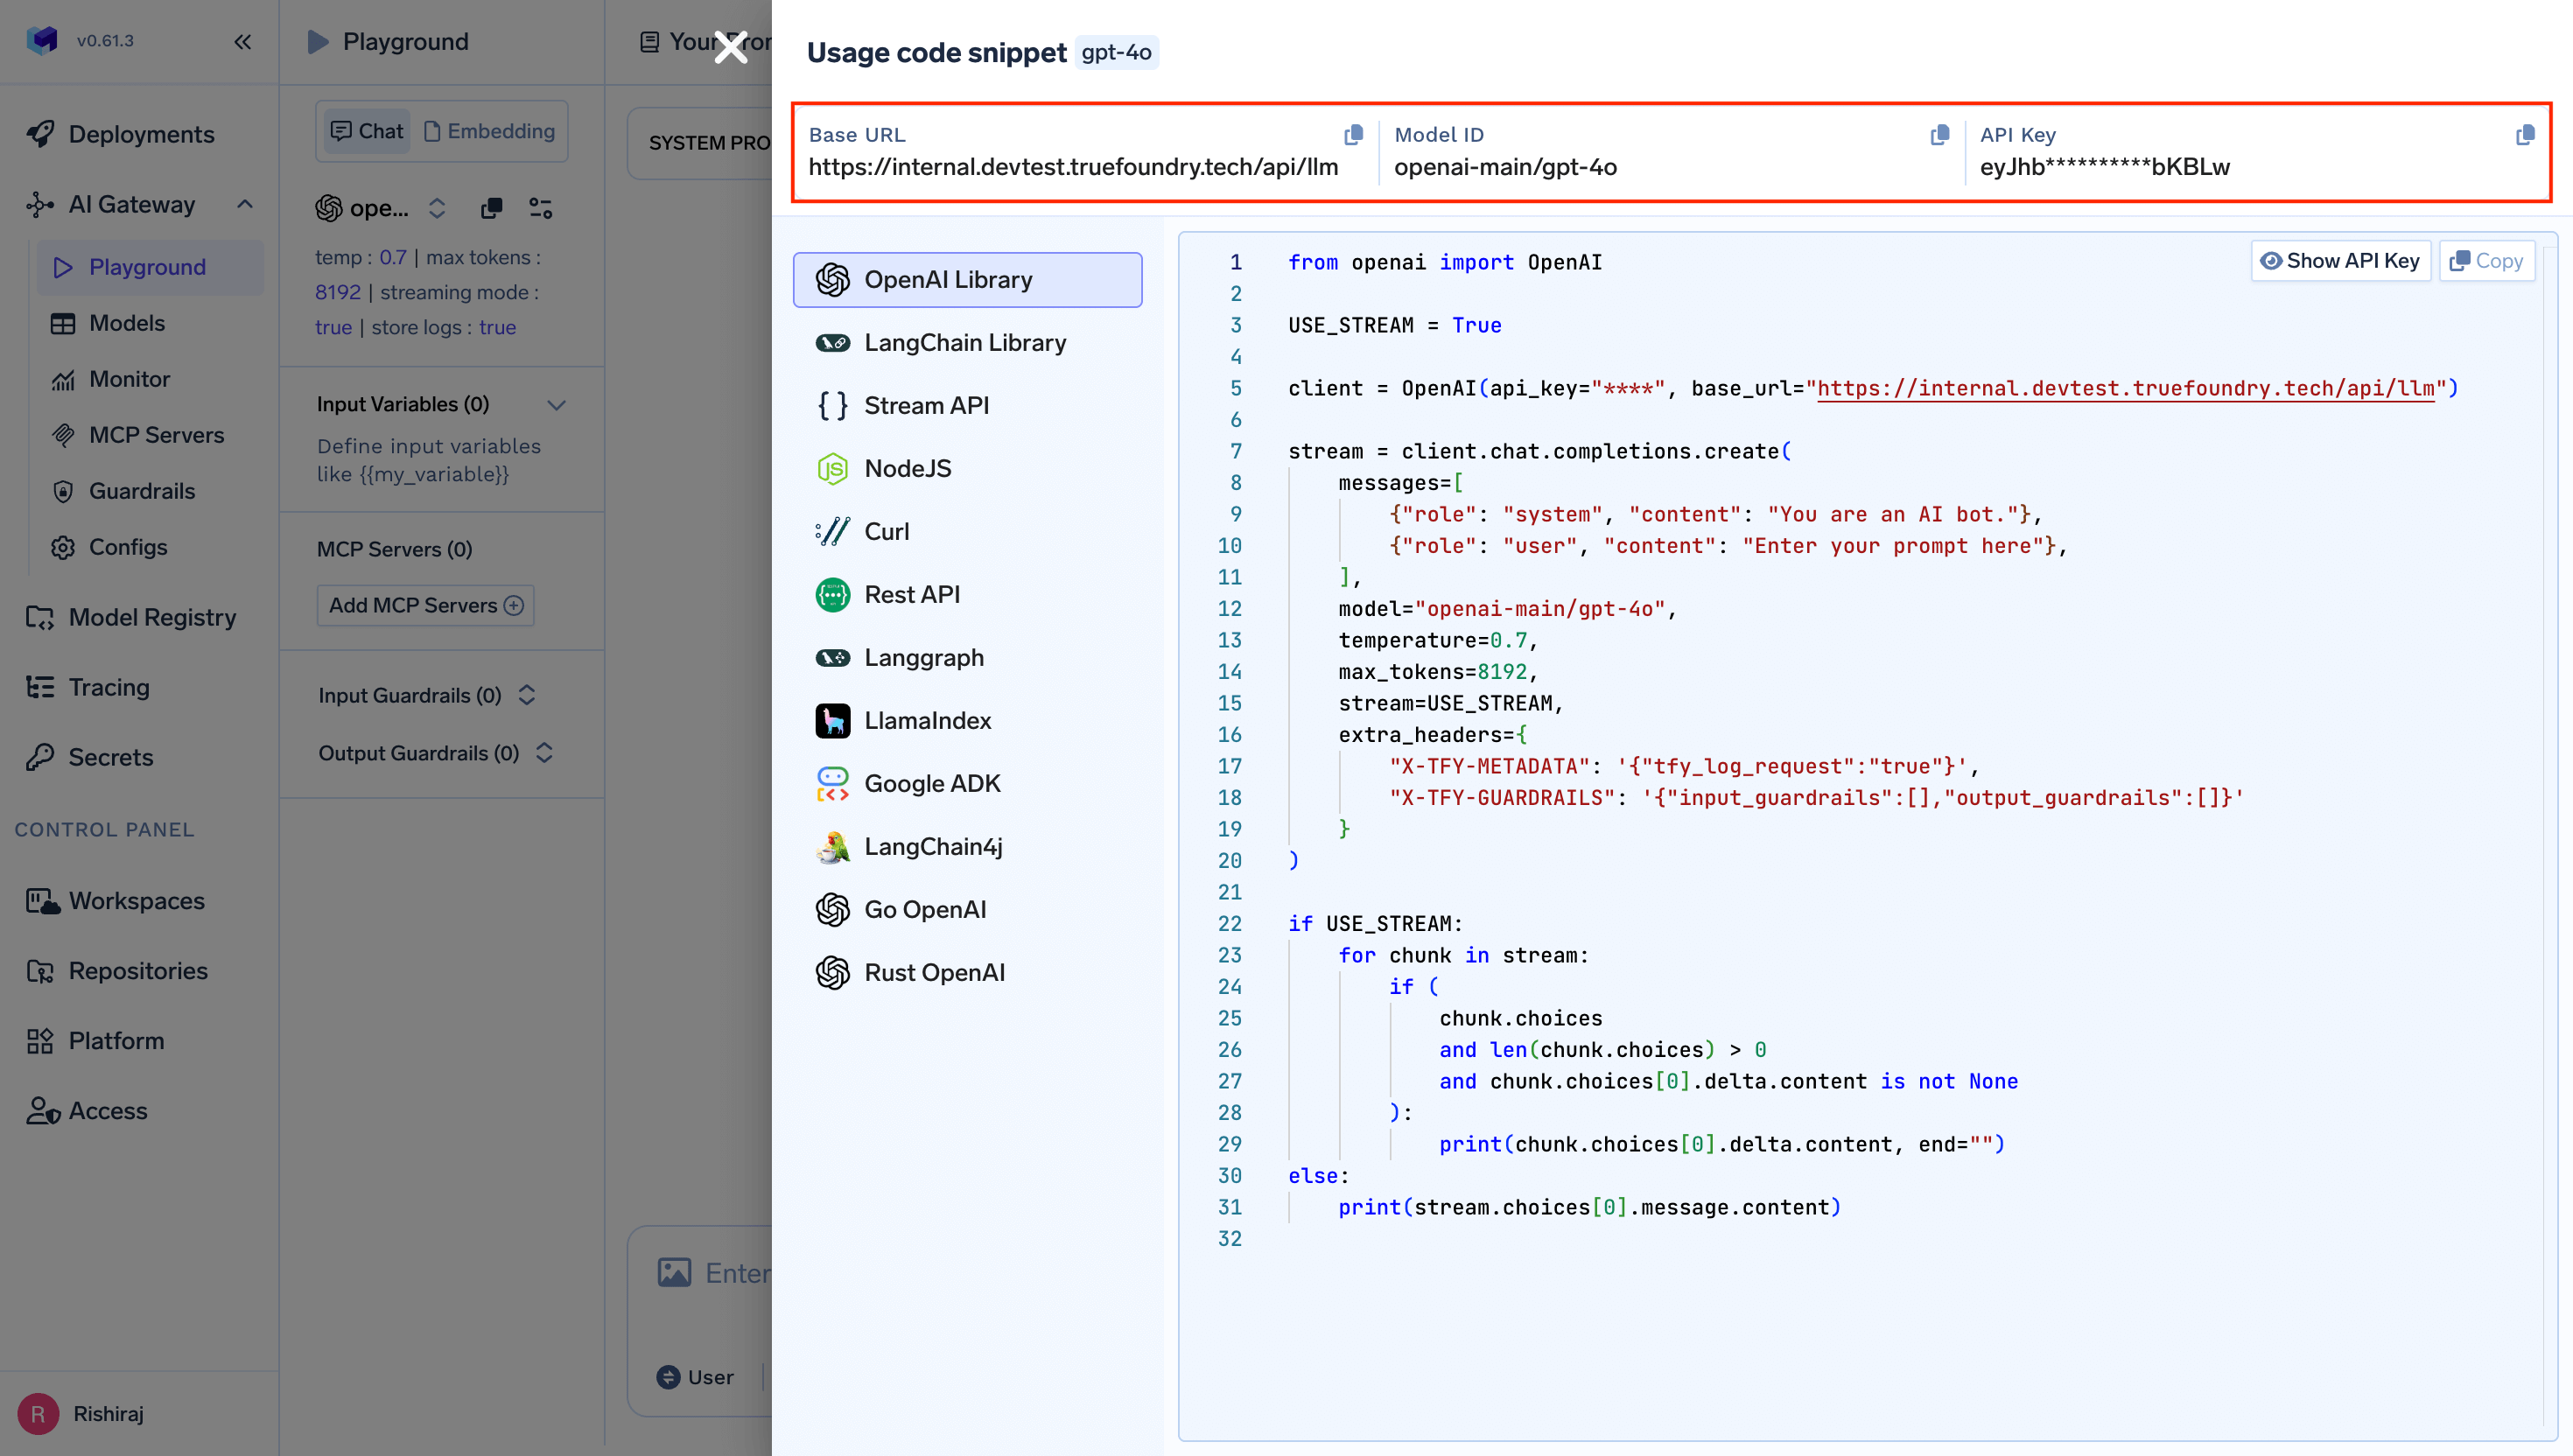
Before configuring Goose, gather your TrueFoundry Gateway details:
1. **Navigate to AI Gateway Playground**: Go to your TrueFoundry AI Gateway playground
2. **Access Unified Code Snippet**: Use the unified code snippet
3. **Copy Base URL, API Key, and Model Name**: You will get the base URL, API key, and model name from the unified code snippet
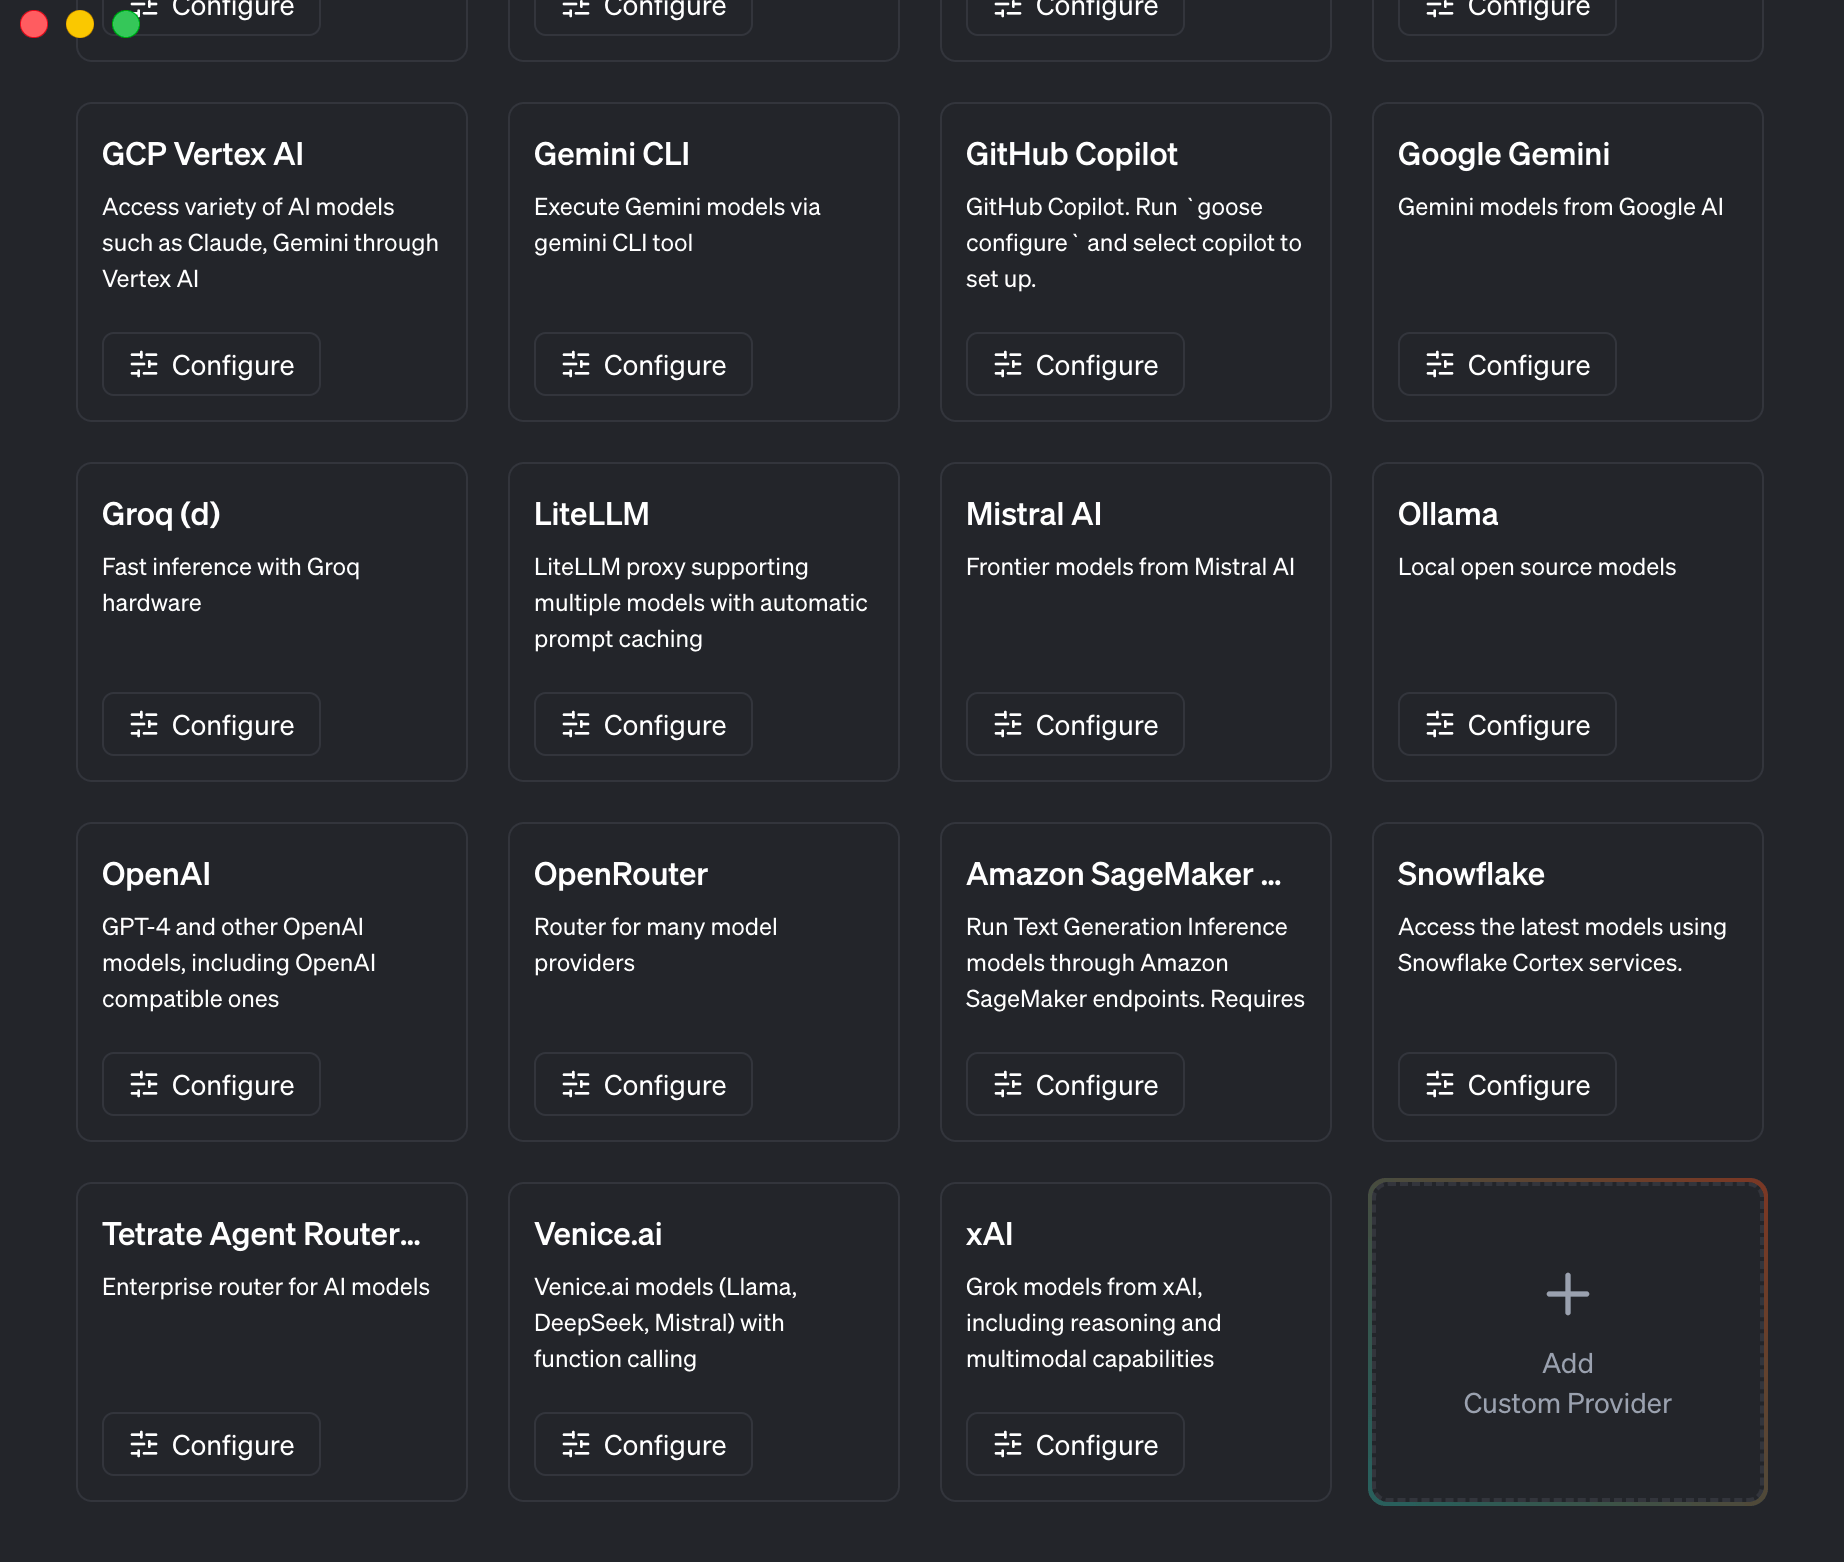
 ### Step 2: Open Goose Provider Settings
1. **Launch Goose**: Open the Goose desktop application
2. **Navigate to Settings**: Click on **Settings** in the left sidebar
3. **Add Custom Provider**: Click on the **Add Custom Provider** option to configure a new provider
### Step 2: Open Goose Provider Settings
1. **Launch Goose**: Open the Goose desktop application
2. **Navigate to Settings**: Click on **Settings** in the left sidebar
3. **Add Custom Provider**: Click on the **Add Custom Provider** option to configure a new provider
 ### Step 3: Configure TrueFoundry as Provider
In the Add Provider dialog, configure the following settings:
1. **Provider Type**: Select `OpenAI Compatible` from the dropdown
2. **Display Name**: Enter `TrueFoundry` (or any name you prefer)
3. **API URL**: Enter your TrueFoundry Gateway URL (e.g., `https://your-gateway-url.truefoundry.tech`)
4. **API Key**: Enter your TrueFoundry API key
5. **Available Models**: Enter the model names you want to use, comma-separated (e.g., `openai-main/gpt-4o`)
6. Click **Create Provider** to save the configuration
### Step 3: Configure TrueFoundry as Provider
In the Add Provider dialog, configure the following settings:
1. **Provider Type**: Select `OpenAI Compatible` from the dropdown
2. **Display Name**: Enter `TrueFoundry` (or any name you prefer)
3. **API URL**: Enter your TrueFoundry Gateway URL (e.g., `https://your-gateway-url.truefoundry.tech`)
4. **API Key**: Enter your TrueFoundry API key
5. **Available Models**: Enter the model names you want to use, comma-separated (e.g., `openai-main/gpt-4o`)
6. Click **Create Provider** to save the configuration
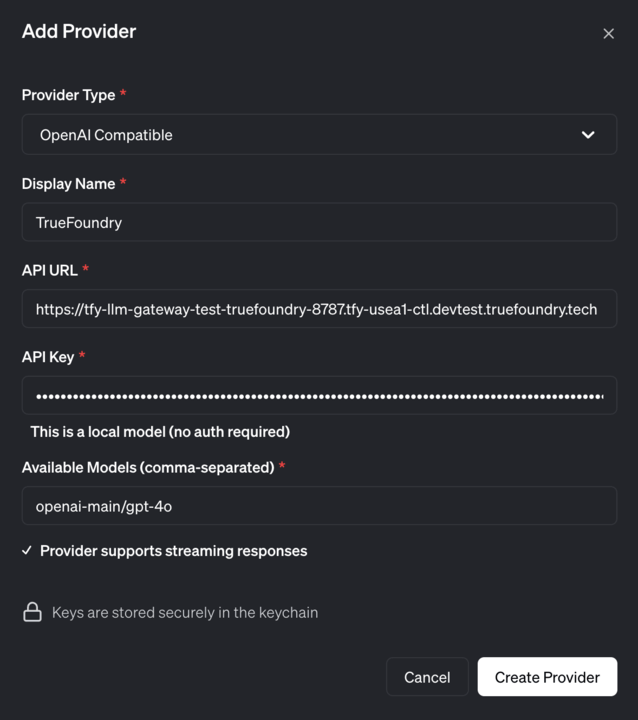 Keys are stored securely in your system's keychain, ensuring your API credentials remain protected.
### Step 4: Start Using Goose with TrueFoundry
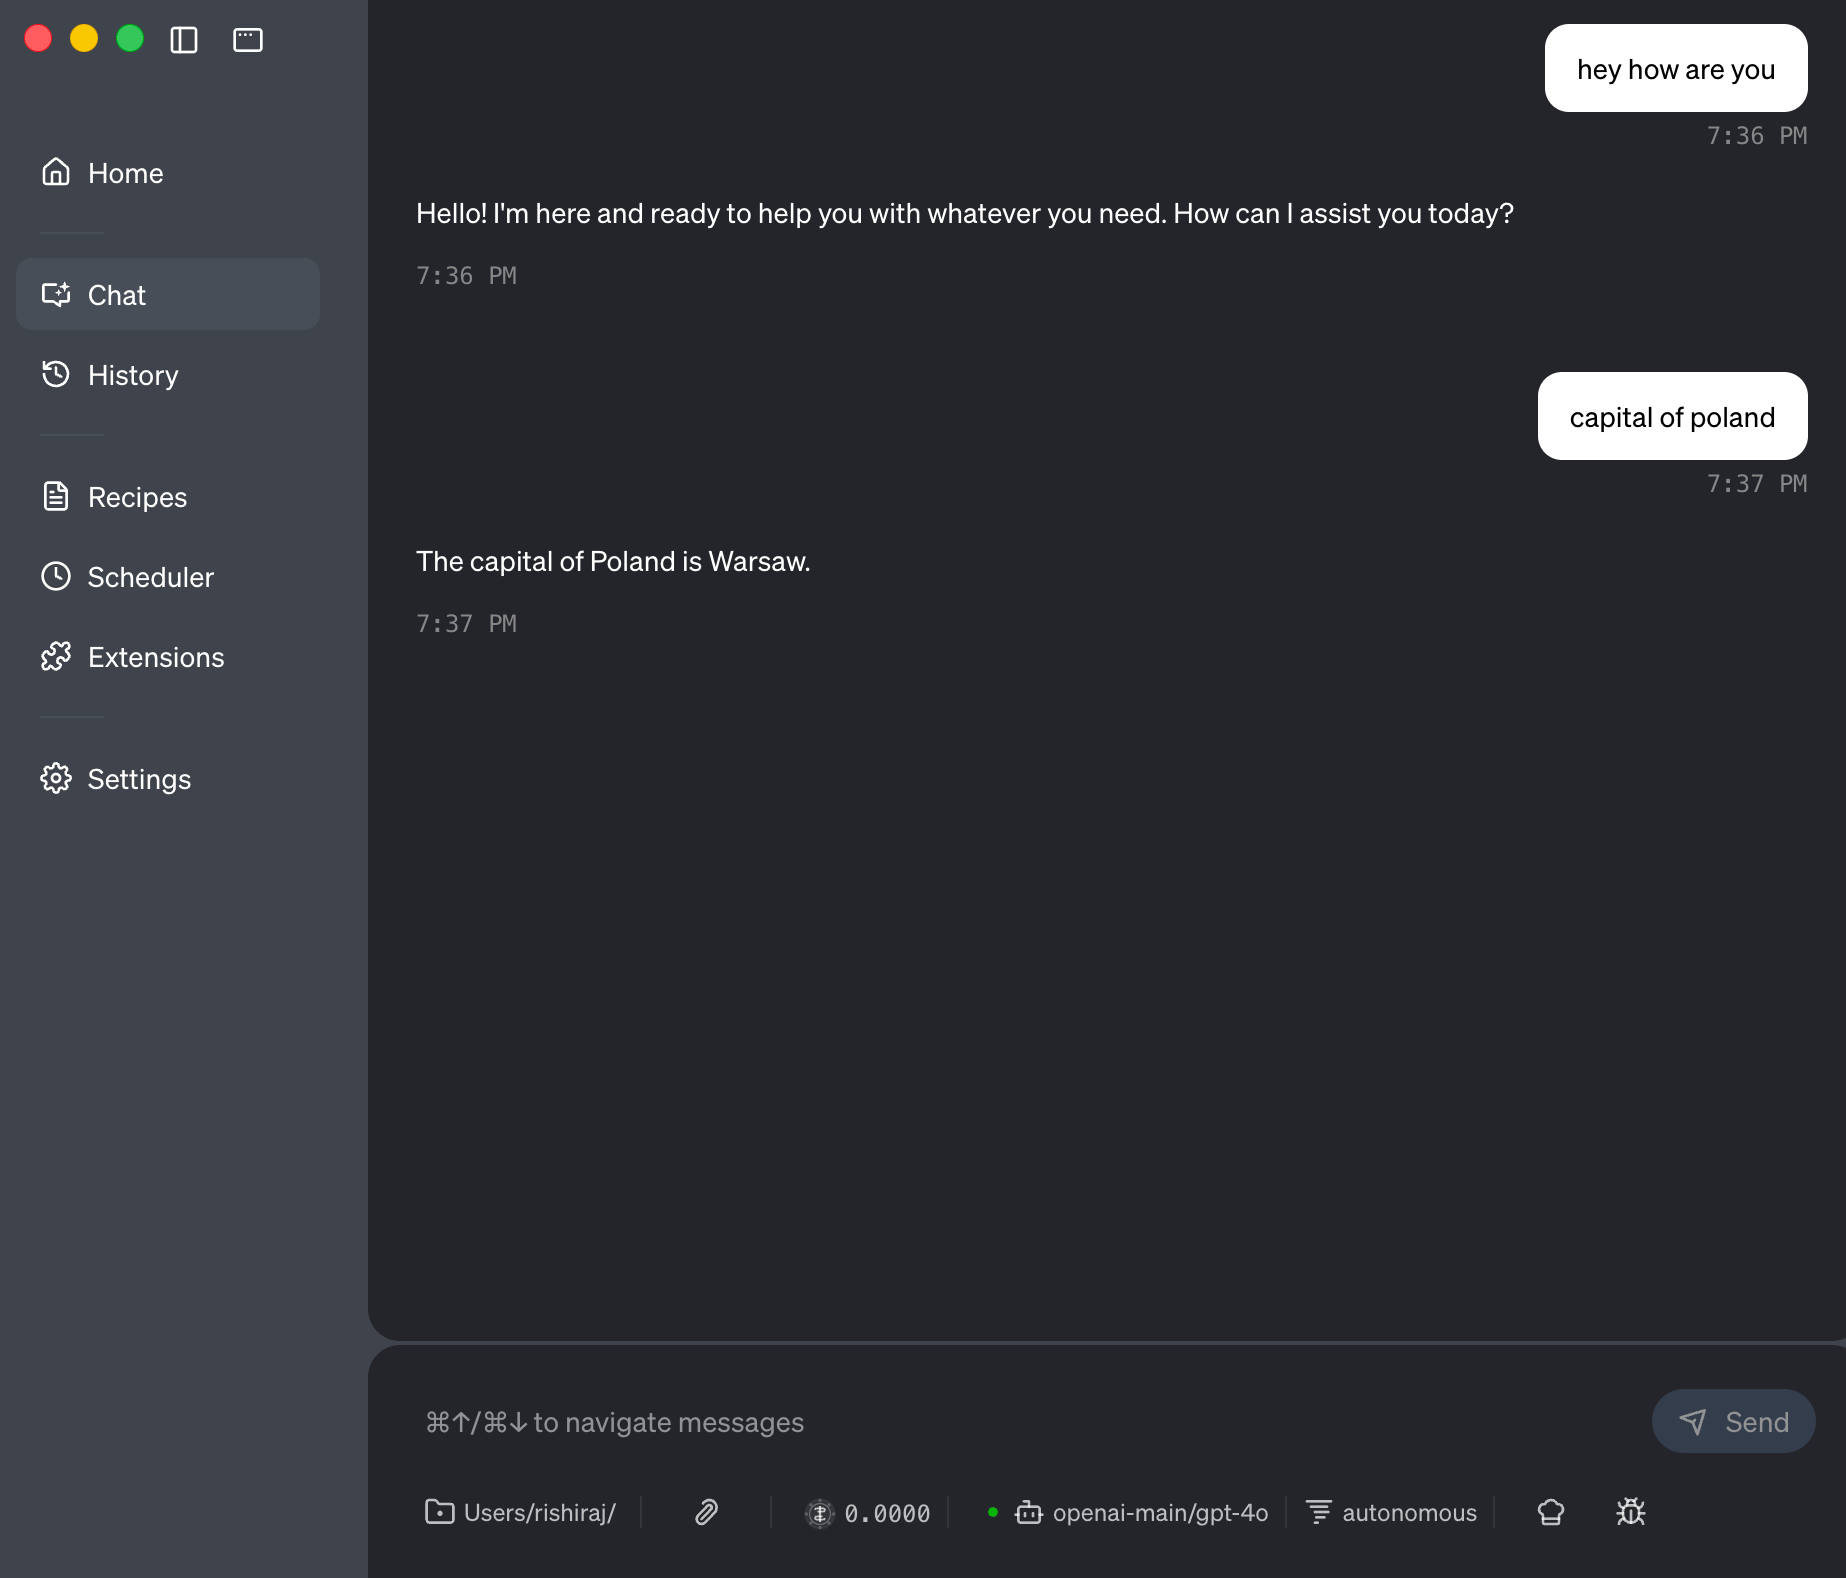
Once configured, you can start using Goose with TrueFoundry Gateway:
1. **Open Chat**: Navigate to the **Chat** section in the left sidebar
2. **Select Model**: The model selector at the bottom of the chat window will show your configured TrueFoundry models
3. **Start Chatting**: Begin interacting with the AI assistant
Keys are stored securely in your system's keychain, ensuring your API credentials remain protected.
### Step 4: Start Using Goose with TrueFoundry
Once configured, you can start using Goose with TrueFoundry Gateway:
1. **Open Chat**: Navigate to the **Chat** section in the left sidebar
2. **Select Model**: The model selector at the bottom of the chat window will show your configured TrueFoundry models
3. **Start Chatting**: Begin interacting with the AI assistant