> ## Documentation Index
> Fetch the complete documentation index at: https://www.truefoundry.com/llms.txt
> Use this file to discover all available pages before exploring further.
# Flowise
> Learn how to use flowise with TrueFoundry AI Gateway, including setup steps, use cases, and production-ready examples.
This guide provides instructions for integrating [Flowise](https://flowiseai.com/) with the Truefoundry AI Gateway.
## What is Flowise?
Flowise is an open-source LLM application builder that enables users to create sophisticated LLM applications using an intuitive drag-and-drop visual interface. It simplifies the process of building complex AI workflows, chatbots, and applications without requiring extensive coding knowledge.
### Key Features of Flowise
* **[Visual Flow Builder](https://docs.flowiseai.com/getting-started)**: Create complex AI applications using drag-and-drop nodes and visual connections, making LLM application development accessible to both technical and non-technical users
* **[Chatflow Templates](https://docs.flowiseai.com/api-reference/chatflows)**: Pre-built templates and components for common use cases like RAG, conversational AI, and document processing to accelerate development
* **[Node-Based Architecture](https://docs.flowiseai.com/contributing/building-node)**: Modular system with specialized nodes for different functions including LLMs, vector databases, document loaders, and memory management
* **[API Integration](https://docs.flowiseai.com/integrations)**: Seamless integration capabilities with REST APIs, webhooks, and various data sources for building production-ready applications
## Prerequisites
Before integrating Flowise with TrueFoundry, ensure you have:
1. **TrueFoundry Account**: Create a [Truefoundry account](https://www.truefoundry.com/register) and follow the instructions in our [Gateway Quick Start Guide](https://docs.truefoundry.com/gateway/quick-start)
2. **Flowise Account**: Set up a Flowise account using either the [open-source version](https://github.com/FlowiseAI/Flowise) for local deployment or the [SaaS version](https://flowiseai.com/)
## Integration Guide
This guide will walk you through connecting Flowise with TrueFoundry's AI Gateway step by step.
### Step 1: Configure Flowise Credentials
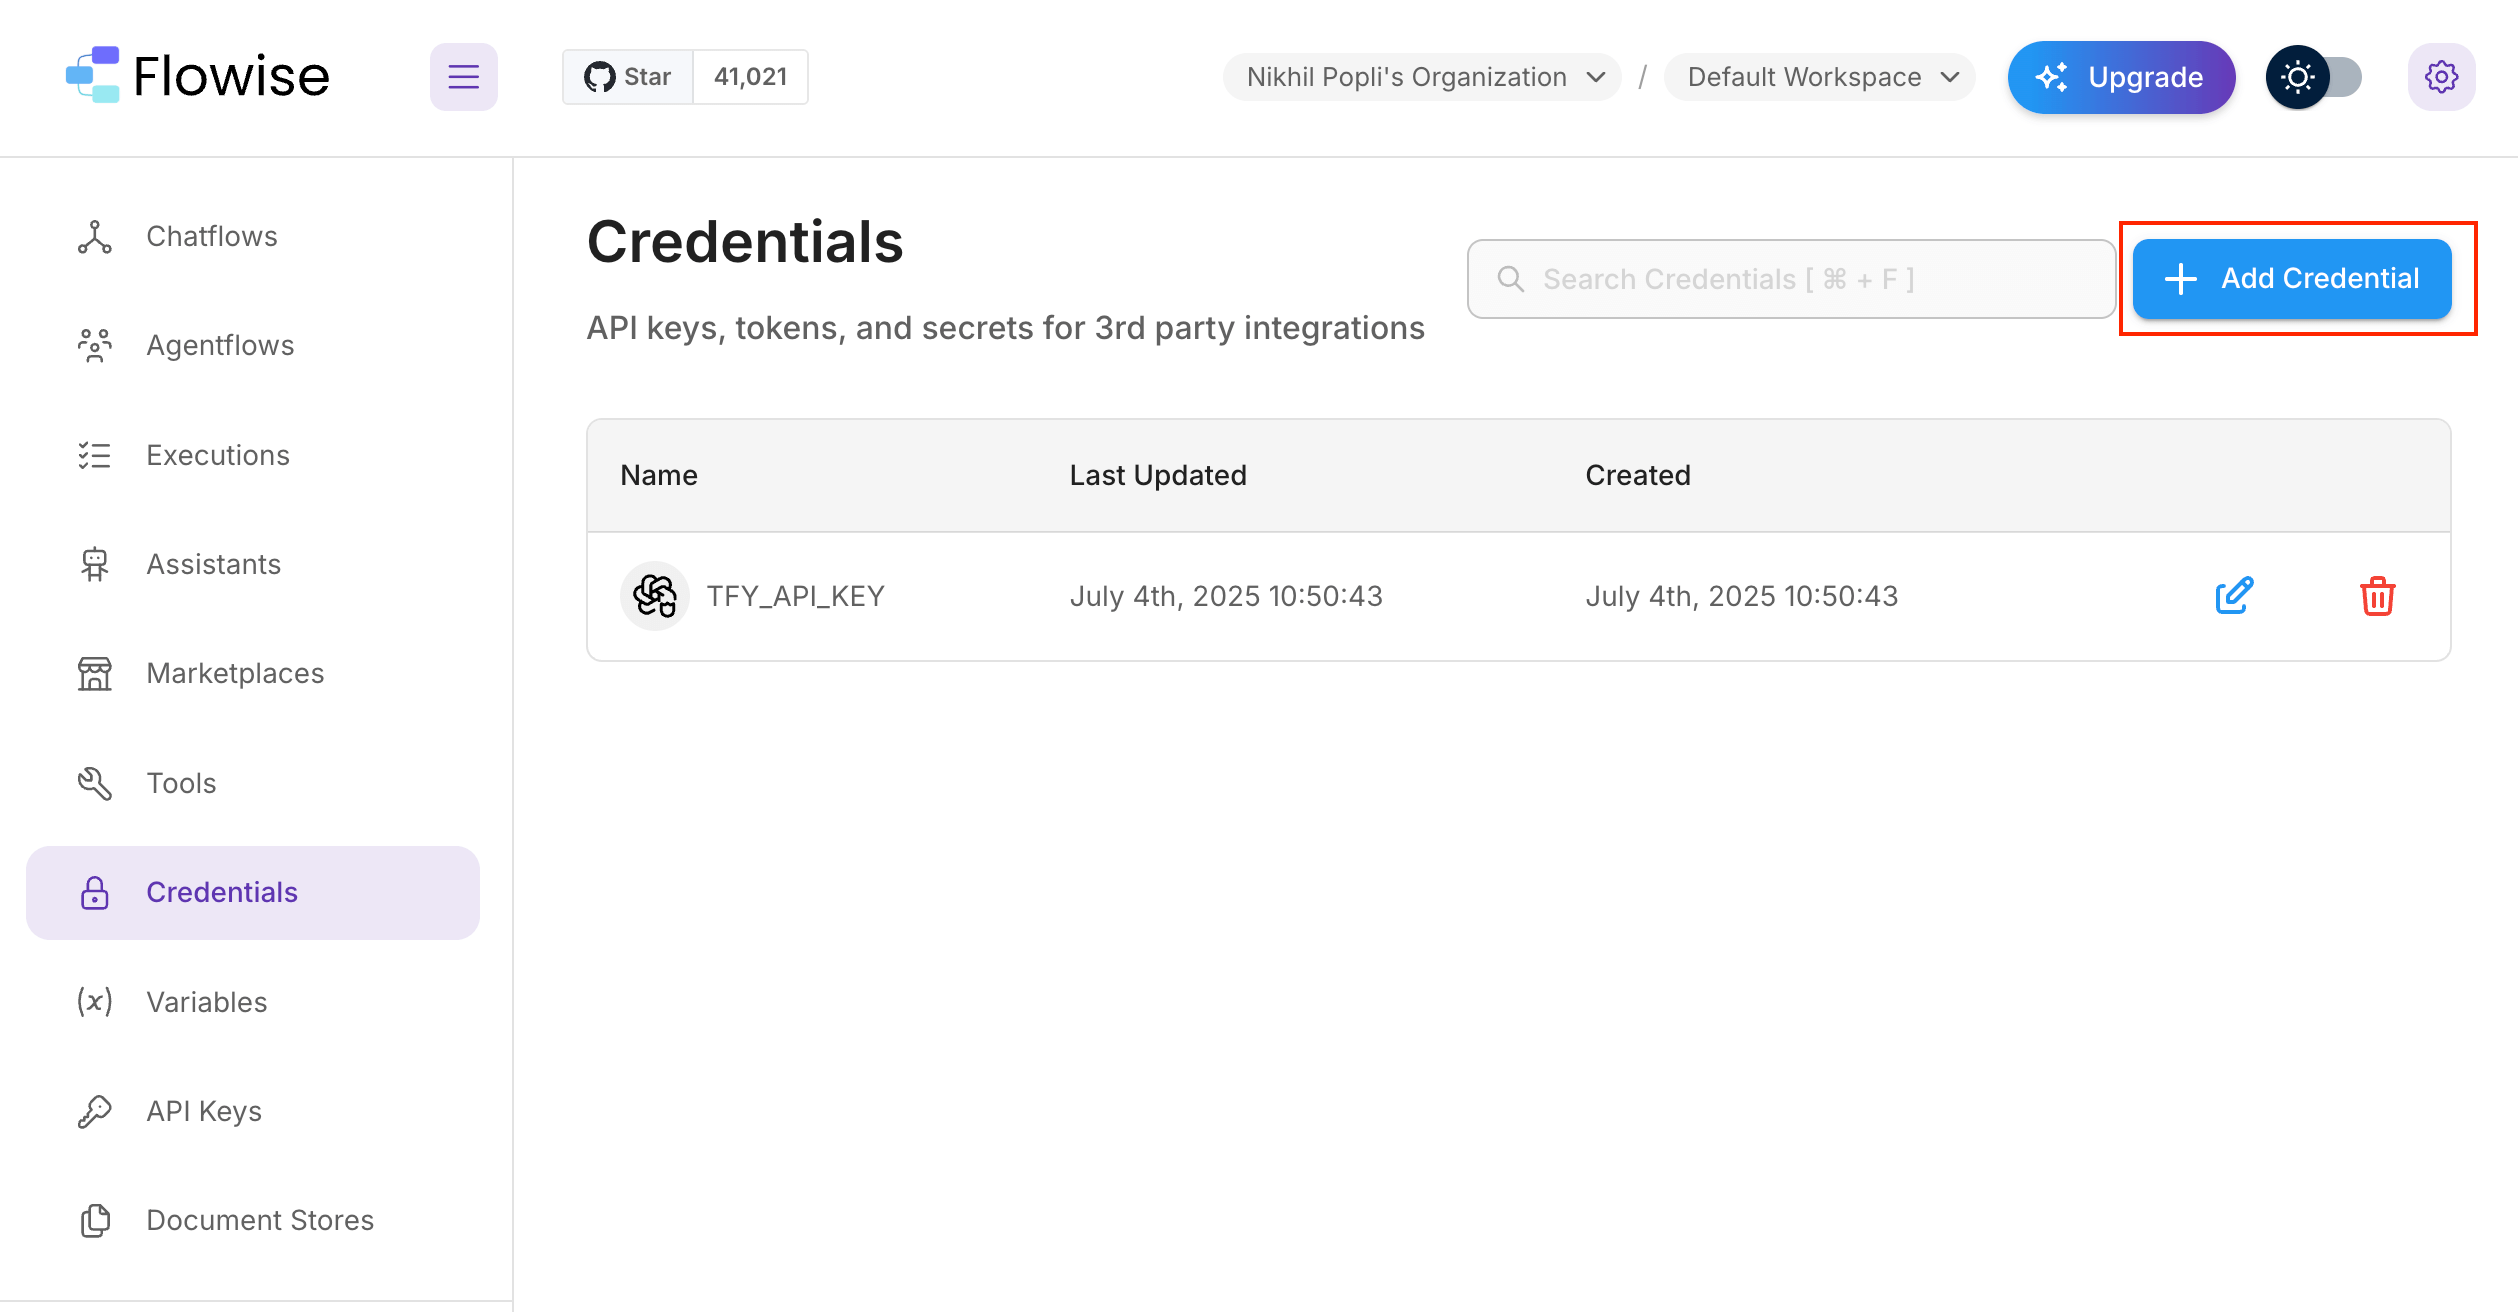
First, you need to set up credentials in Flowise to connect to TrueFoundry's Gateway:
1. **Navigate to Credentials**: In your Flowise dashboard, look for the "Credentials" section in the left sidebar or main menu
2. **Add New Credential**: Click on "Add Credential" or the "+" button to create a new credential
 ### Step 2: Configure OpenAI Custom Credential
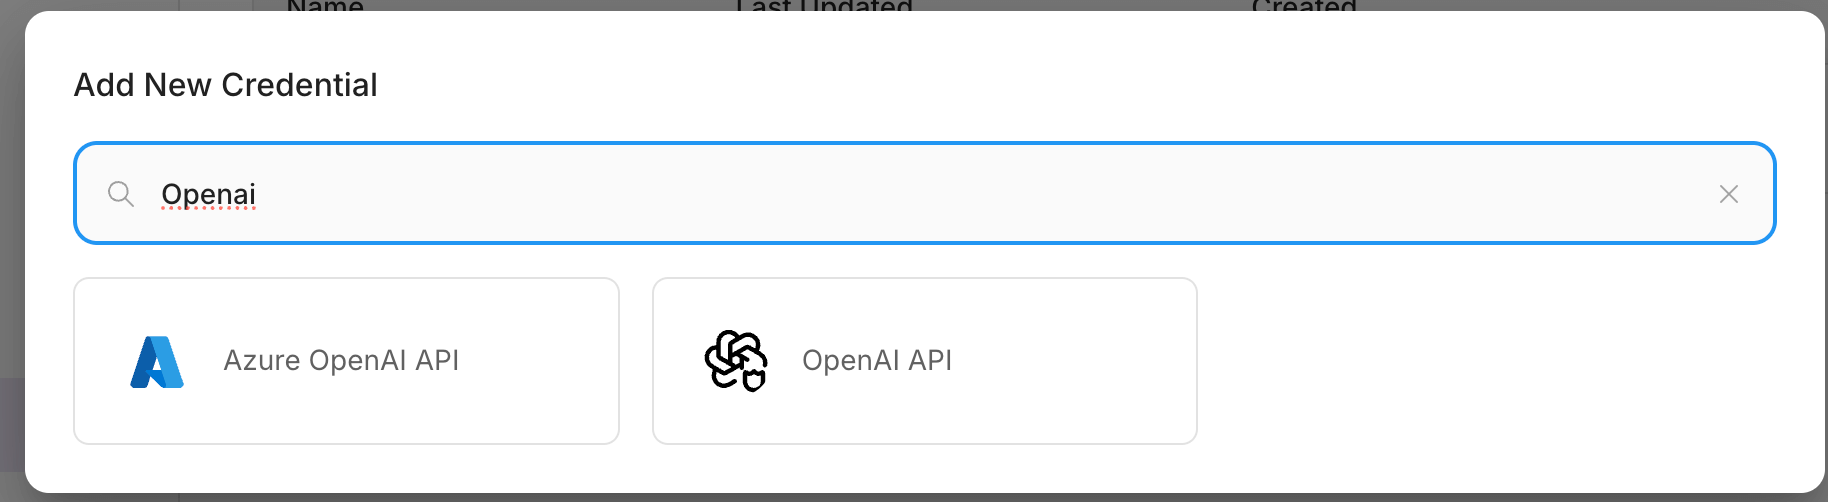
Since TrueFoundry's Gateway is OpenAI-compatible, you'll use the OpenAI Custom credential type:
1. **Select Credential Type**: From the dropdown menu, choose "OpenAI API"
### Step 2: Configure OpenAI Custom Credential
Since TrueFoundry's Gateway is OpenAI-compatible, you'll use the OpenAI Custom credential type:
1. **Select Credential Type**: From the dropdown menu, choose "OpenAI API"
 2. **Enter Credential Details**:
* **Name**: Give your credential a descriptive name (e.g., "TrueFoundry Gateway")
3. **Save the Credential**: Click "Save" to store your TrueFoundry Gateway credentials
### Step 3: Create Your First Agent Workflow
Now you'll create an agent that uses TrueFoundry's Gateway for LLM calls:
1. **Navigate to AgentFlow**: In the left sidebar, click on "AgentFlow" to access the workflow builder
2. **Enter Credential Details**:
* **Name**: Give your credential a descriptive name (e.g., "TrueFoundry Gateway")
3. **Save the Credential**: Click "Save" to store your TrueFoundry Gateway credentials
### Step 3: Create Your First Agent Workflow
Now you'll create an agent that uses TrueFoundry's Gateway for LLM calls:
1. **Navigate to AgentFlow**: In the left sidebar, click on "AgentFlow" to access the workflow builder
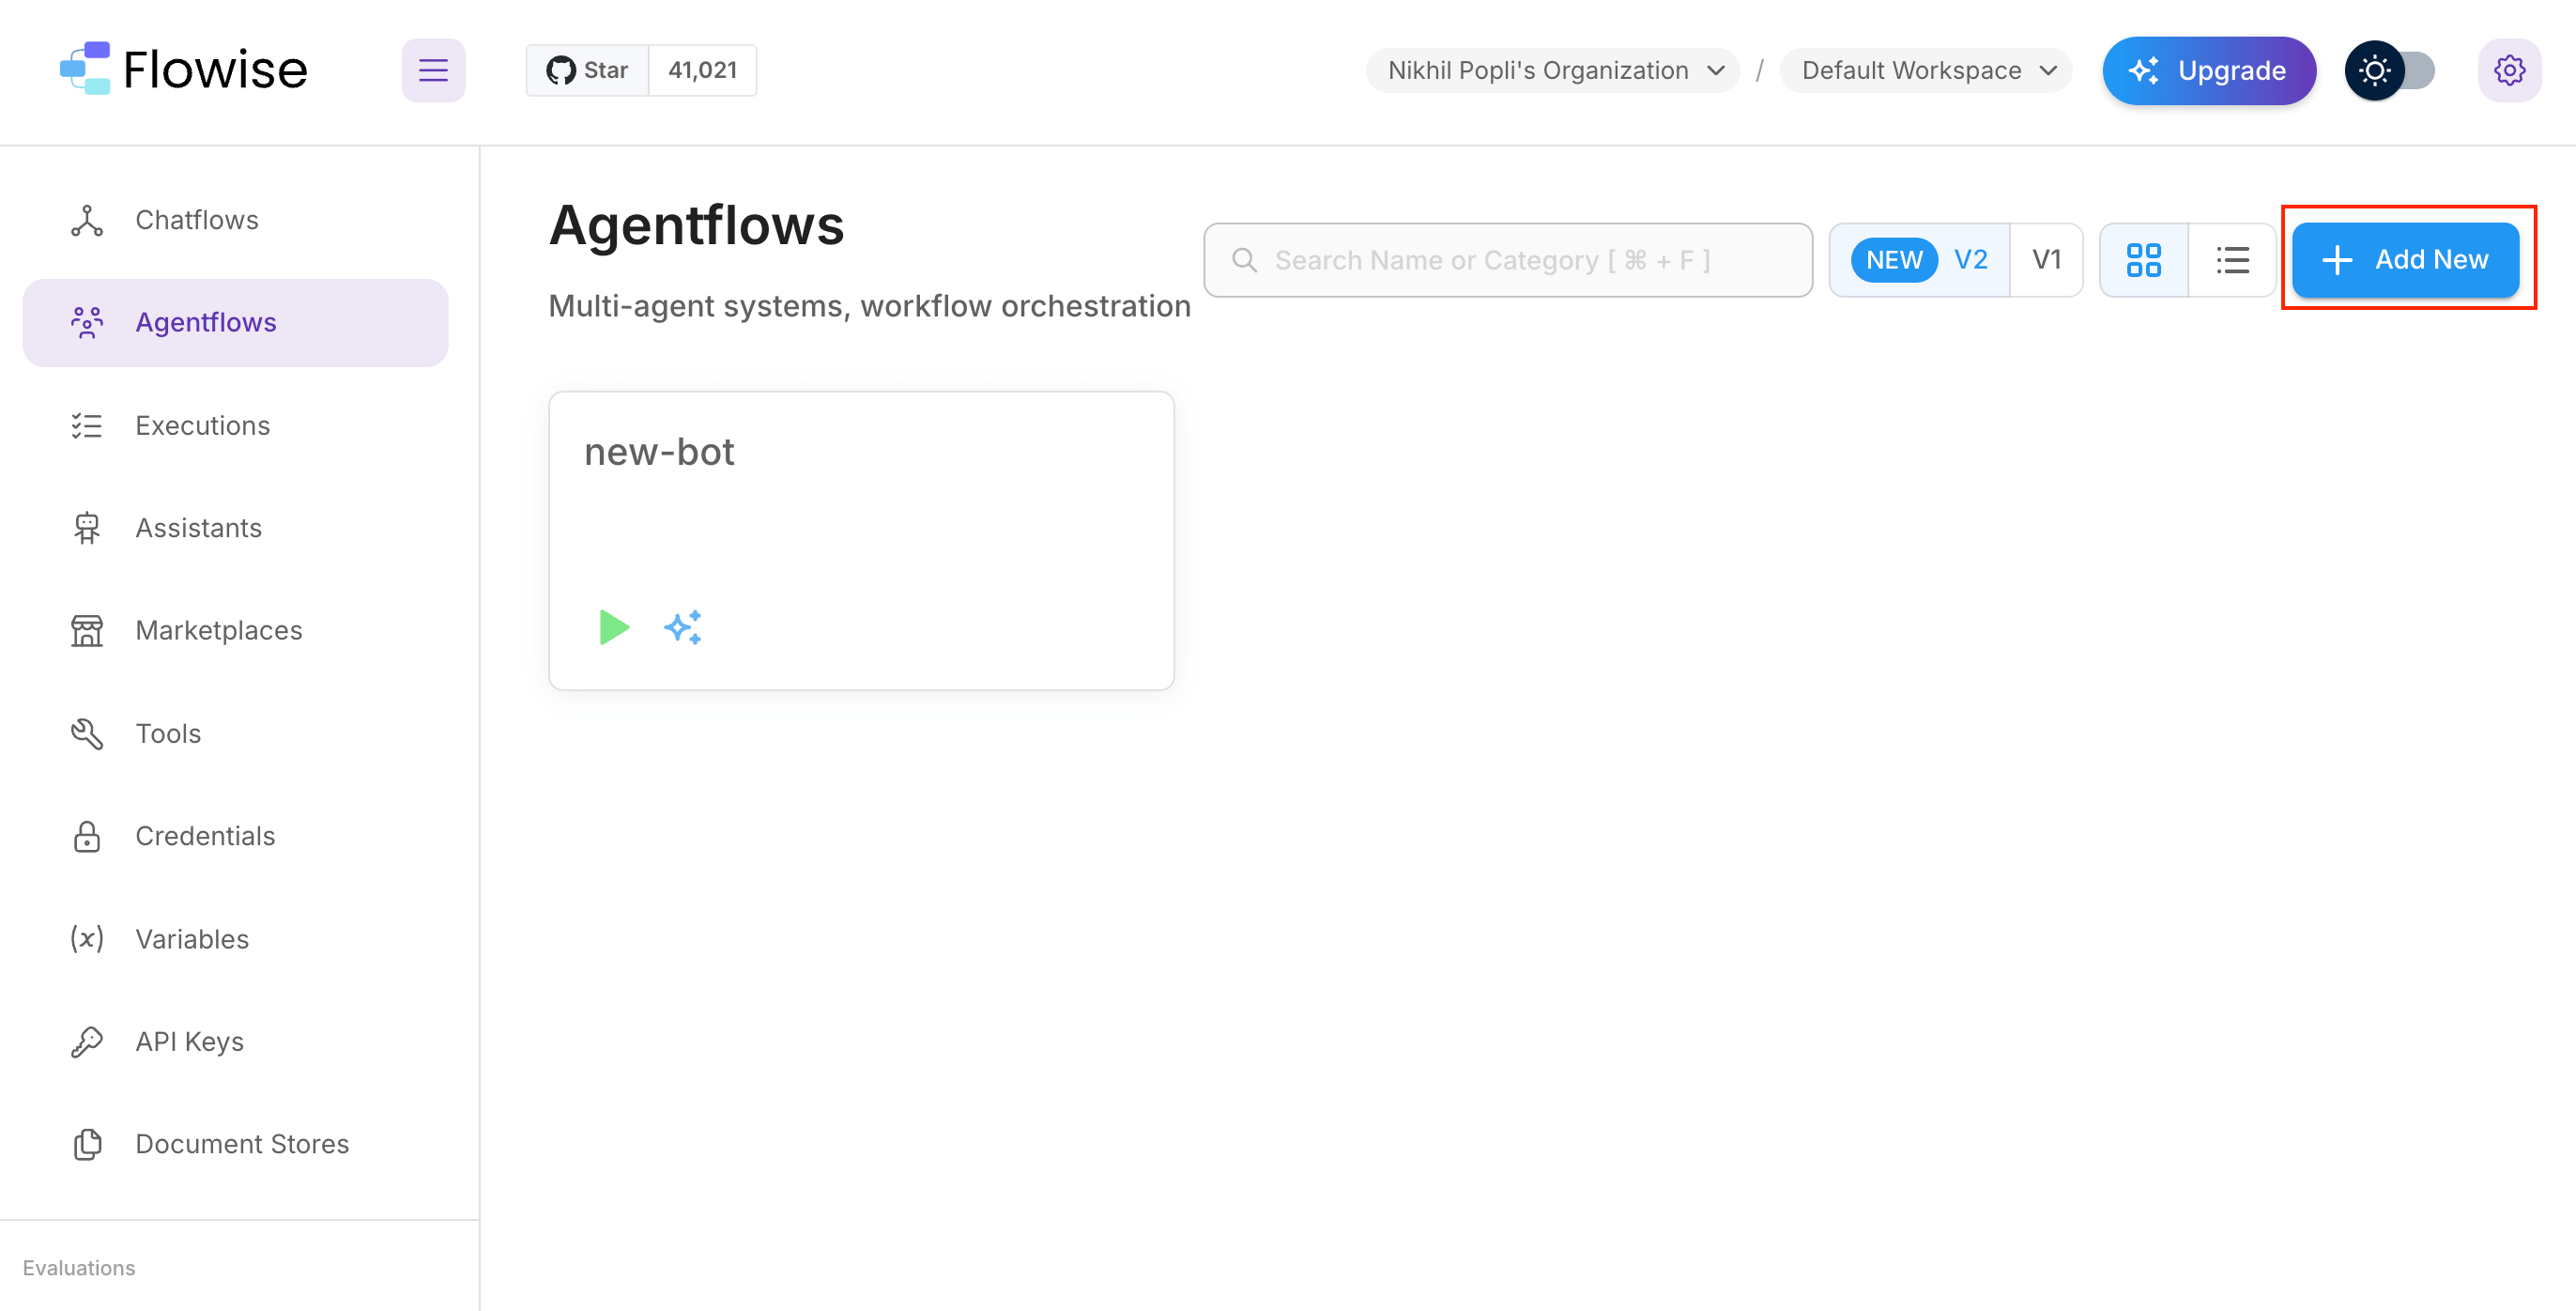 2. **Add a New Node**: Click the "Add Node" button to start building your workflow
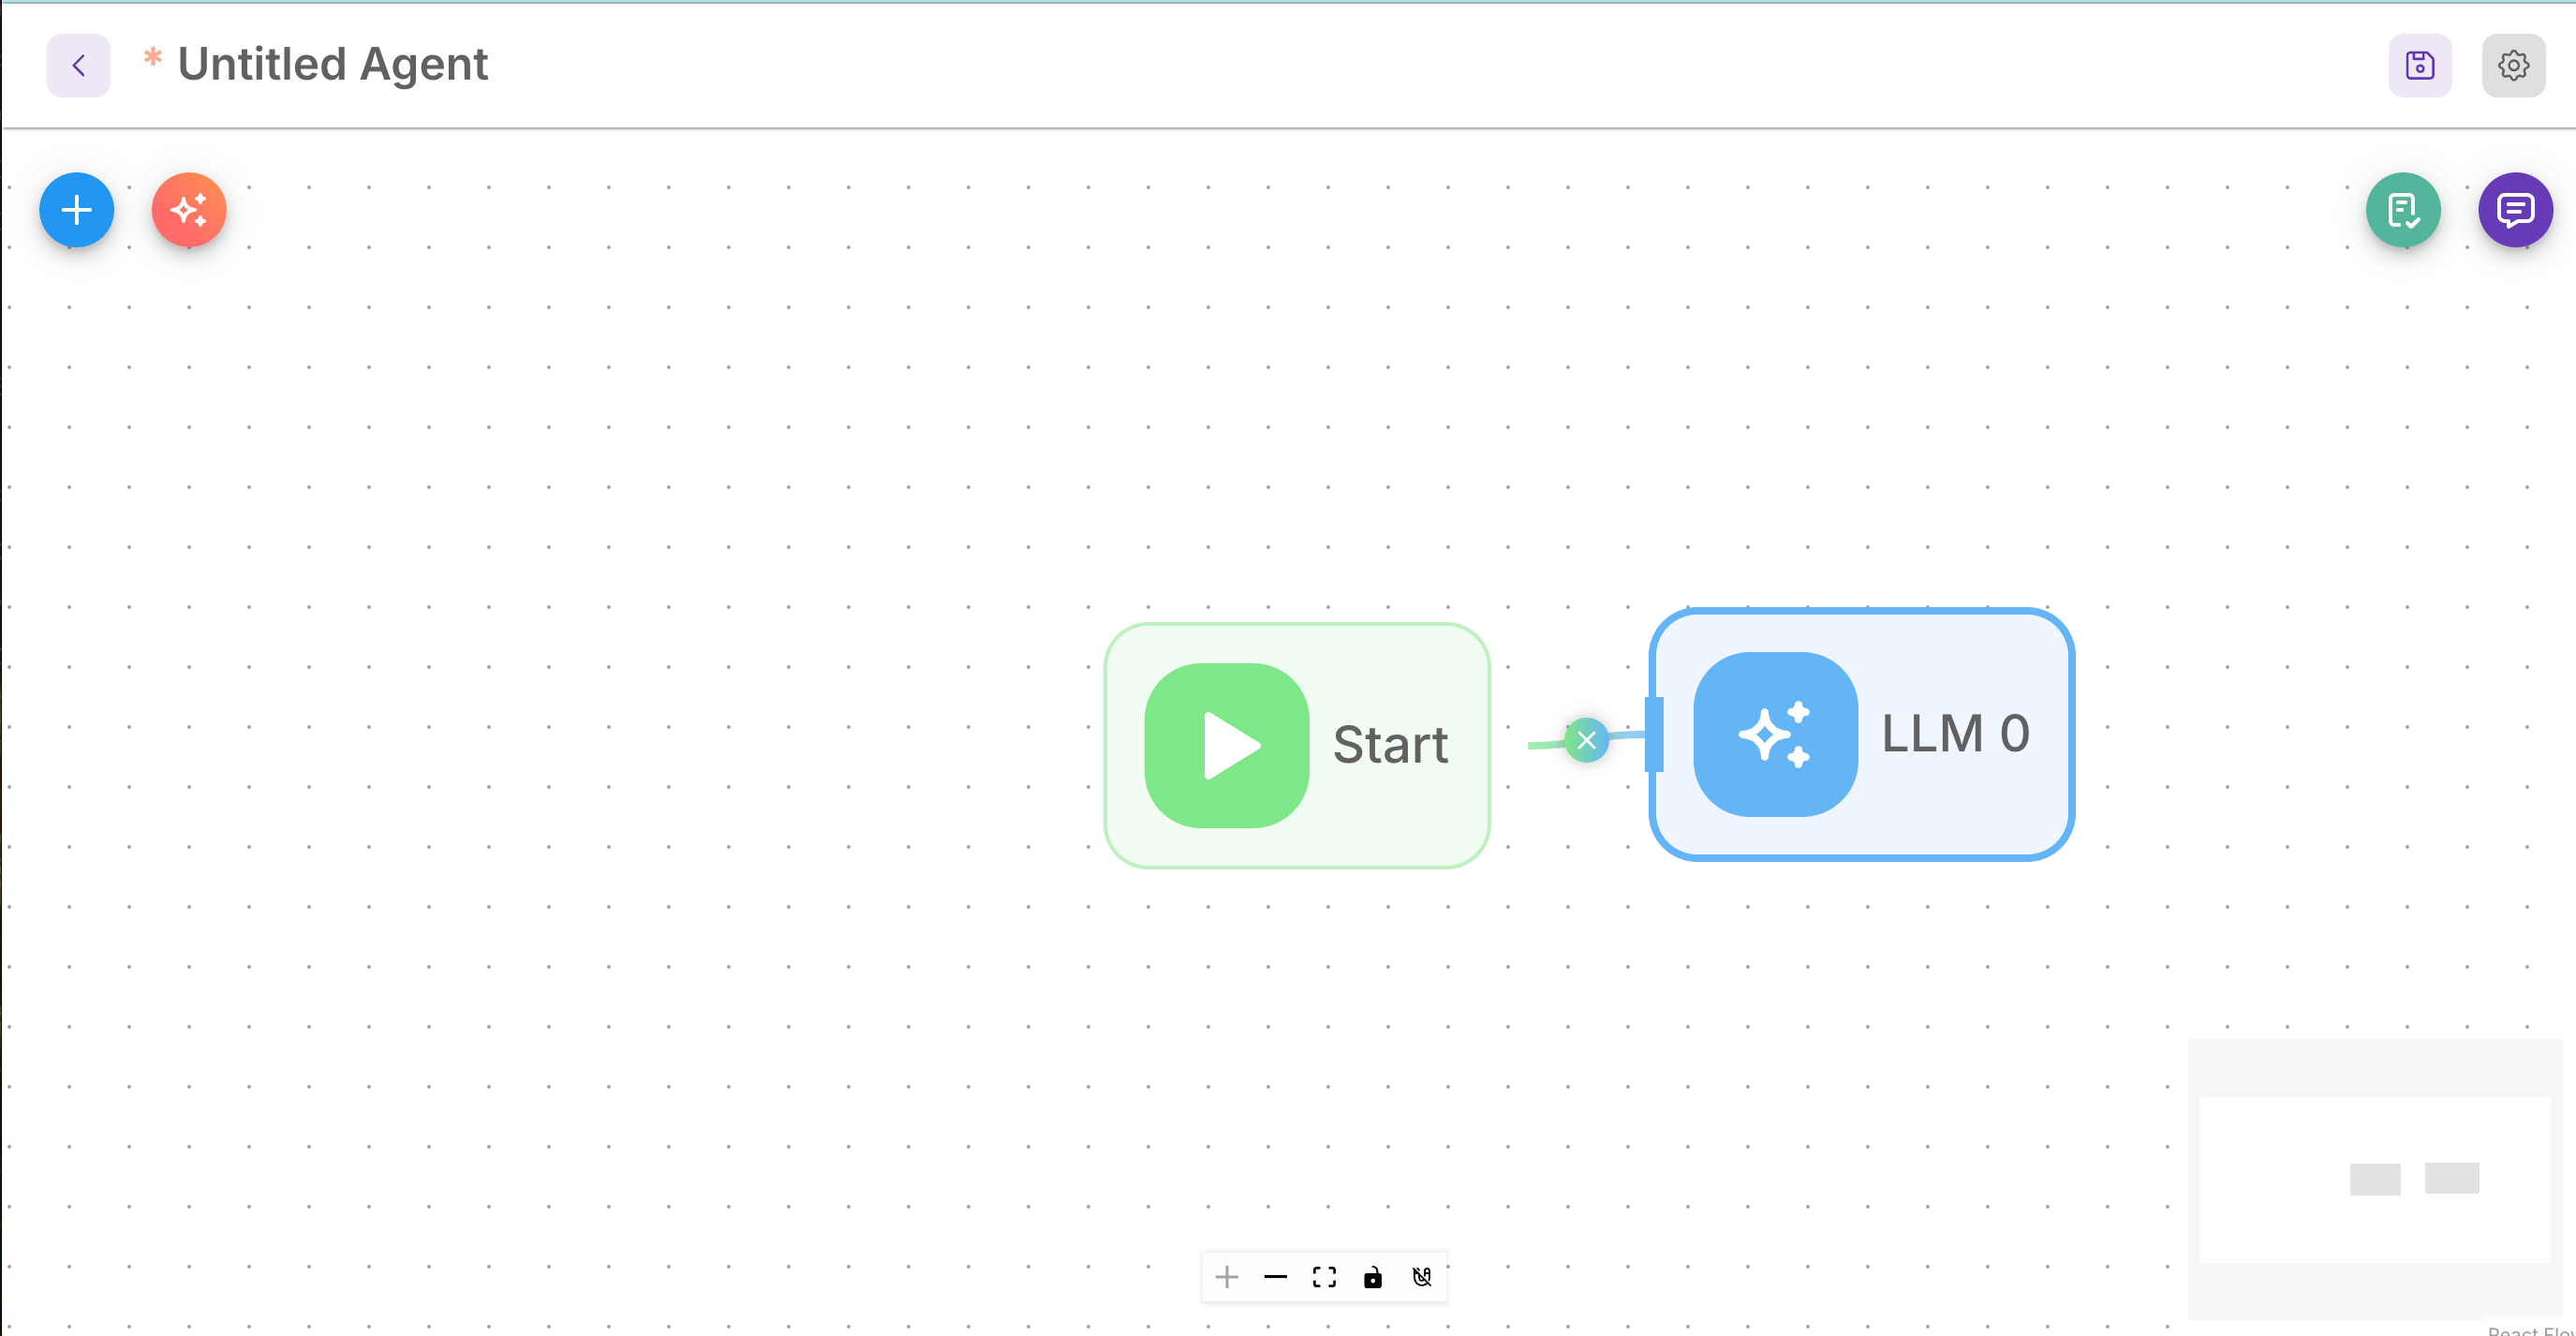 3. **Connect Start Node**: Make sure to create a connection from the Start node to your AgentFlow node. This is crucial for the workflow to function properly.
 ### Step 4: Configure the LLM Model
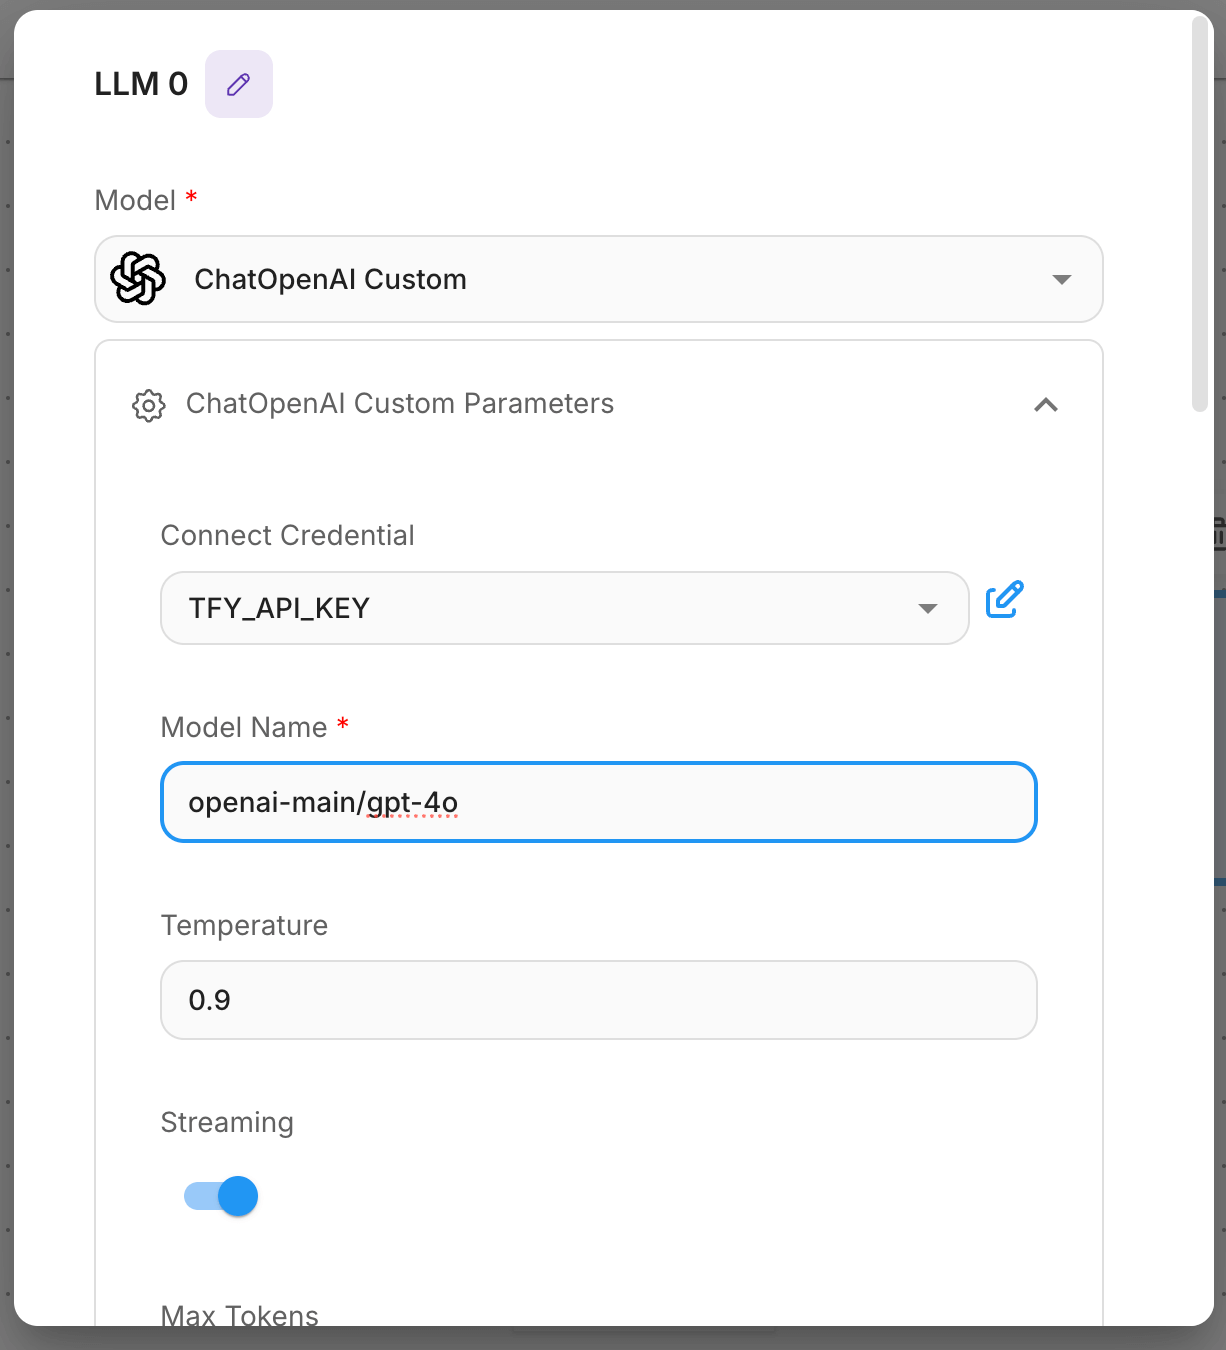
This is the most important step where you connect your agent to TrueFoundry's models:
1. **Configure the Agent Node**:
* Click on your agent node to open the configuration panel
* **Select Credential**: Choose the TrueFoundry credential you created in Step 2
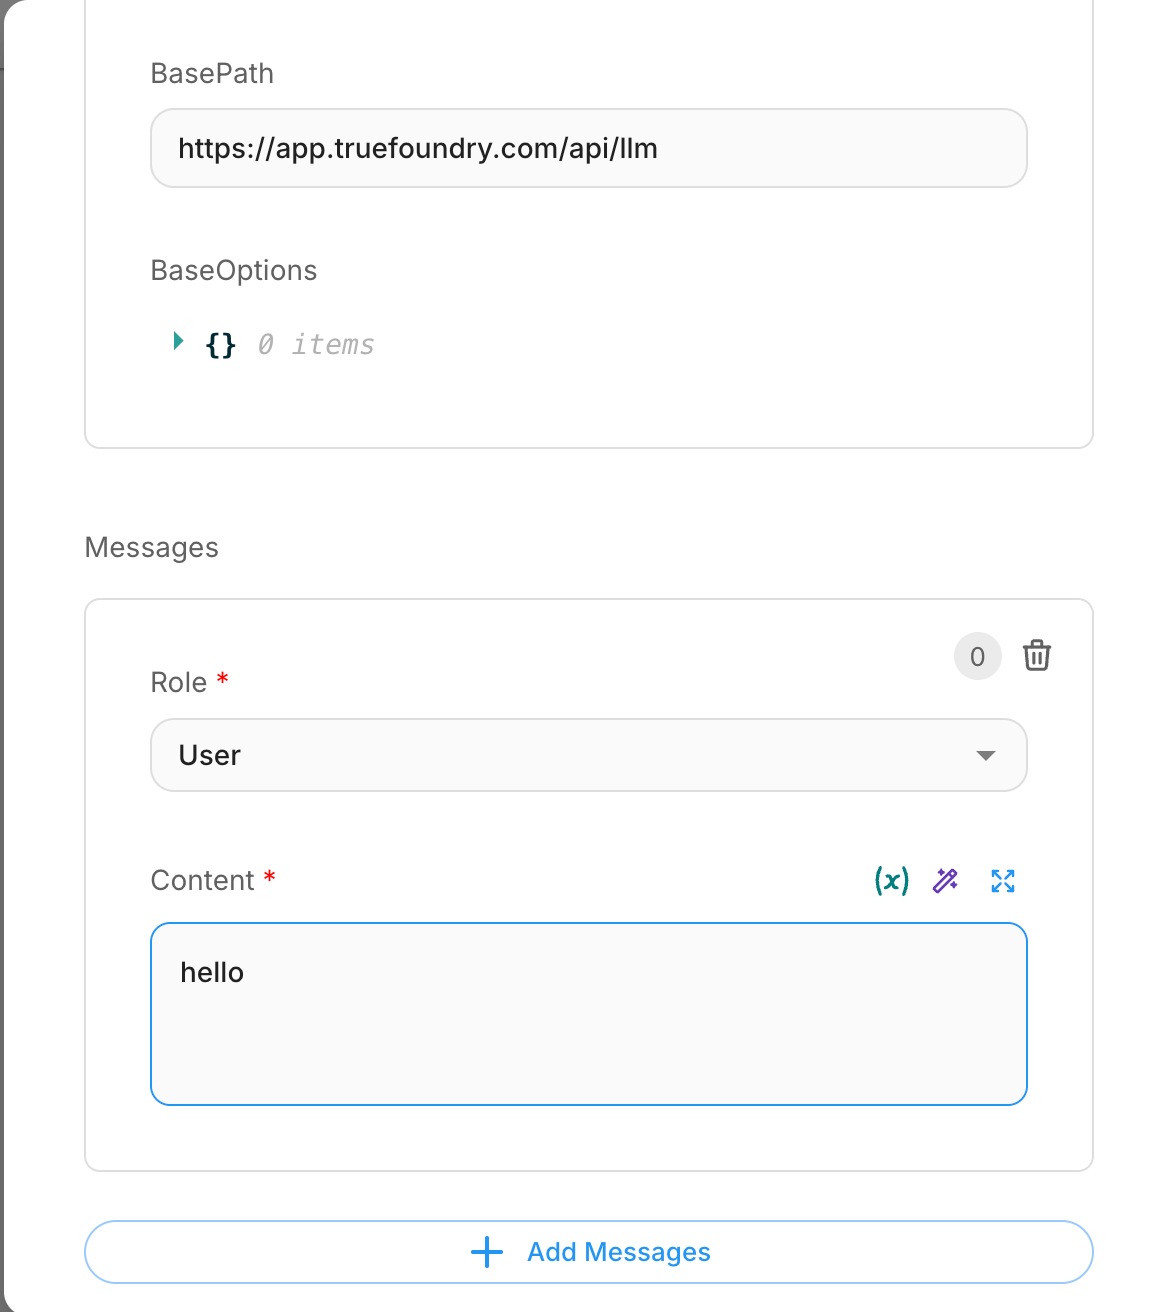
* **Base URL and Model Name**: You will get both the base URL and model name from the unified code snippet
### Step 4: Configure the LLM Model
This is the most important step where you connect your agent to TrueFoundry's models:
1. **Configure the Agent Node**:
* Click on your agent node to open the configuration panel
* **Select Credential**: Choose the TrueFoundry credential you created in Step 2
* **Base URL and Model Name**: You will get both the base URL and model name from the unified code snippet
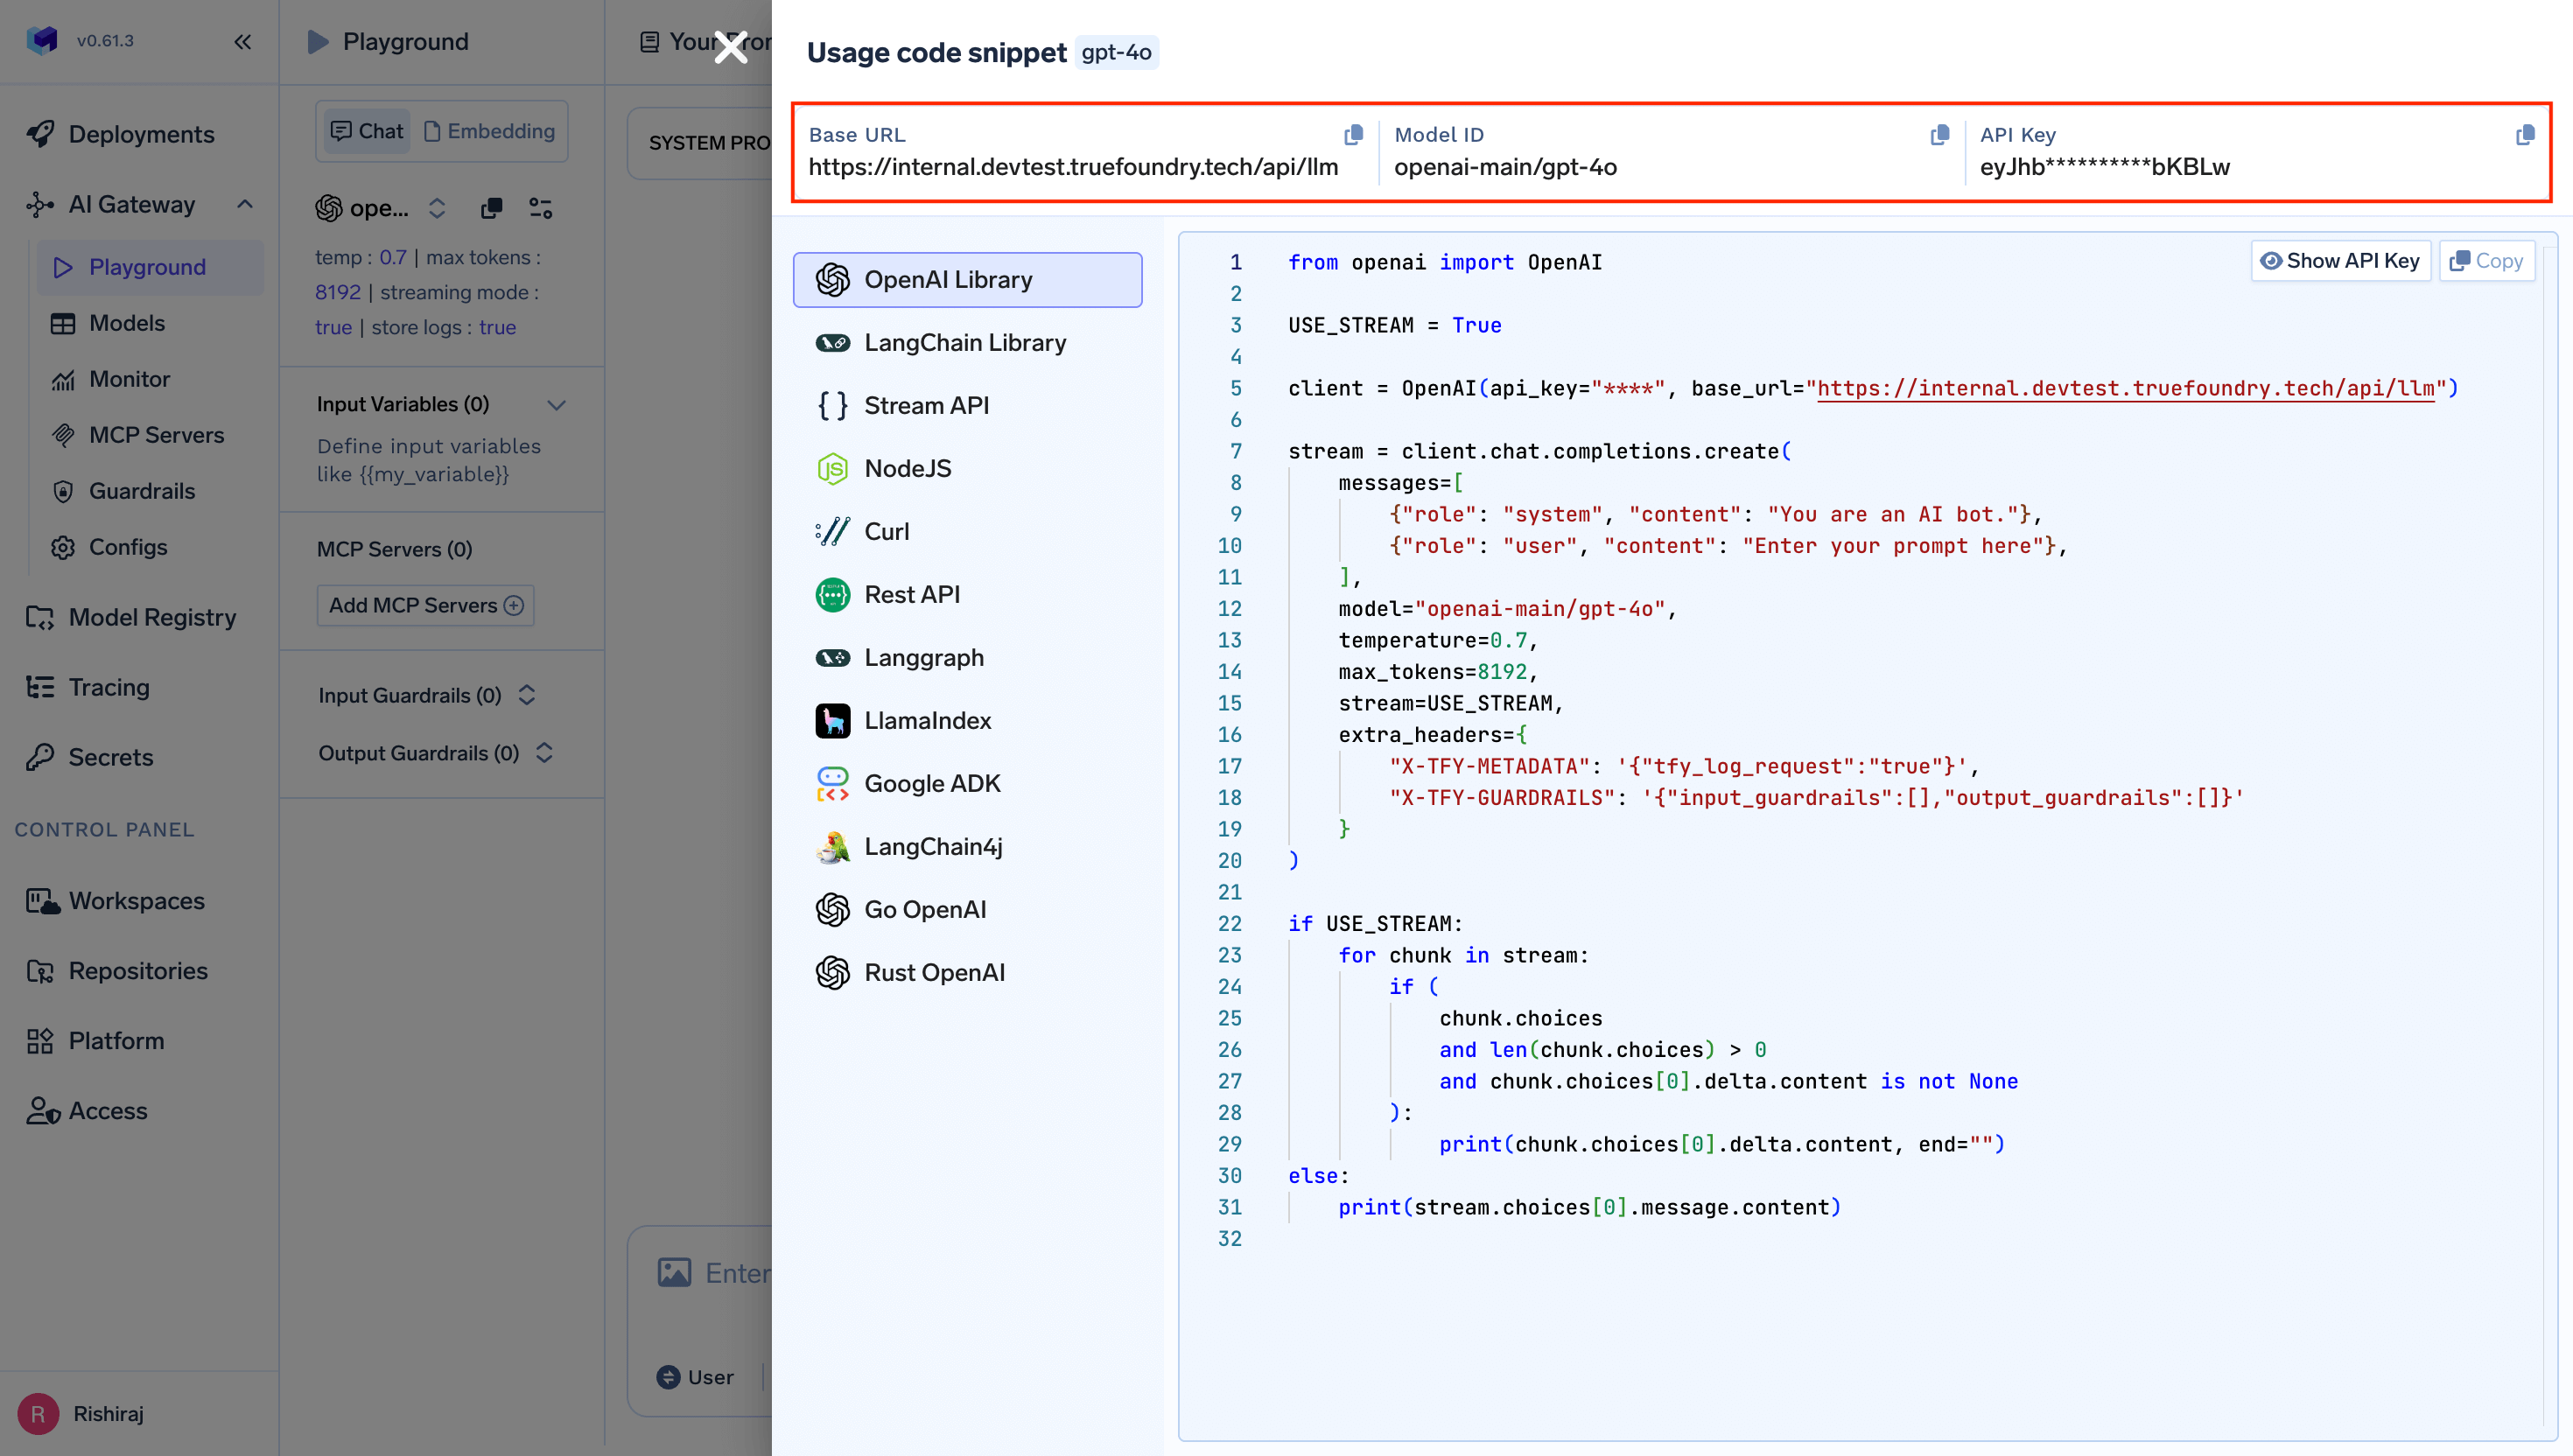 * **Additional Settings**: Configure any other parameters like temperature, max tokens, etc., as needed
 ### Step 5: Save and Test Your Integration
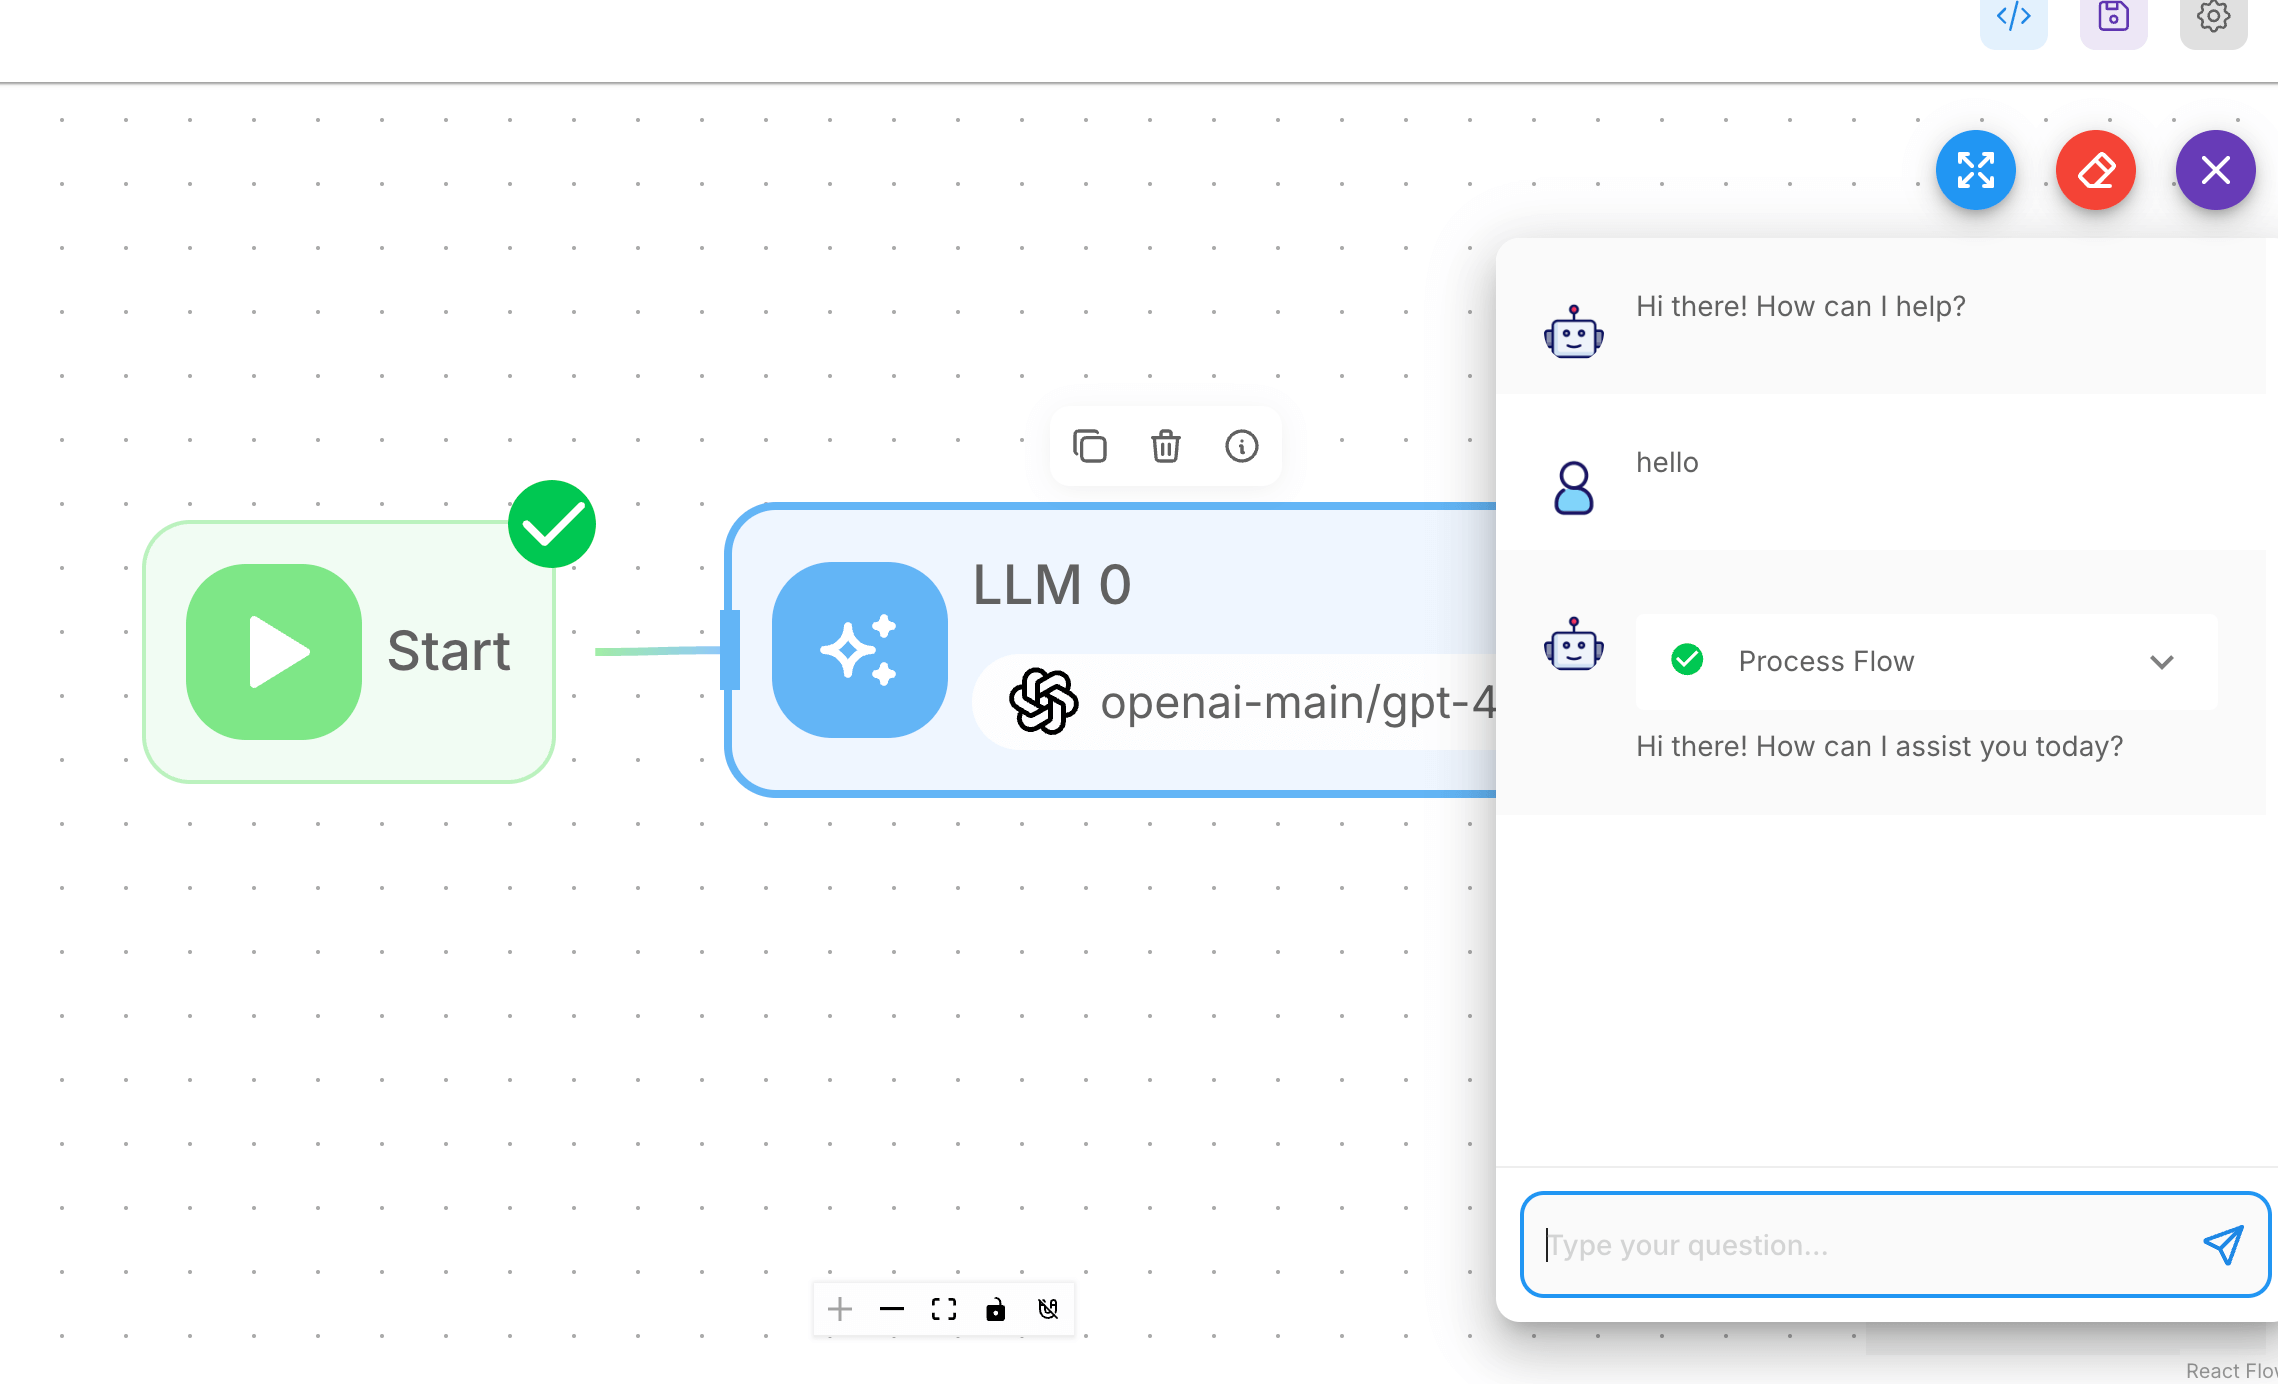
1. **Save Your Workflow**: Click the "Save" button in the top-right corner of the Flowise interface
2. **Test the Connection**:
* Open the chat interface by clicking the chat icon
* Send a test message to verify that your agent is working correctly
* The messages should now be processed through TrueFoundry's Gateway
### Step 5: Save and Test Your Integration
1. **Save Your Workflow**: Click the "Save" button in the top-right corner of the Flowise interface
2. **Test the Connection**:
* Open the chat interface by clicking the chat icon
* Send a test message to verify that your agent is working correctly
* The messages should now be processed through TrueFoundry's Gateway
 ## Troubleshooting Tips
* **Authentication Errors**: Double click on the LLM node you will see the settings ensure base url, model name are correctly configured
* **Model Not Found**: Ensure the model name from the unified code snippet is exact and the model is deployed
* **Connection Issues**: Verify your Gateway base URL format is correct: `{GATEWAY_BASE_URL}`
* **Workflow Not Responding**: Check that all nodes are properly connected, especially the connection from the Start node
Your Flowise application is now integrated with TrueFoundry's AI Gateway and ready for use.
## Troubleshooting Tips
* **Authentication Errors**: Double click on the LLM node you will see the settings ensure base url, model name are correctly configured
* **Model Not Found**: Ensure the model name from the unified code snippet is exact and the model is deployed
* **Connection Issues**: Verify your Gateway base URL format is correct: `{GATEWAY_BASE_URL}`
* **Workflow Not Responding**: Check that all nodes are properly connected, especially the connection from the Start node
Your Flowise application is now integrated with TrueFoundry's AI Gateway and ready for use.