> ## Documentation Index
> Fetch the complete documentation index at: https://www.truefoundry.com/llms.txt
> Use this file to discover all available pages before exploring further.
# Databricks
> Add and configure Databricks models in TrueFoundry's AI Gateway
### Adding Models
This section explains the steps to add Databricks models and configure the required access controls.
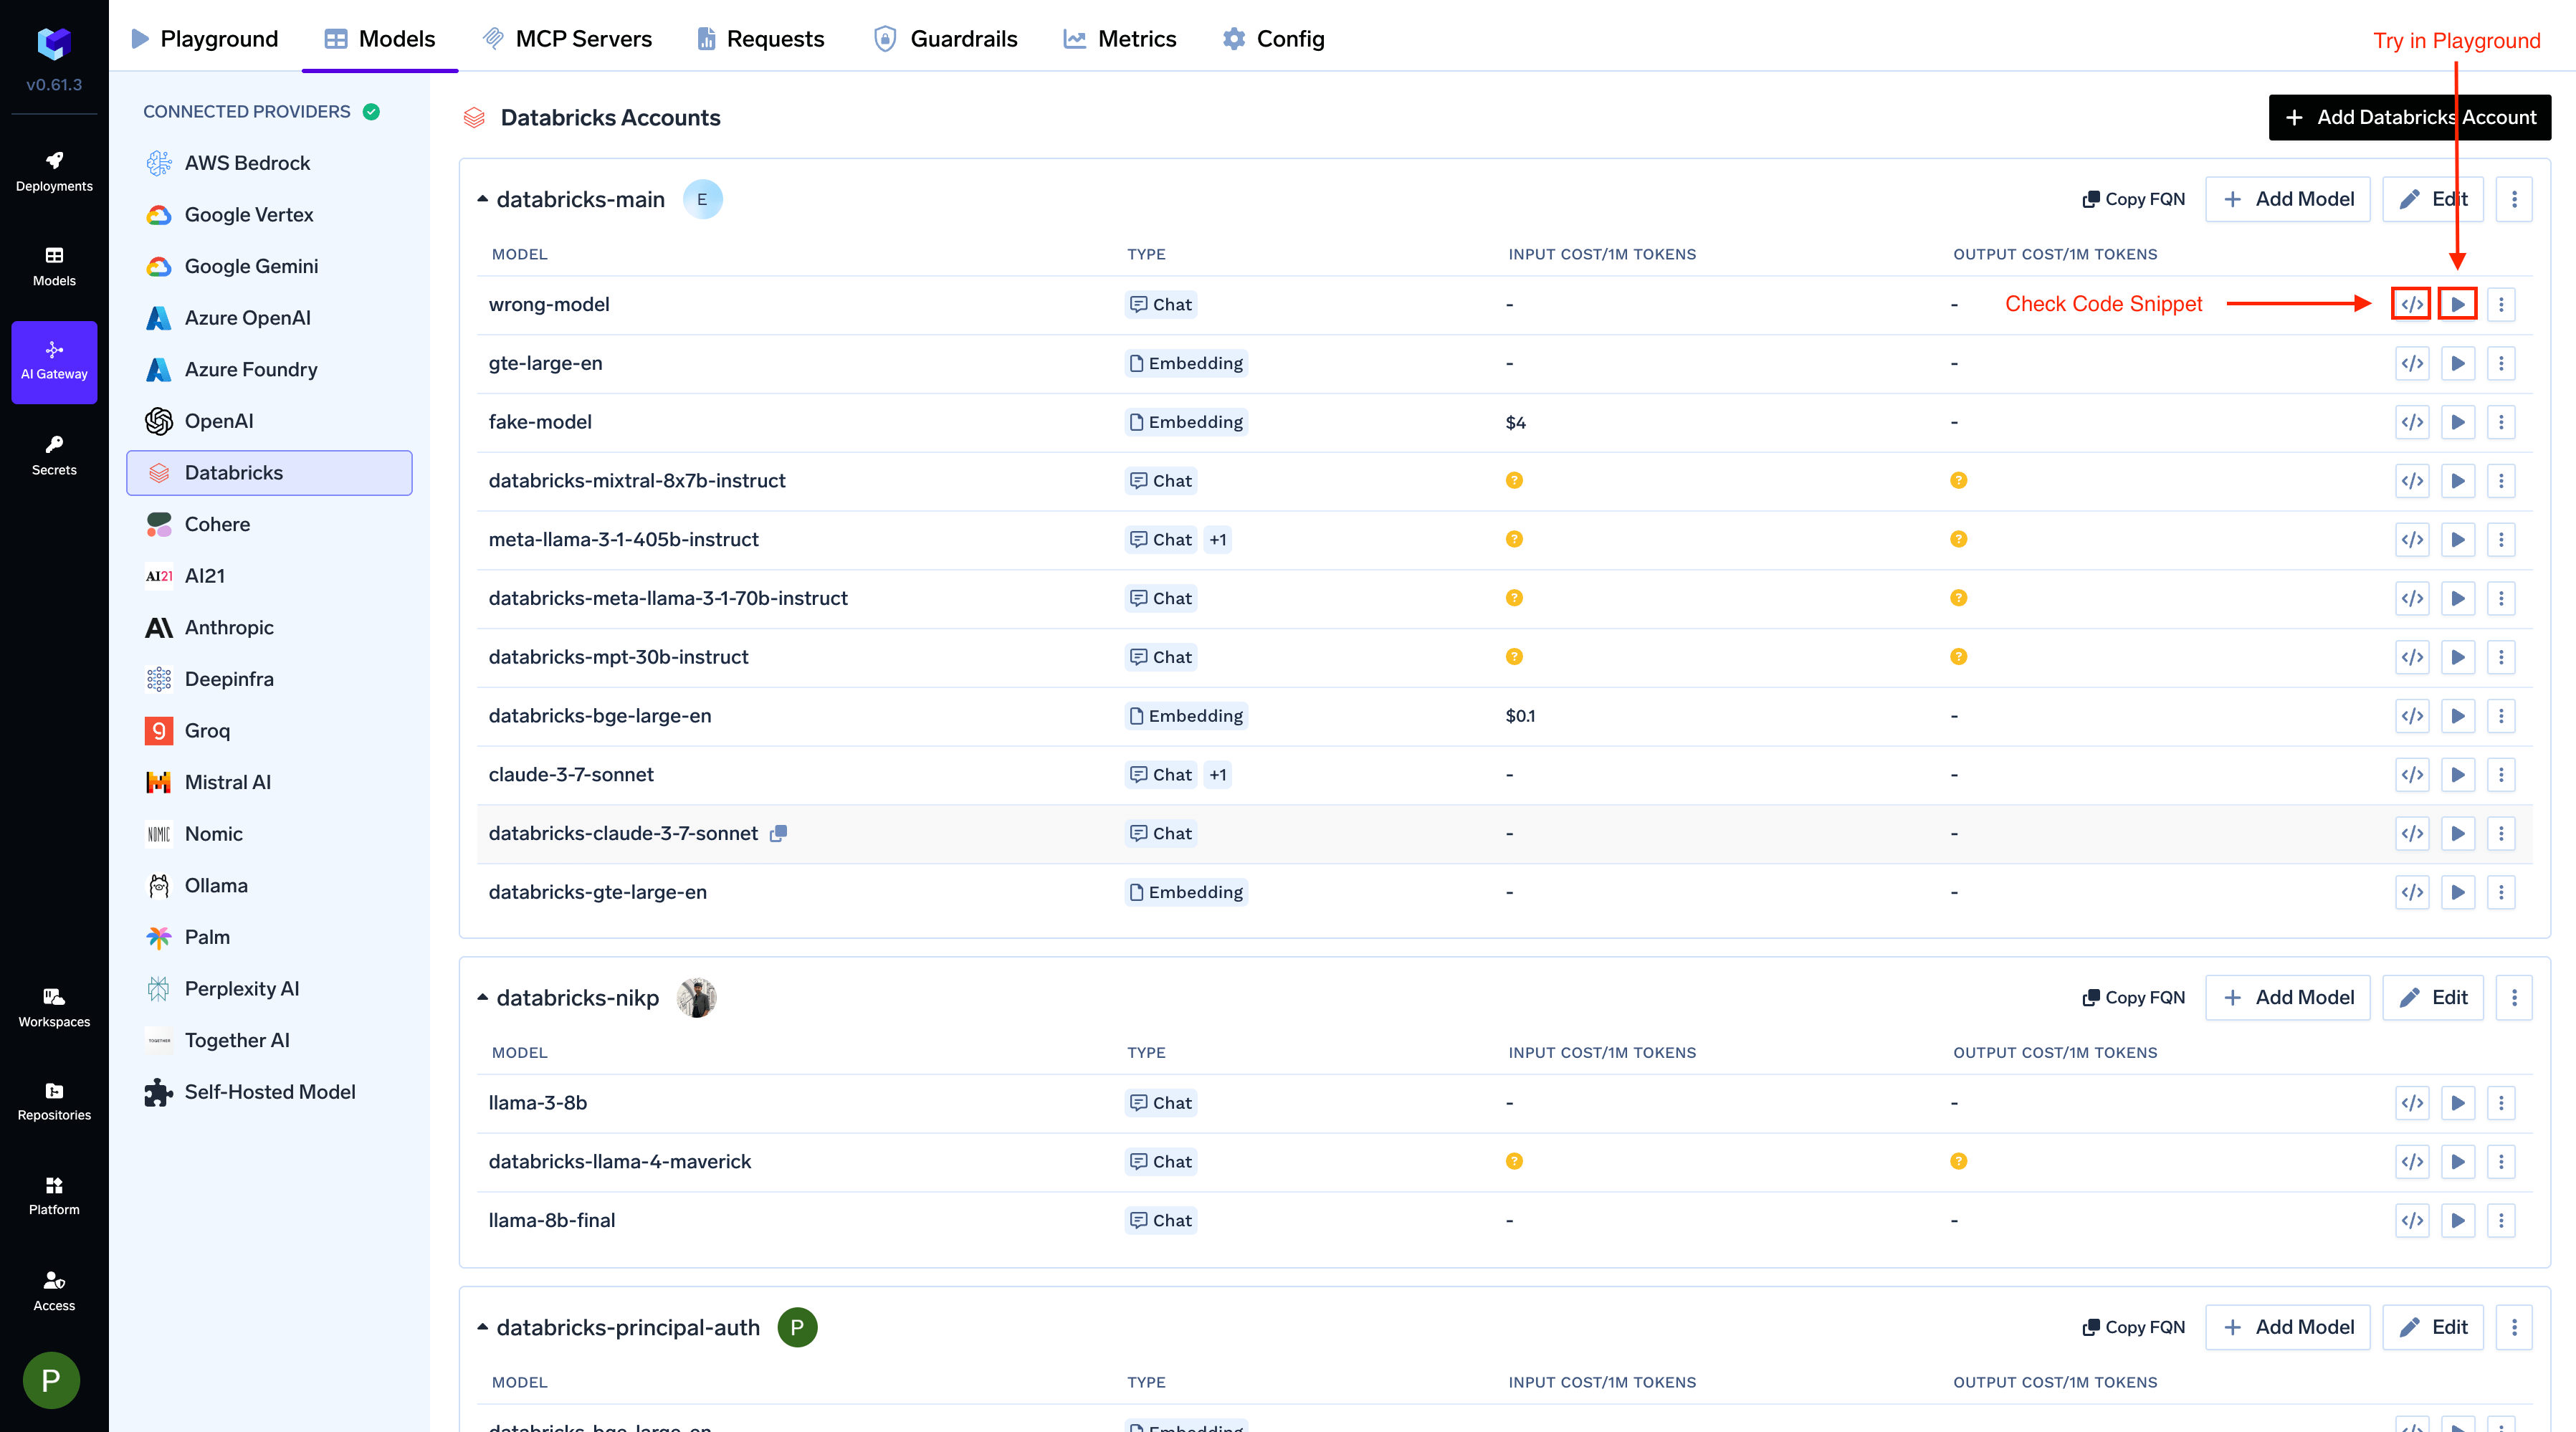
From the TrueFoundry dashboard, navigate to `AI Gateway` > `Models` and select `Databricks`.
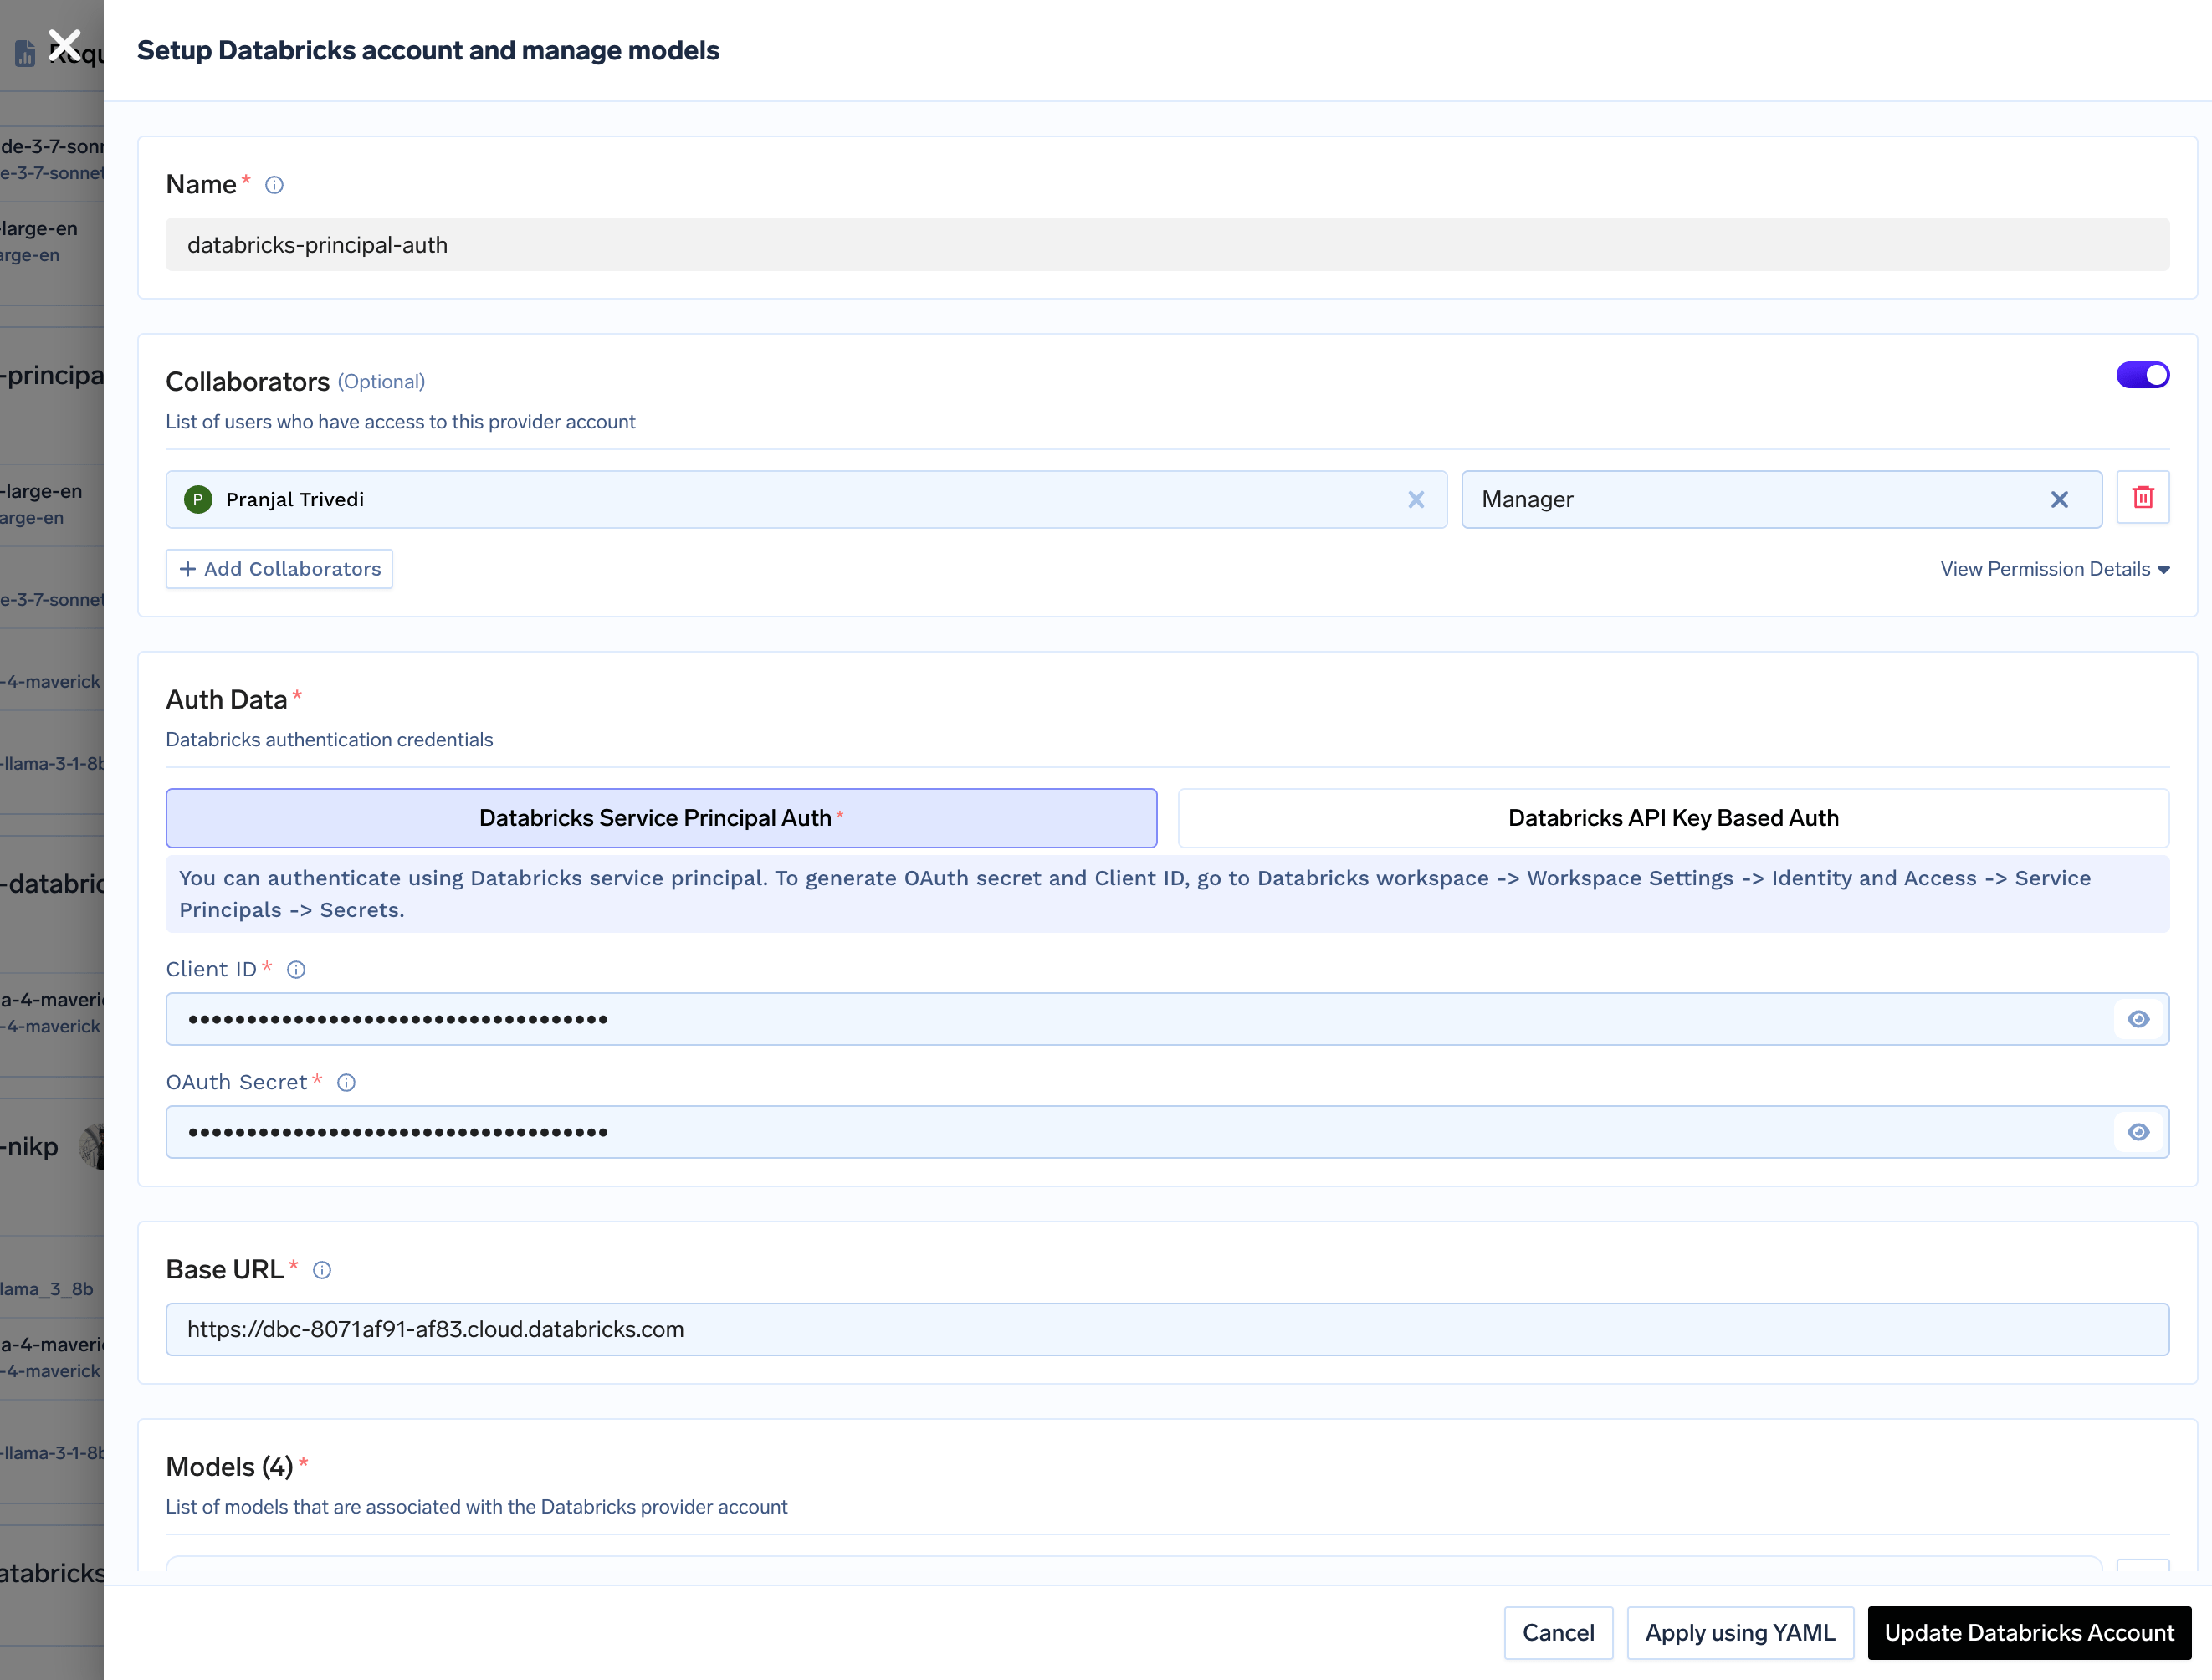
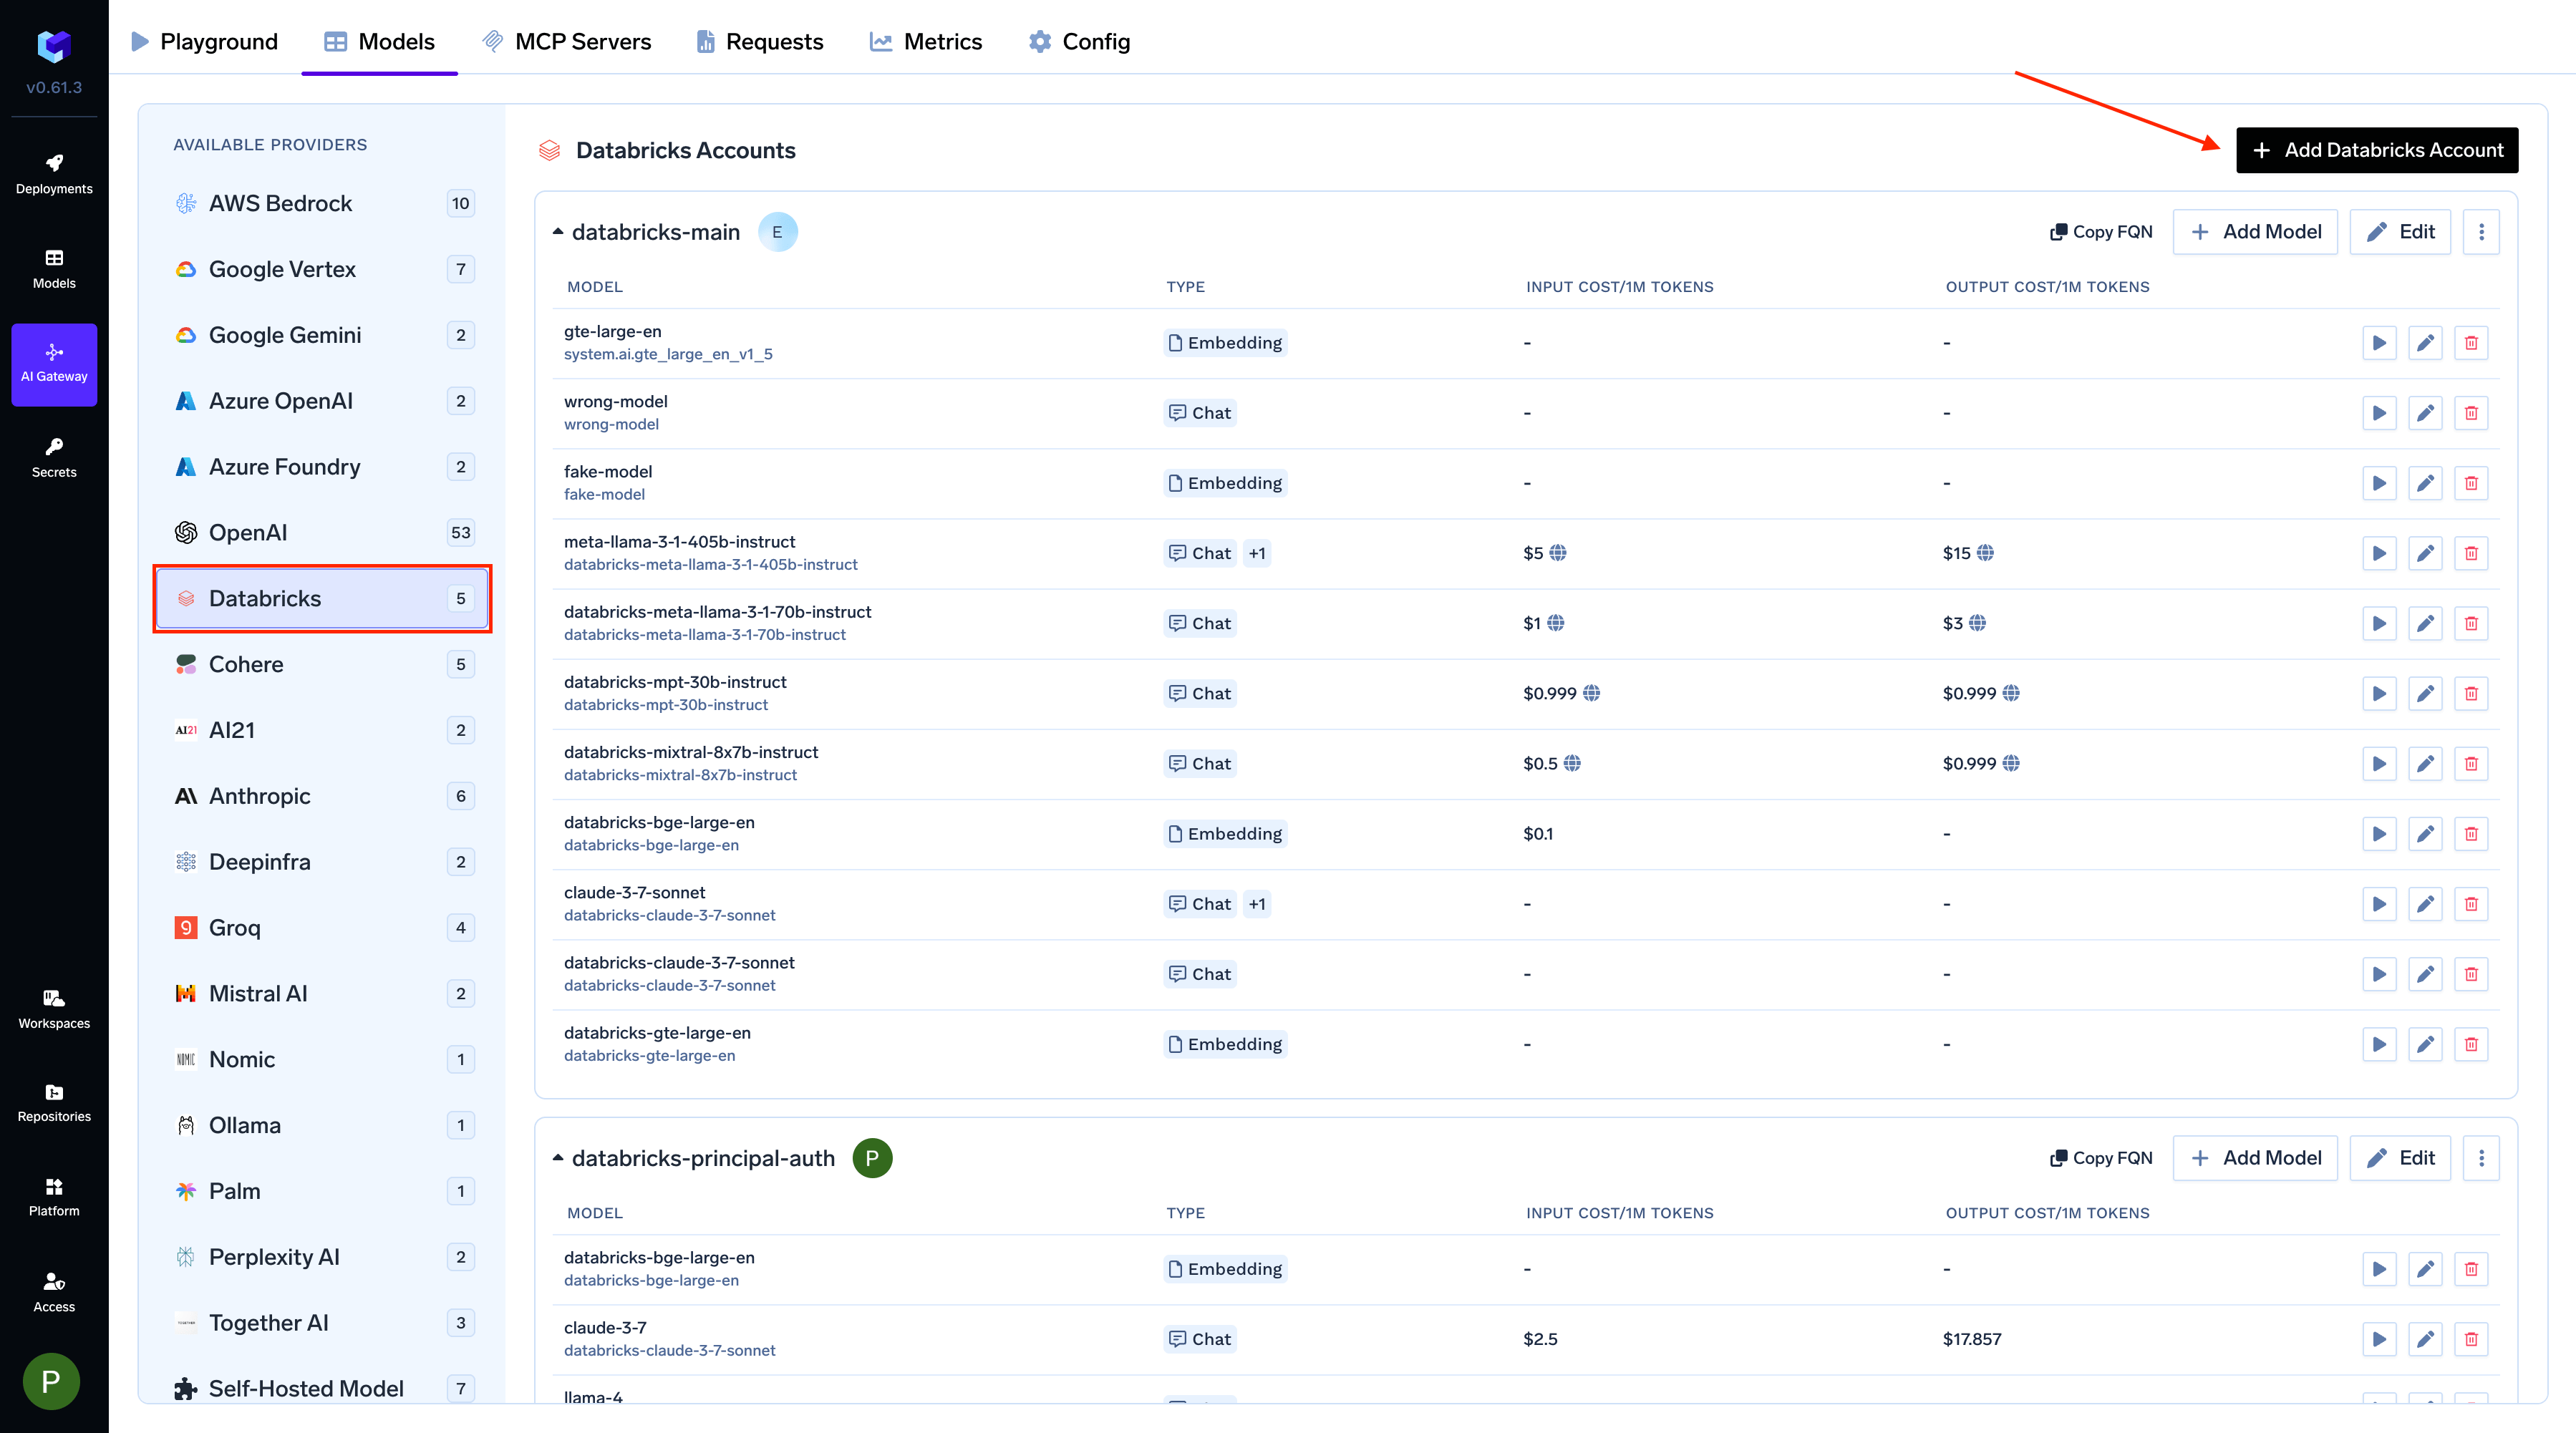 Give a unique name for the Databricks account. This will be used to refer to the models later. Provide the authentication details for the gateway to access your Databricks models. Truefoundry supports both Service Principal and Personal Access Token (PAT) based authentication.
**Using Service Principal (Recommended):**
Service Principal authentication is the recommended approach for production environments as it provides better security and access control.
* Choose **Service Principal Auth**.
* Enter your Databricks Service Principal `Client ID` and `OAuth Secret`.
Give a unique name for the Databricks account. This will be used to refer to the models later. Provide the authentication details for the gateway to access your Databricks models. Truefoundry supports both Service Principal and Personal Access Token (PAT) based authentication.
**Using Service Principal (Recommended):**
Service Principal authentication is the recommended approach for production environments as it provides better security and access control.
* Choose **Service Principal Auth**.
* Enter your Databricks Service Principal `Client ID` and `OAuth Secret`.
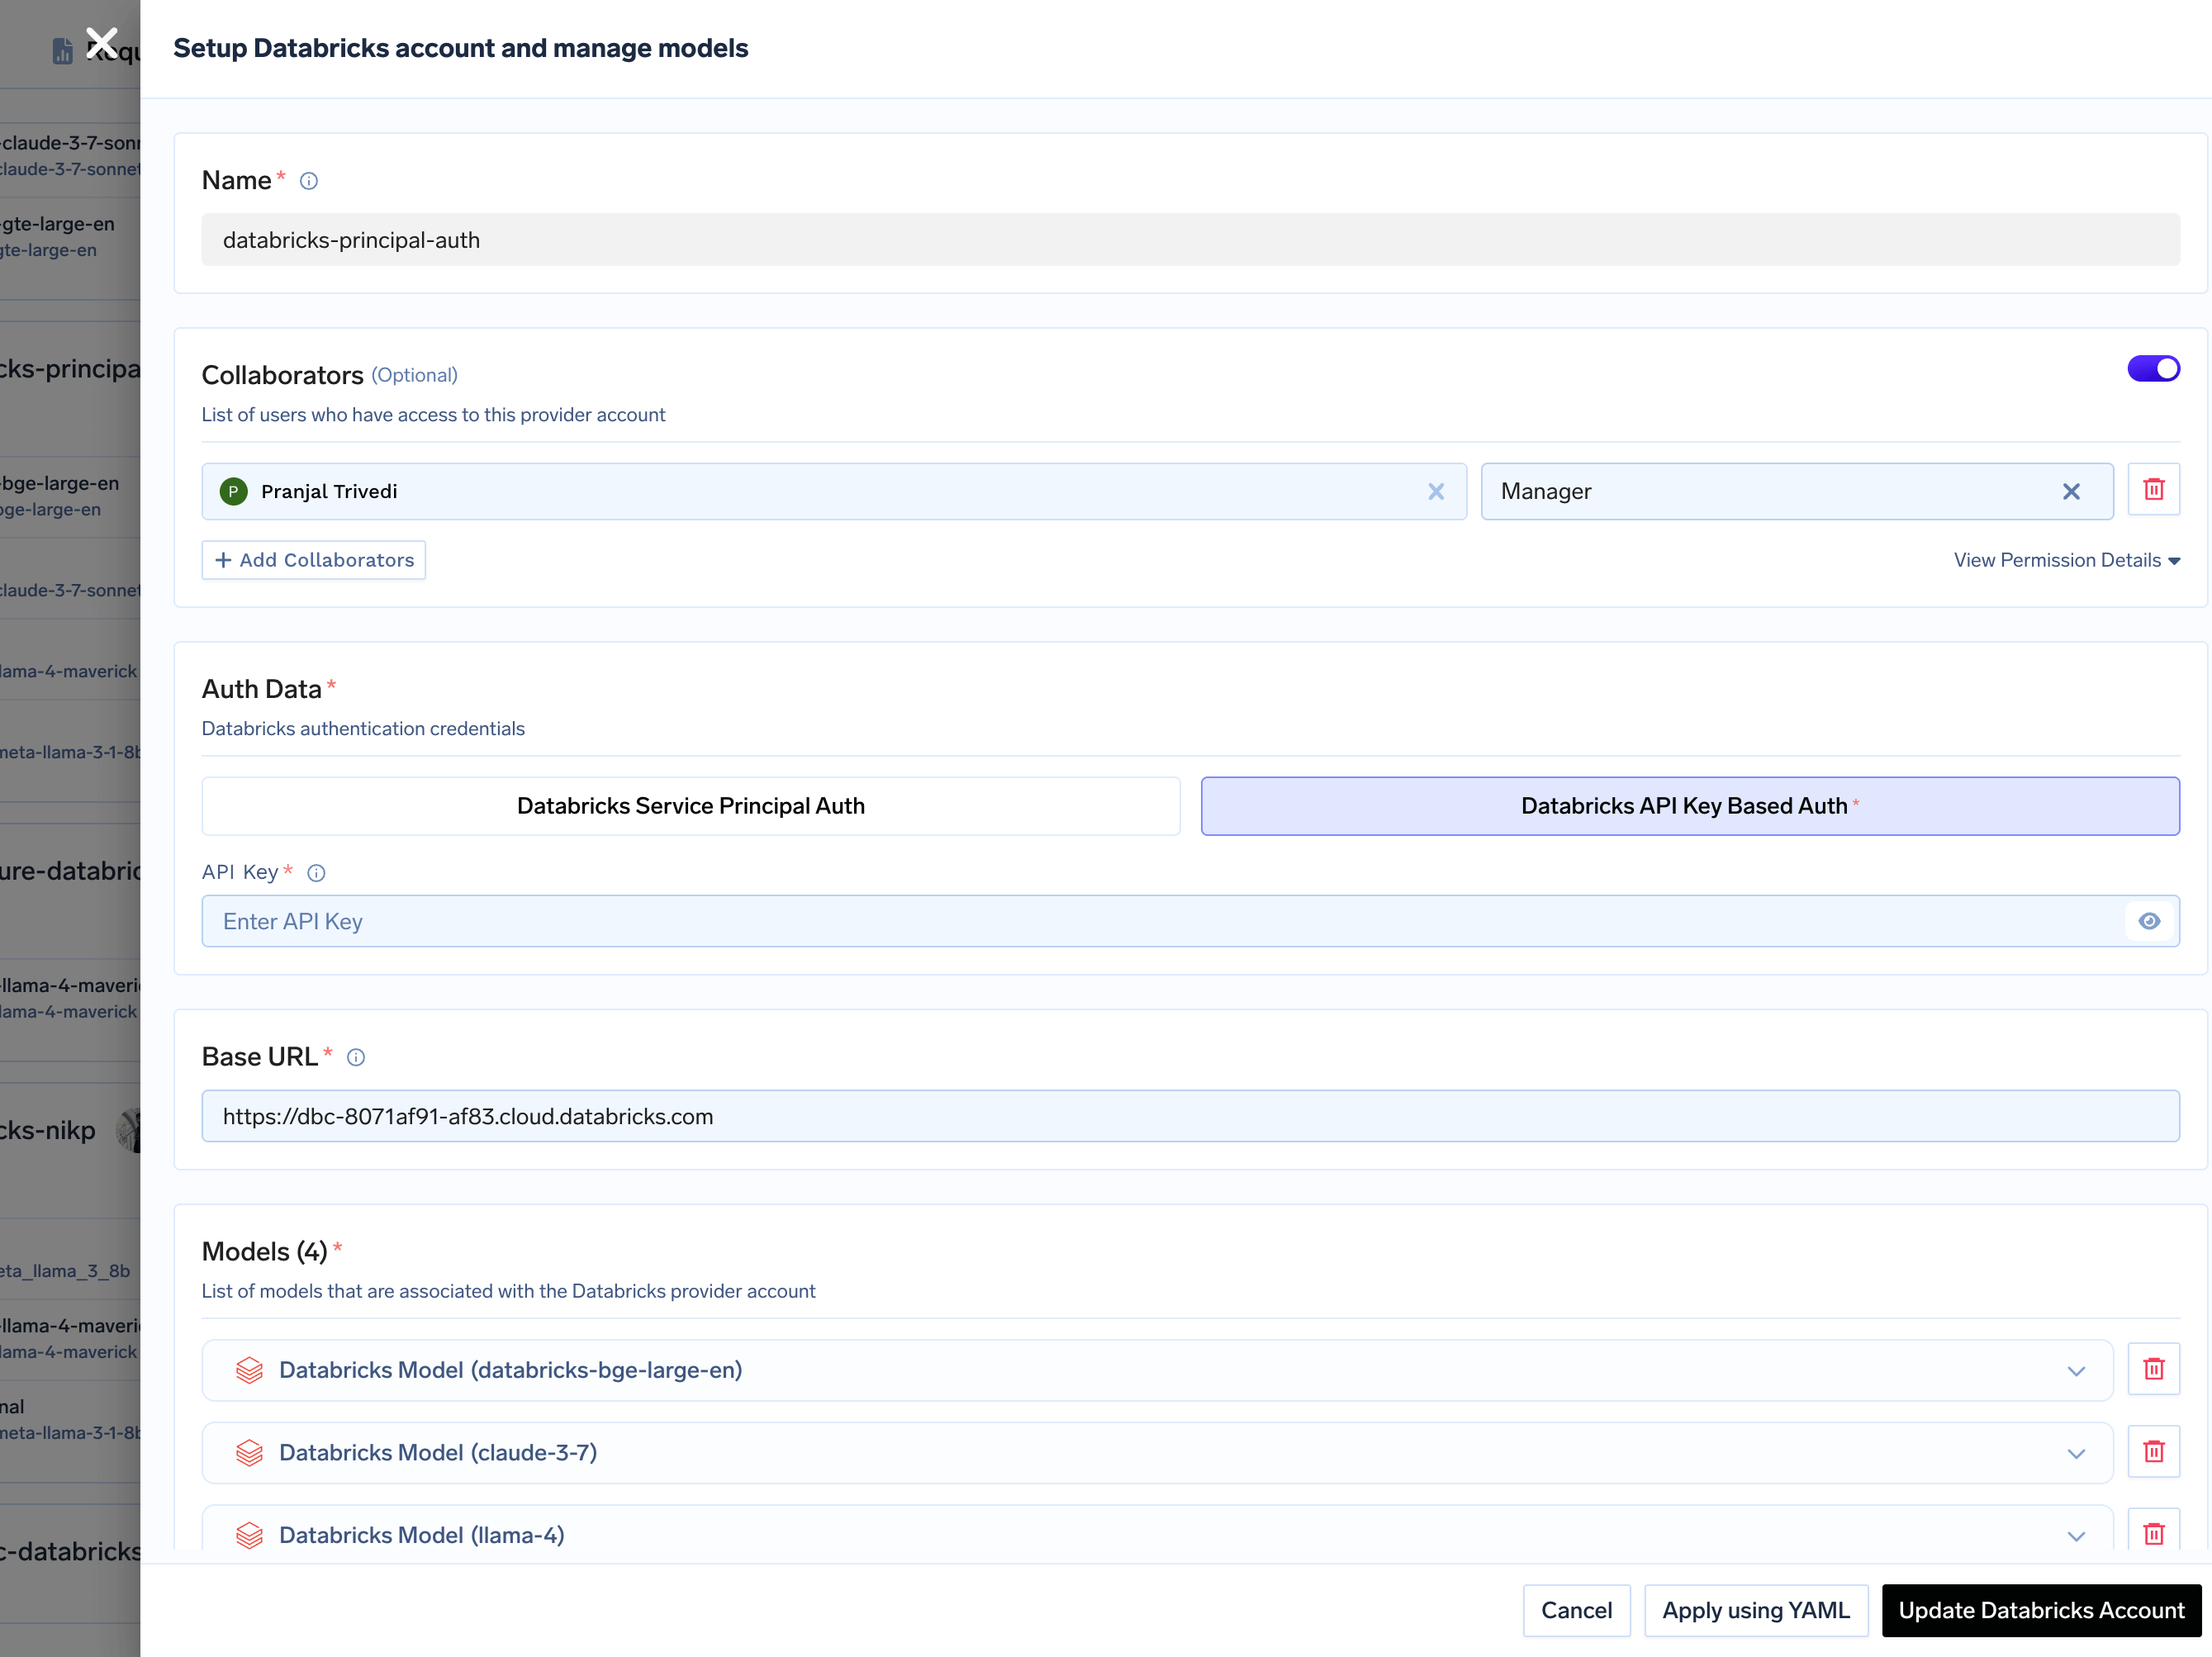
 **Using Personal Access Token (PAT):**
Personal Access Tokens are suitable for development and testing environments.
* Choose **Databricks API Key Based Auth**.
* Enter your `PAT`.
**Using Personal Access Token (PAT):**
Personal Access Tokens are suitable for development and testing environments.
* Choose **Databricks API Key Based Auth**.
* Enter your `PAT`.
 Finally, enter your Databricks workspace URL (e.g., `https://.databricks.com`).
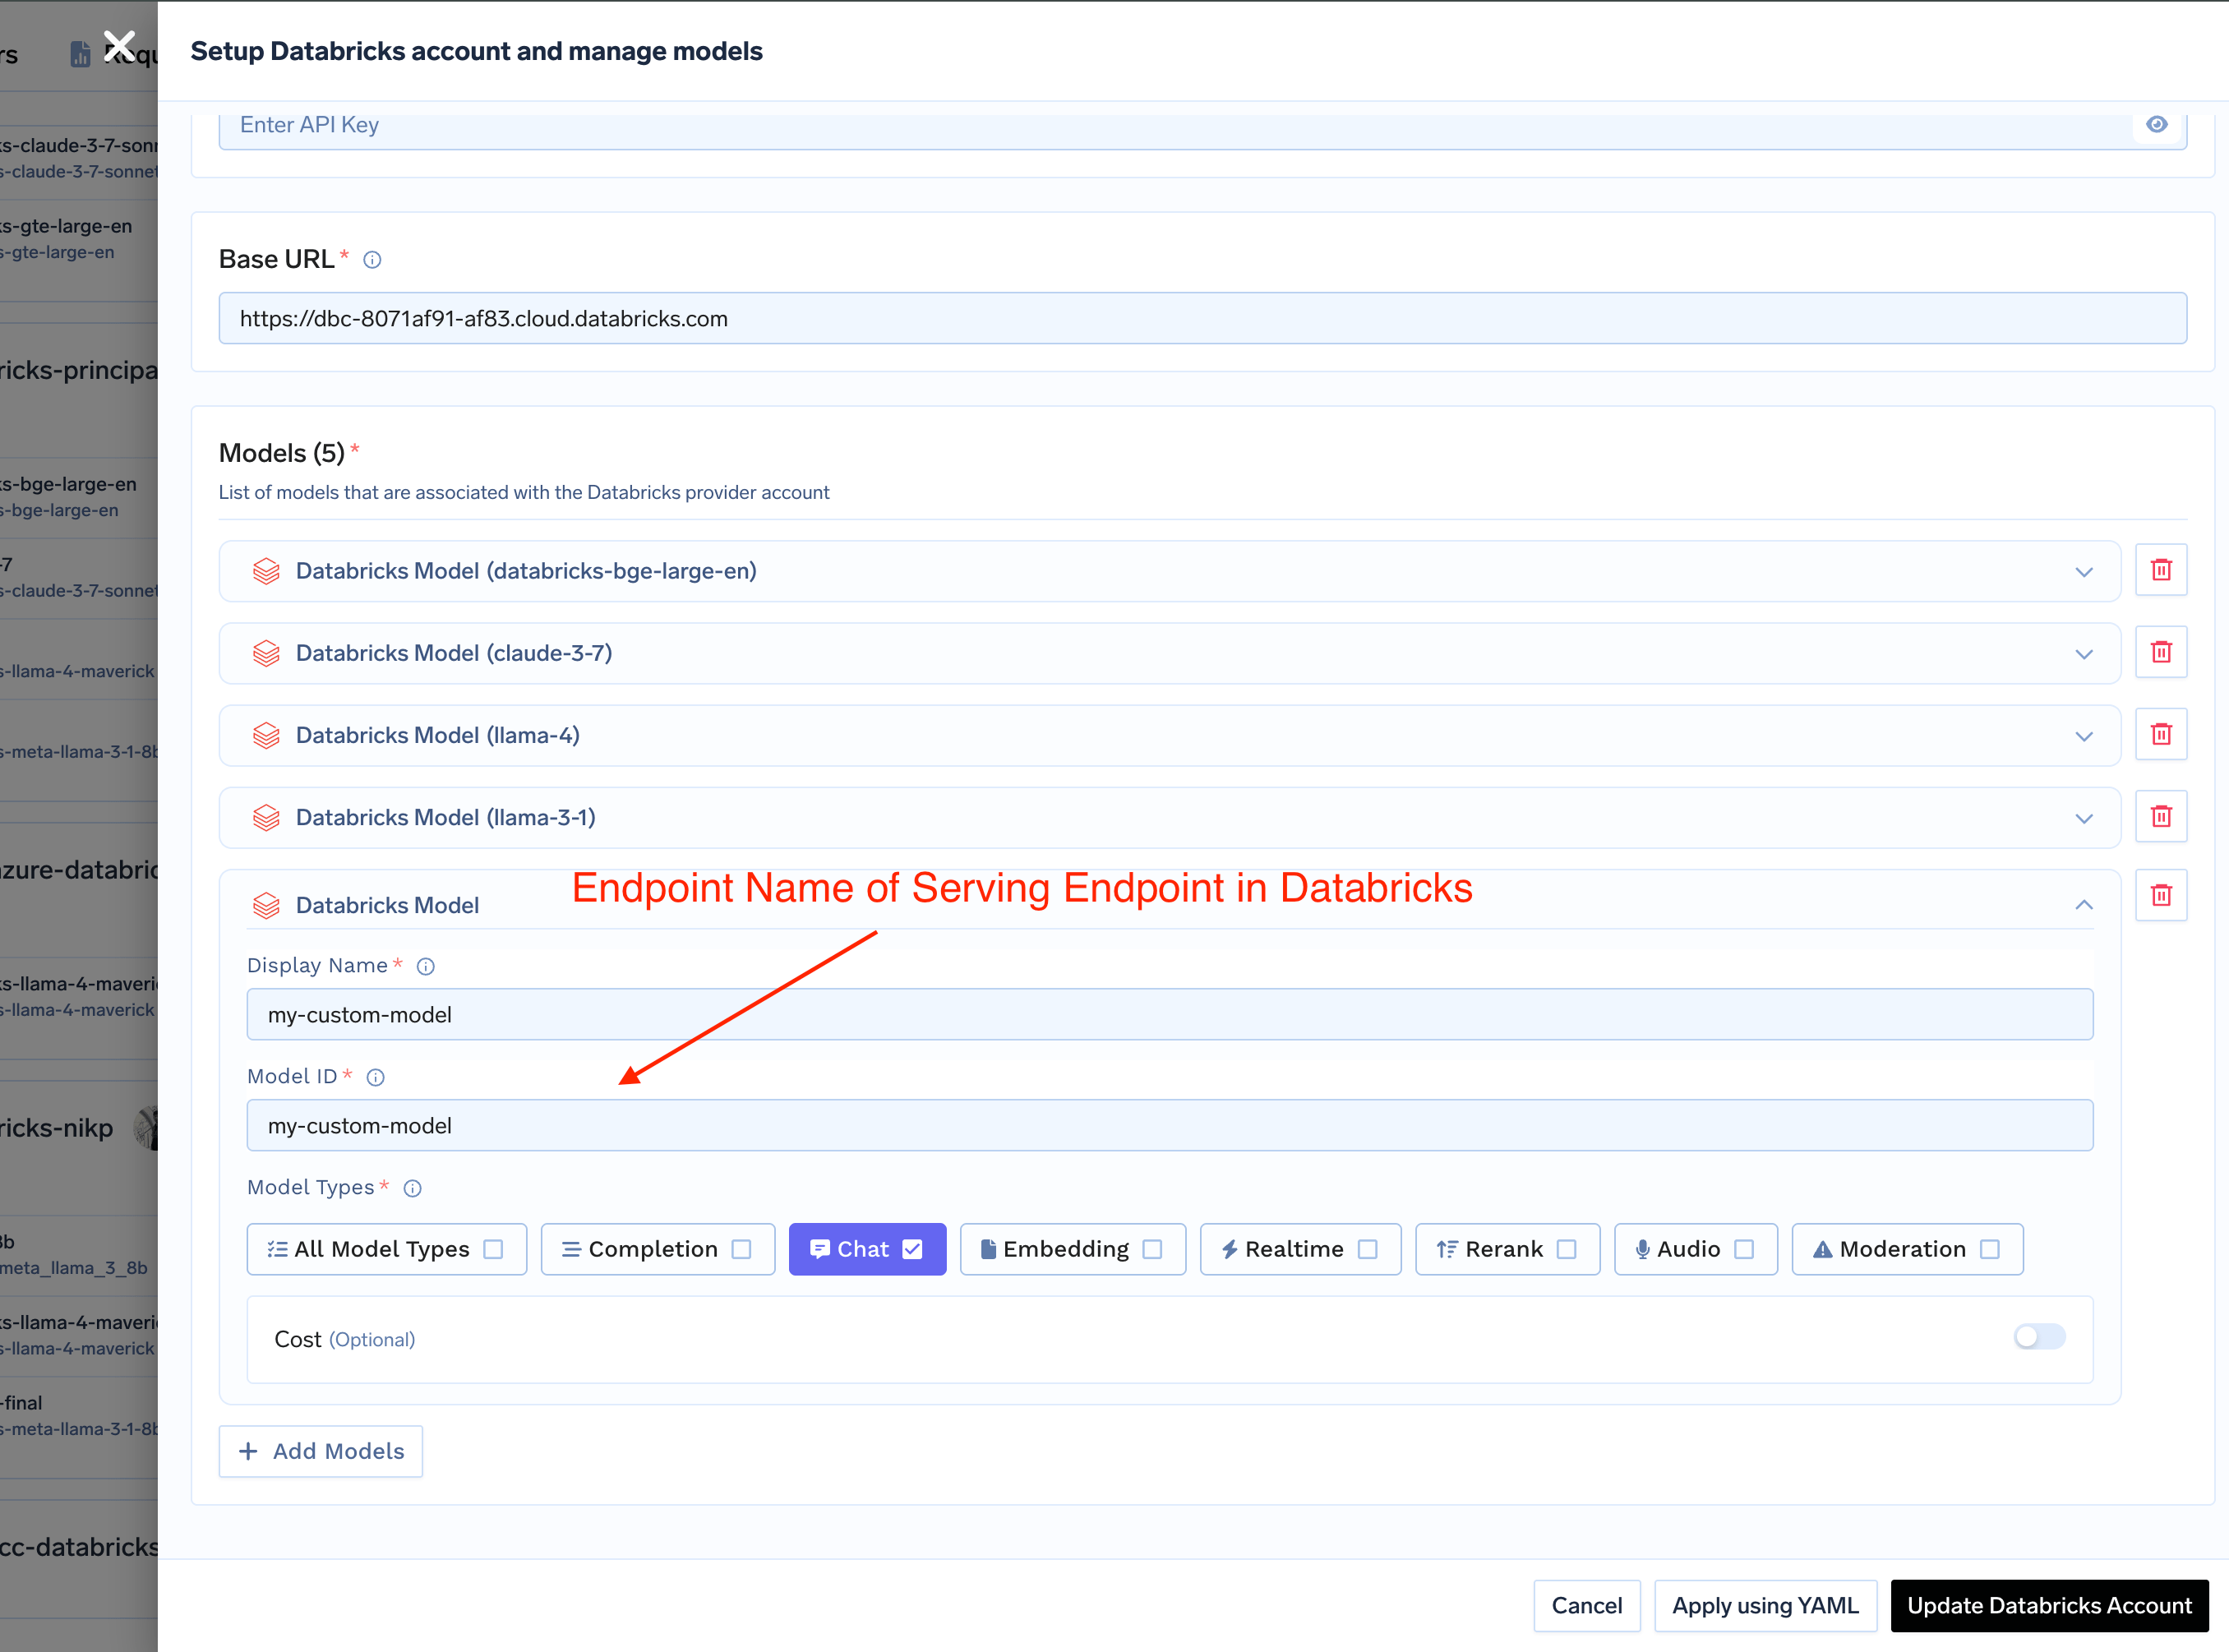
Click `+ Add Model` to add a new model configuration. The `Model ID` in TrueFoundry **must exactly match** the **serving endpoint name** in your Databricks workspace.
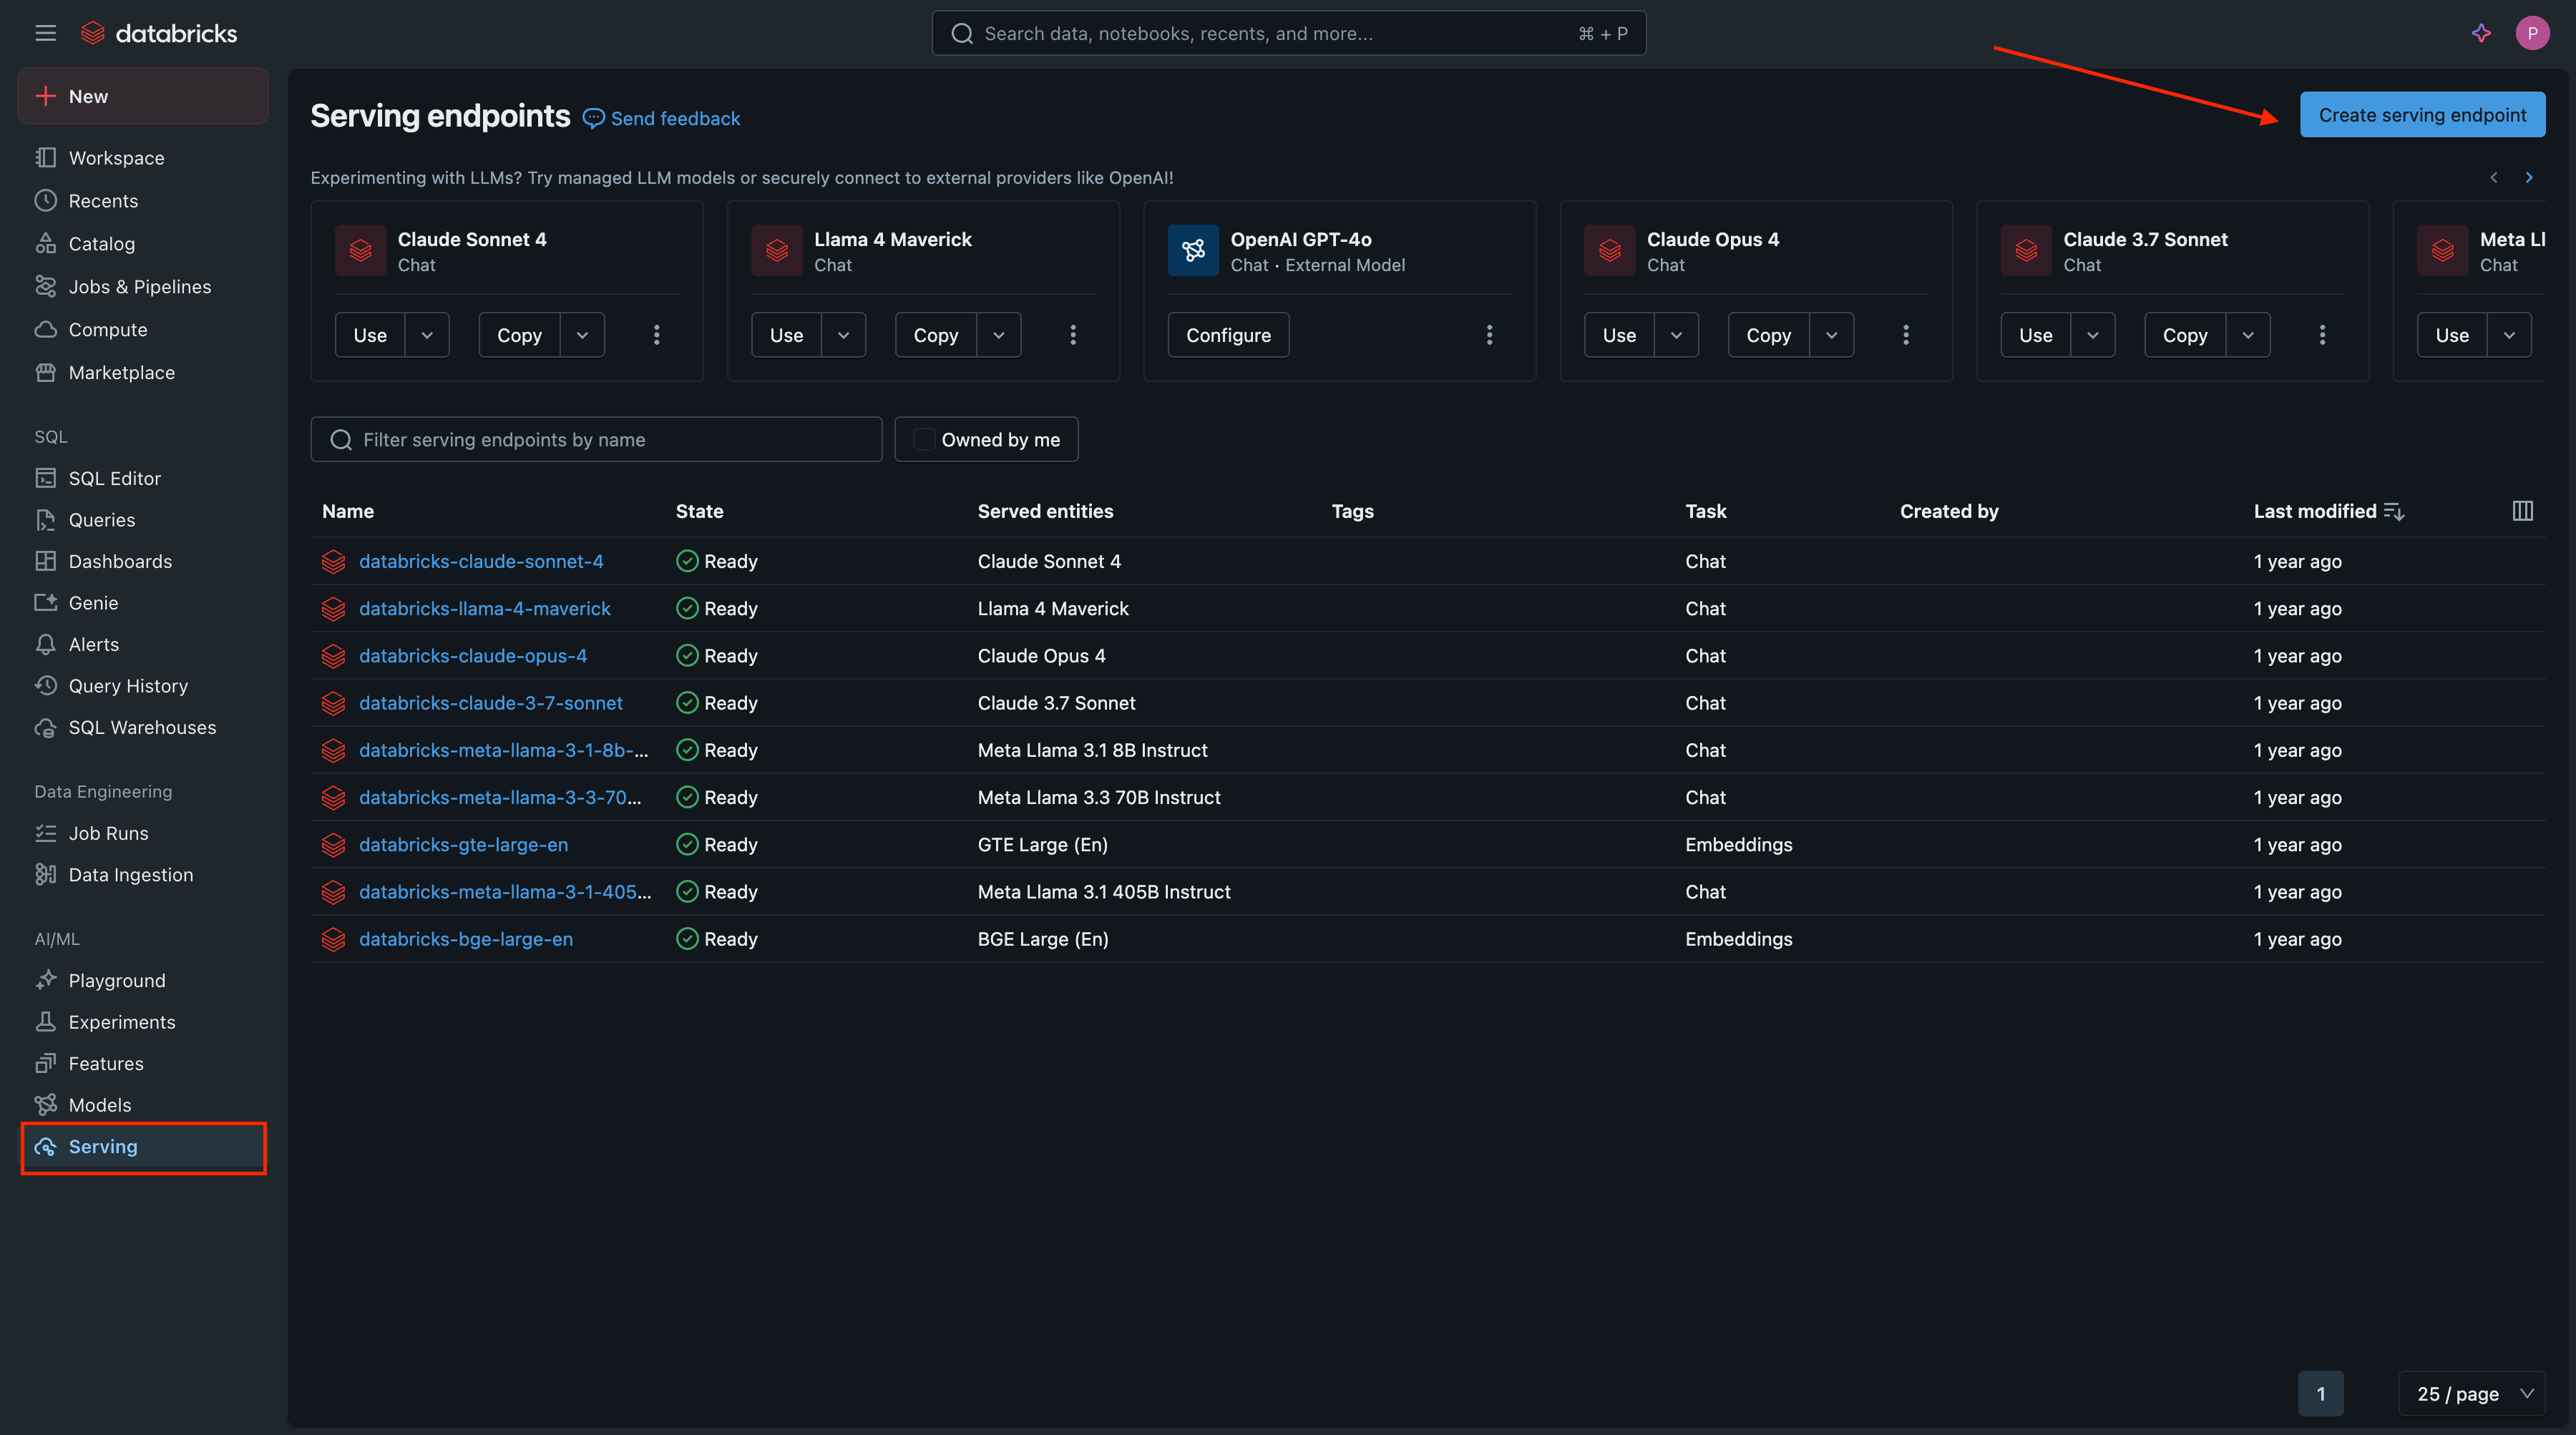
1. **Access Databricks Serving**: In your Databricks workspace, navigate to **Serving** in the left sidebar and click **Create serving endpoint**.
Finally, enter your Databricks workspace URL (e.g., `https://.databricks.com`).
Click `+ Add Model` to add a new model configuration. The `Model ID` in TrueFoundry **must exactly match** the **serving endpoint name** in your Databricks workspace.
1. **Access Databricks Serving**: In your Databricks workspace, navigate to **Serving** in the left sidebar and click **Create serving endpoint**.
 2. **Configure Endpoint**:
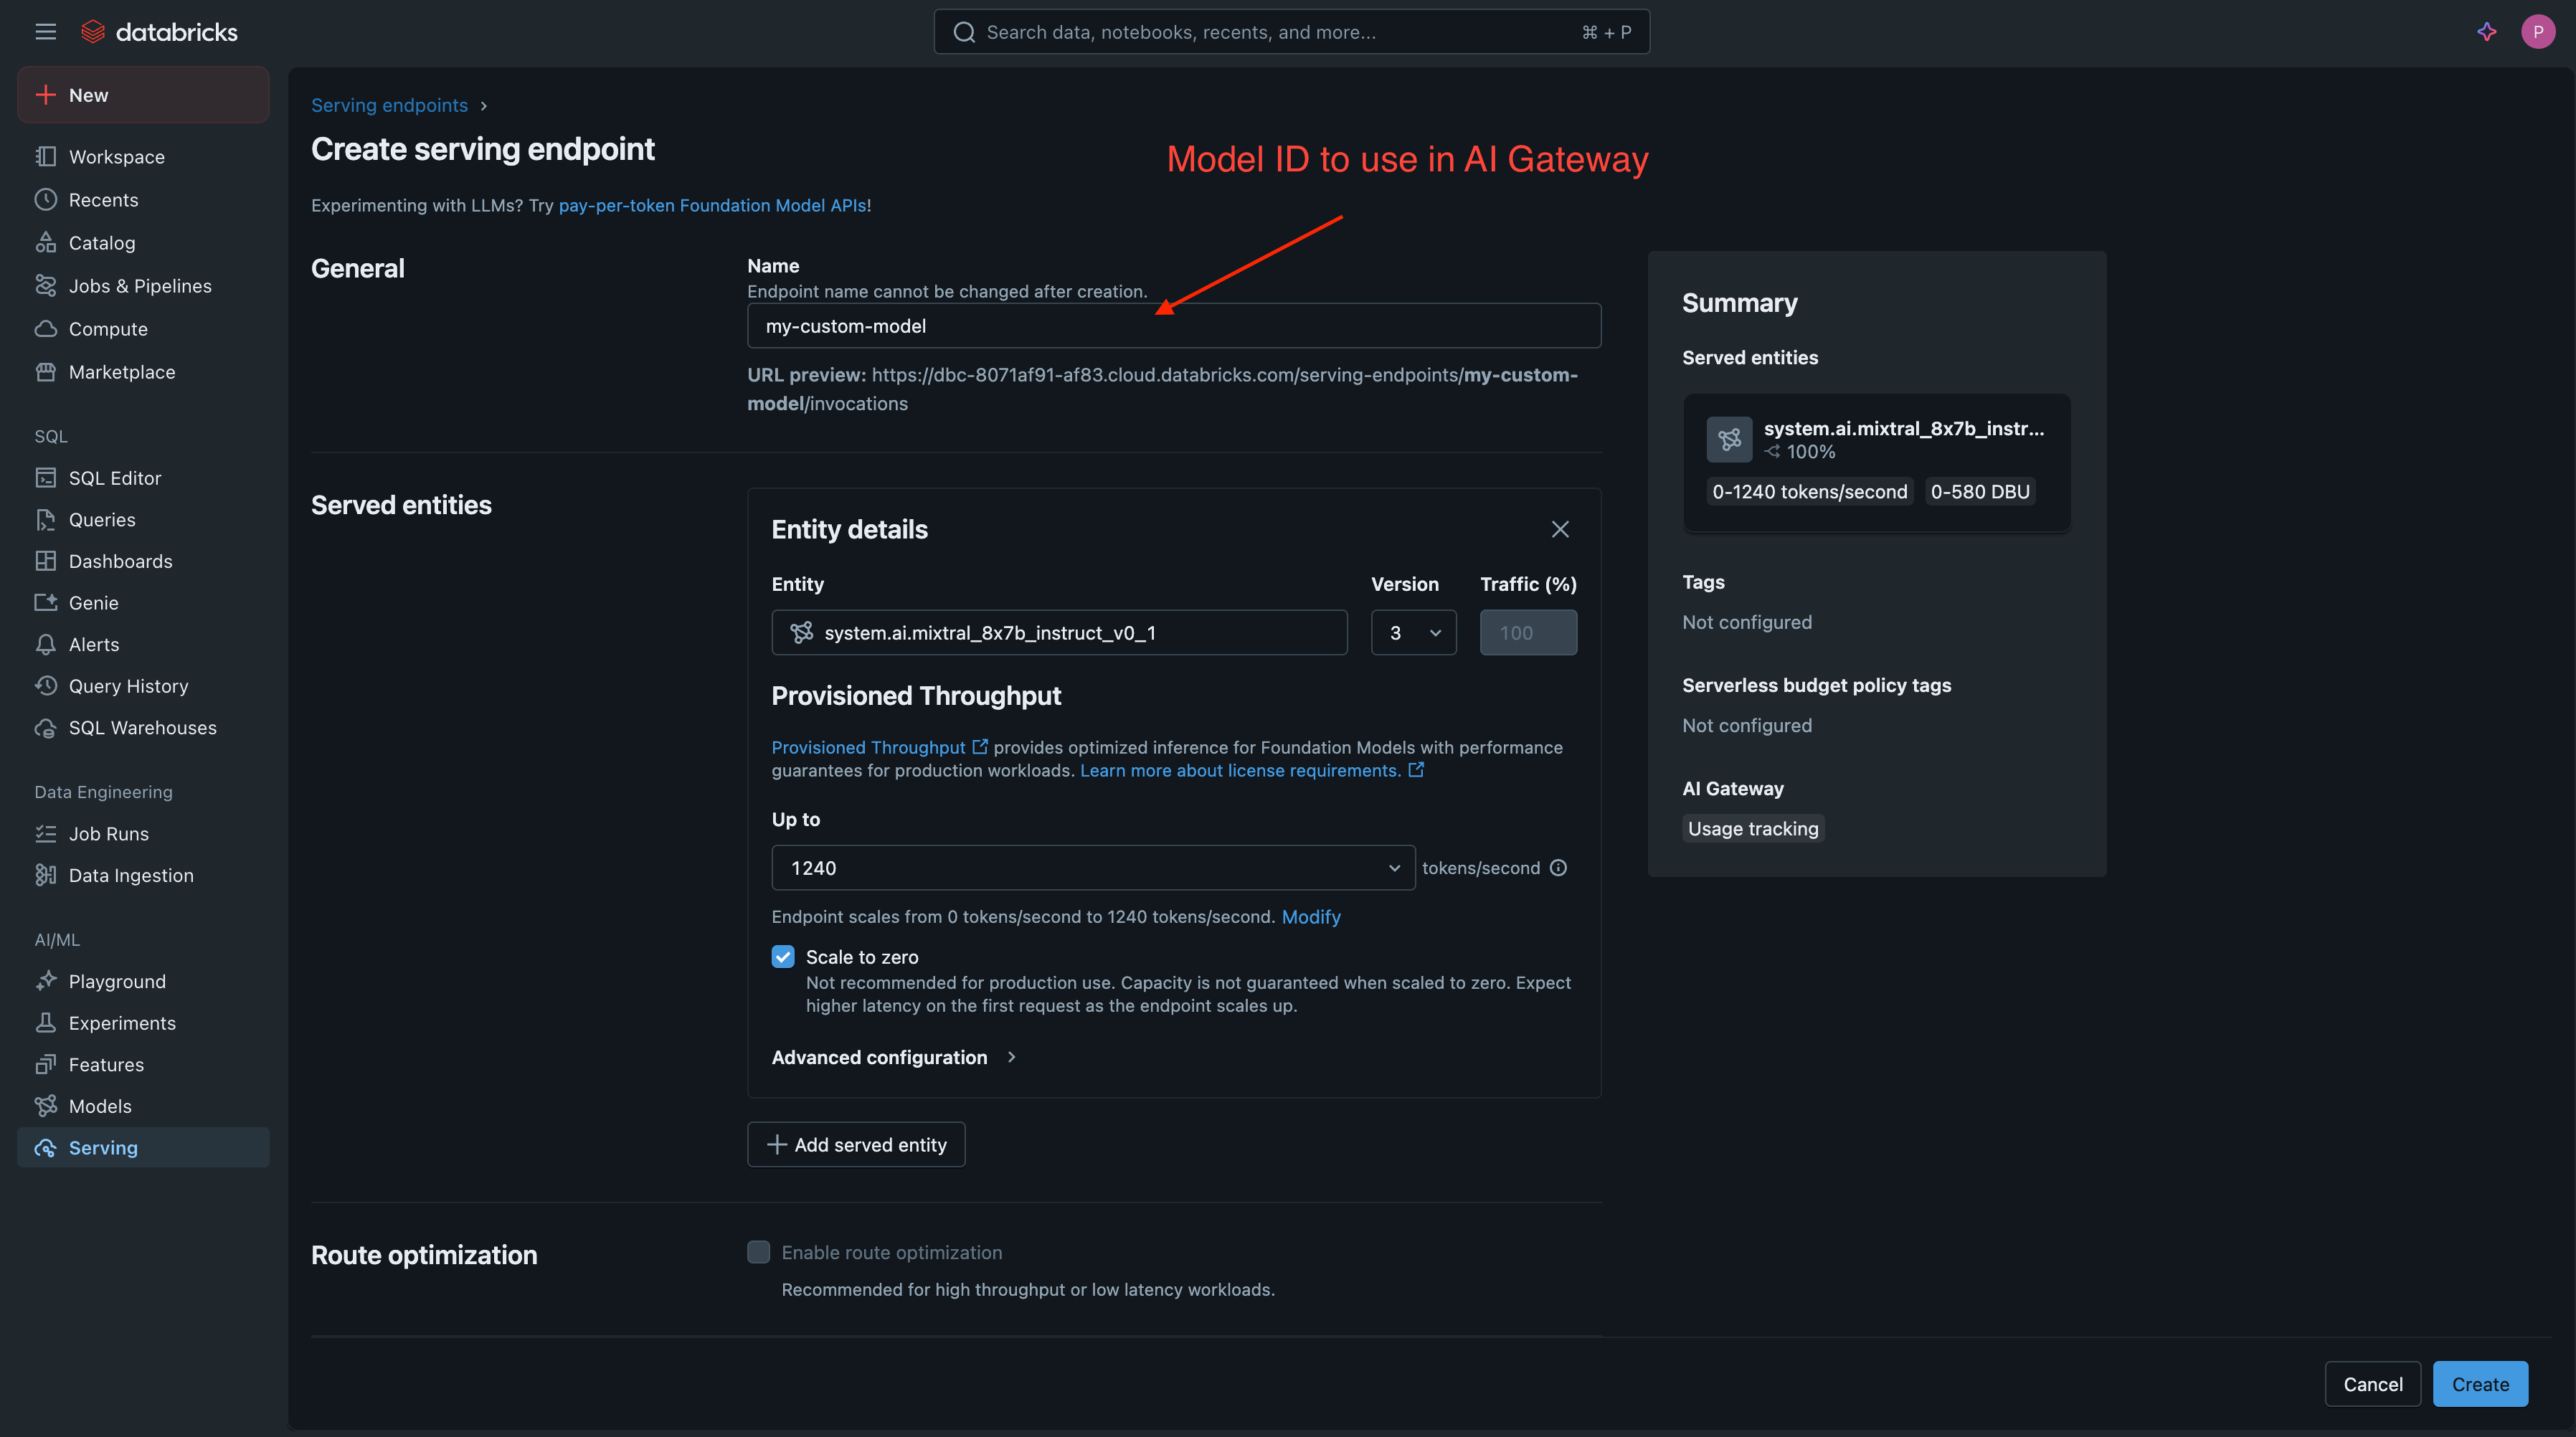
* **Endpoint name**: Choose a descriptive name. This name will be your **Model ID** in TrueFoundry.
* **Served Entity**: Choose from **Foundation Models** or your custom models.
2. **Configure Endpoint**:
* **Endpoint name**: Choose a descriptive name. This name will be your **Model ID** in TrueFoundry.
* **Served Entity**: Choose from **Foundation Models** or your custom models.
 3. **Deploy and Verify**: Click **Create** and wait for the deployment to become **Ready**.
 ### Inference
After adding the models, you can perform inference using an OpenAI-compatible API via the Playground or by integrating it with your own application.
### Inference
After adding the models, you can perform inference using an OpenAI-compatible API via the Playground or by integrating it with your own application.