> ## Documentation Index
> Fetch the complete documentation index at: https://www.truefoundry.com/llms.txt
> Use this file to discover all available pages before exploring further.
# Cost Tracking
> Set up and manage cost tracking for AI model usage with public and private pricing options.
TrueFoundry AI Gateway makes it easy to track and manage costs for all your AI model usage. This guide walks you through setting up cost tracking, viewing detailed breakdowns, and analyzing your spending.
## Setting Up Cost Tracking
To set up cost tracking for your AI models:
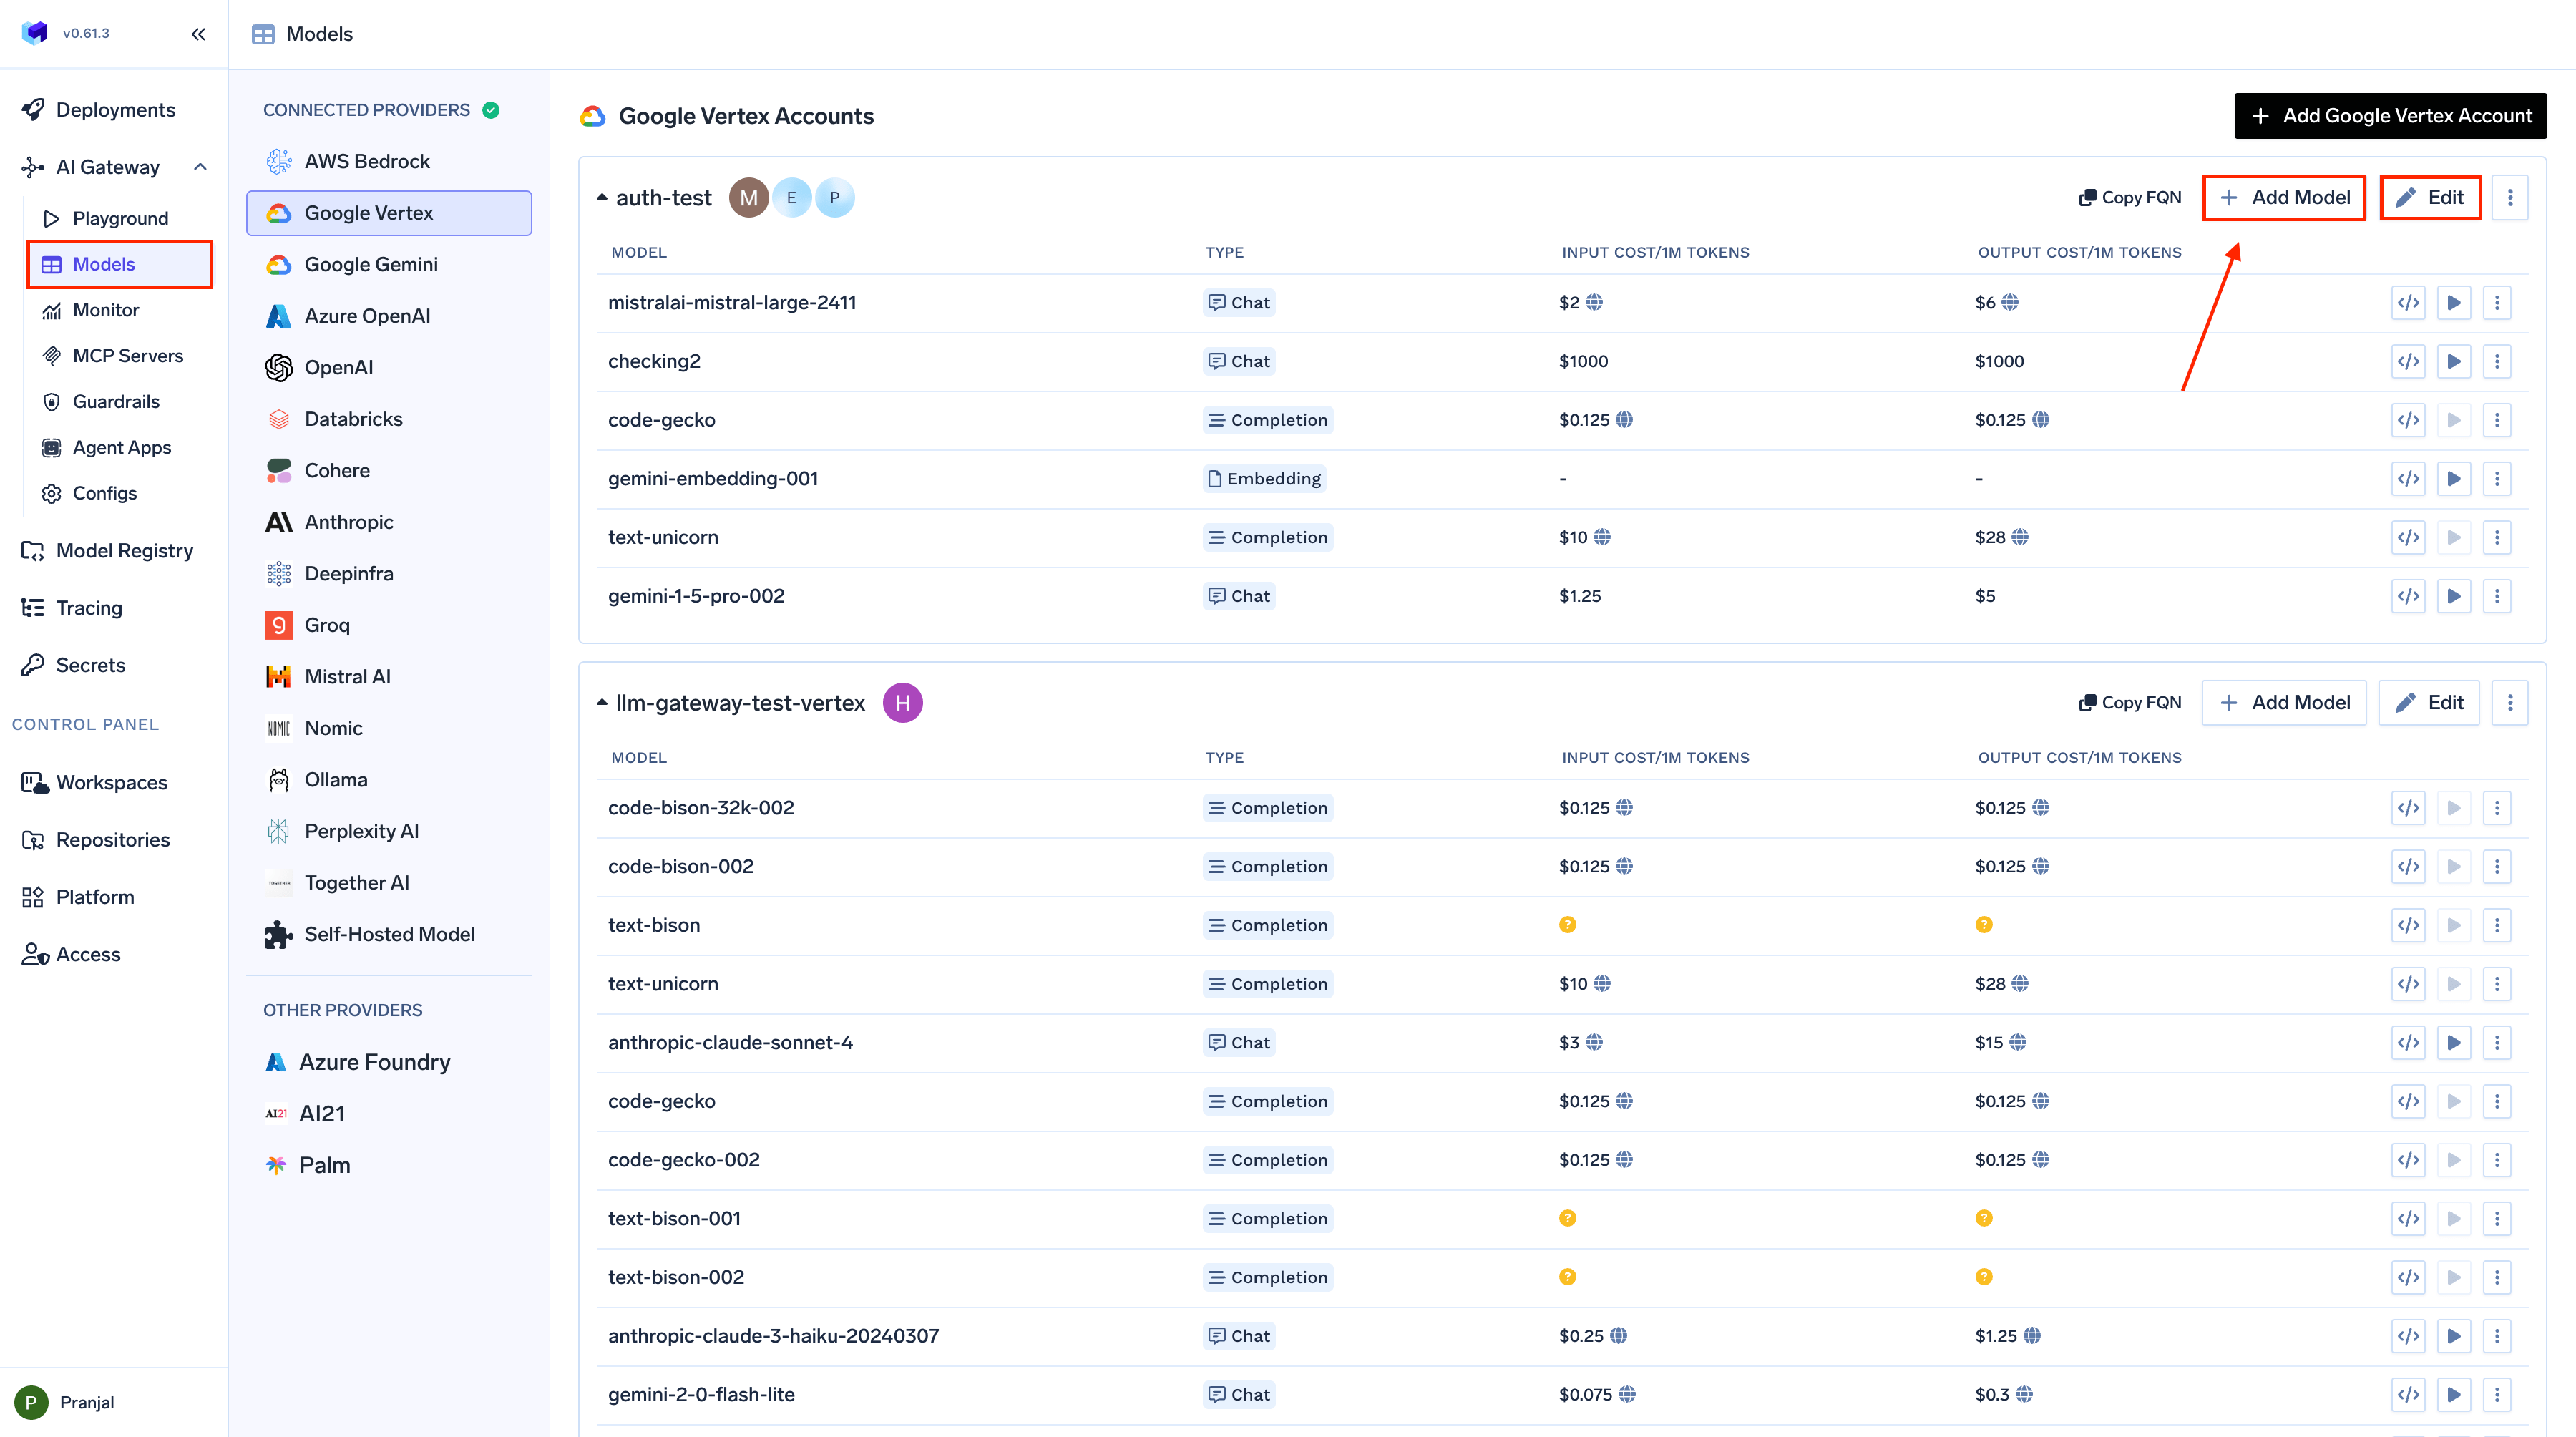
1. From the TrueFoundry dashboard, navigate to `AI Gateway` > `Models`
2. Select any Provider Account
3. Click on the `Edit` button for an existing model or `+ Add Model` to create a new one
4. In the model configuration screen, you'll find cost options
 TrueFoundry offers two simple ways to track costs:
* **Public Cost** — Uses provider-published rates from our open-source pricing catalog. Cost per token is auto-populated and updated; ideal for most popular models.
* **Private Cost** — Lets you set custom pricing for models without public rates, custom contracts, or fine-tuned models.
TrueFoundry offers two simple ways to track costs:
* **Public Cost** — Uses provider-published rates from our open-source pricing catalog. Cost per token is auto-populated and updated; ideal for most popular models.
* **Private Cost** — Lets you set custom pricing for models without public rates, custom contracts, or fine-tuned models.
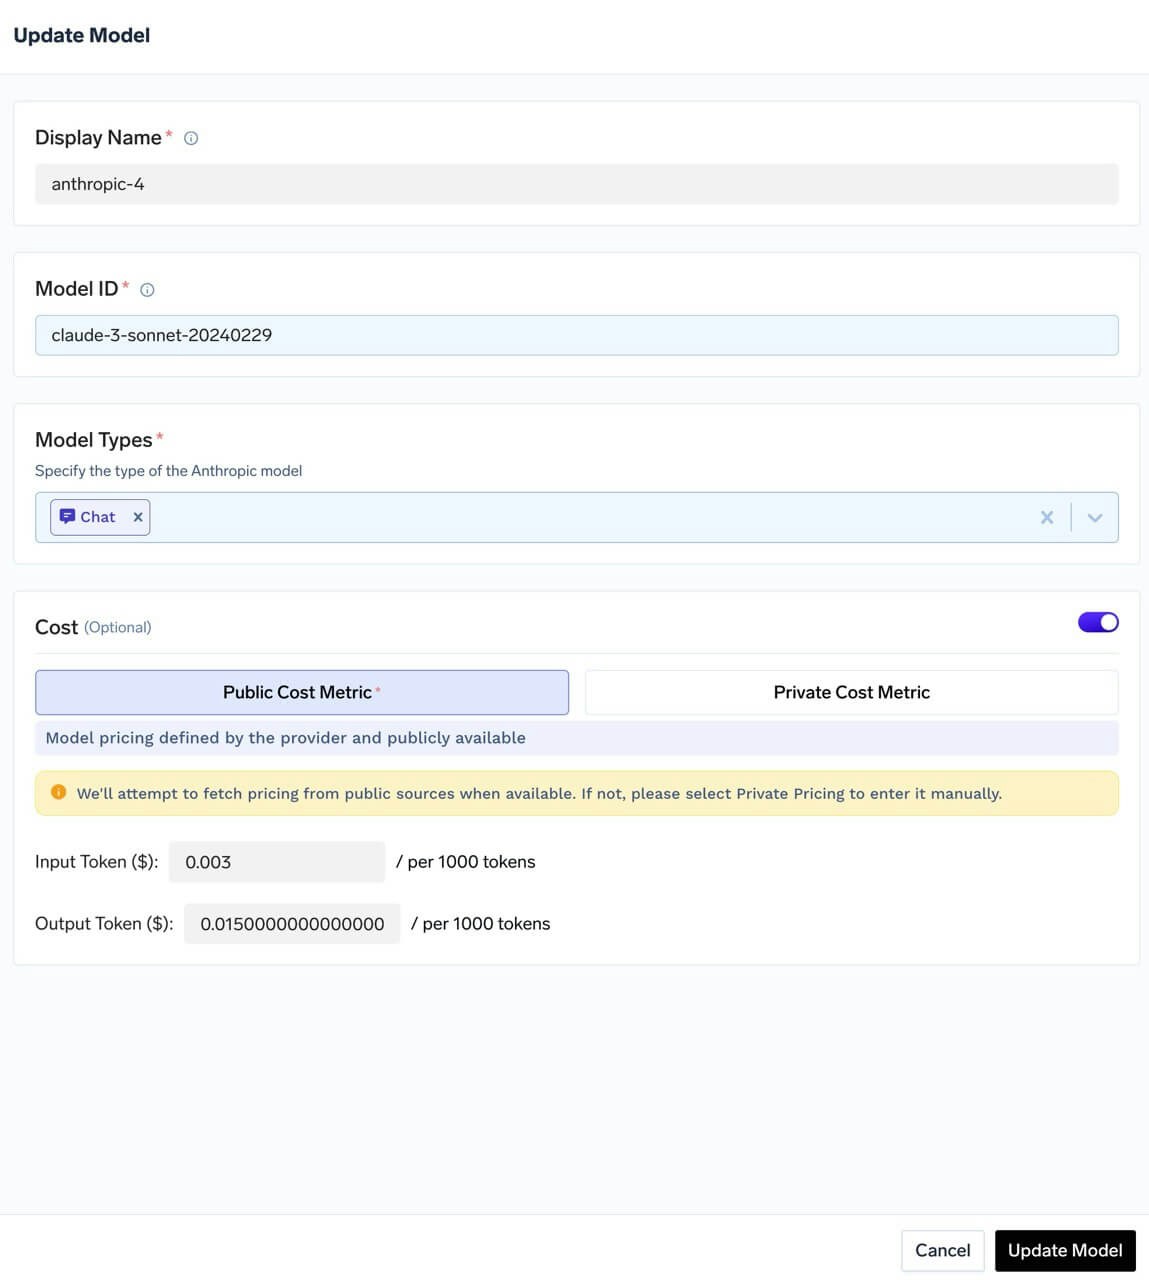 Public cost uses pre-configured pricing based on the provider's published rates:
* Automatically populated cost per token
* Continuously updated using provider-published rates
* Available for most popular models
TrueFoundry maintains an open-source pricing catalog in the [truefoundry/models GitHub repository](https://github.com/truefoundry/models). This repository acts as the pricing database used by AI Gateway for public cost tracking.
The same pricing data is also viewable on the public [TrueFoundry Models dashboard](https://www.truefoundry.com/models), so you can inspect model pricing outside of your workspace as well.
When AI Gateway calculates cost using public pricing, it considers:
* **Region-wise pricing**: If a model has different rates by deployment region, the matching regional rate is used. For example, AWS Bedrock’s [Nova Lite](https://github.com/truefoundry/models/blob/main/providers/aws-bedrock/us.amazon.nova-lite-v1:0.yaml) uses different input/output costs per token in `us-west-2`, `us-west-1`, `eu-central-1`, and `eu-west-1`.
* **Tiered pricing**: If a provider defines usage tiers (e.g. different rates at different volume thresholds), the applicable tier is selected. For example, [Gemini 2.5 Pro](https://github.com/truefoundry/models/blob/main/providers/google-gemini/gemini-2.5-pro.yaml) has base rates and higher rates from 200K tokens; [Gemini 1.5 Flash](https://github.com/truefoundry/models/blob/main/providers/google-gemini/gemini-1.5-flash.yaml) has tiers starting at 128K tokens.
This helps ensure tracked costs align more closely with how providers bill in real-world scenarios.
Public cost uses pre-configured pricing based on the provider's published rates:
* Automatically populated cost per token
* Continuously updated using provider-published rates
* Available for most popular models
TrueFoundry maintains an open-source pricing catalog in the [truefoundry/models GitHub repository](https://github.com/truefoundry/models). This repository acts as the pricing database used by AI Gateway for public cost tracking.
The same pricing data is also viewable on the public [TrueFoundry Models dashboard](https://www.truefoundry.com/models), so you can inspect model pricing outside of your workspace as well.
When AI Gateway calculates cost using public pricing, it considers:
* **Region-wise pricing**: If a model has different rates by deployment region, the matching regional rate is used. For example, AWS Bedrock’s [Nova Lite](https://github.com/truefoundry/models/blob/main/providers/aws-bedrock/us.amazon.nova-lite-v1:0.yaml) uses different input/output costs per token in `us-west-2`, `us-west-1`, `eu-central-1`, and `eu-west-1`.
* **Tiered pricing**: If a provider defines usage tiers (e.g. different rates at different volume thresholds), the applicable tier is selected. For example, [Gemini 2.5 Pro](https://github.com/truefoundry/models/blob/main/providers/google-gemini/gemini-2.5-pro.yaml) has base rates and higher rates from 200K tokens; [Gemini 1.5 Flash](https://github.com/truefoundry/models/blob/main/providers/google-gemini/gemini-1.5-flash.yaml) has tiers starting at 128K tokens.
This helps ensure tracked costs align more closely with how providers bill in real-world scenarios.
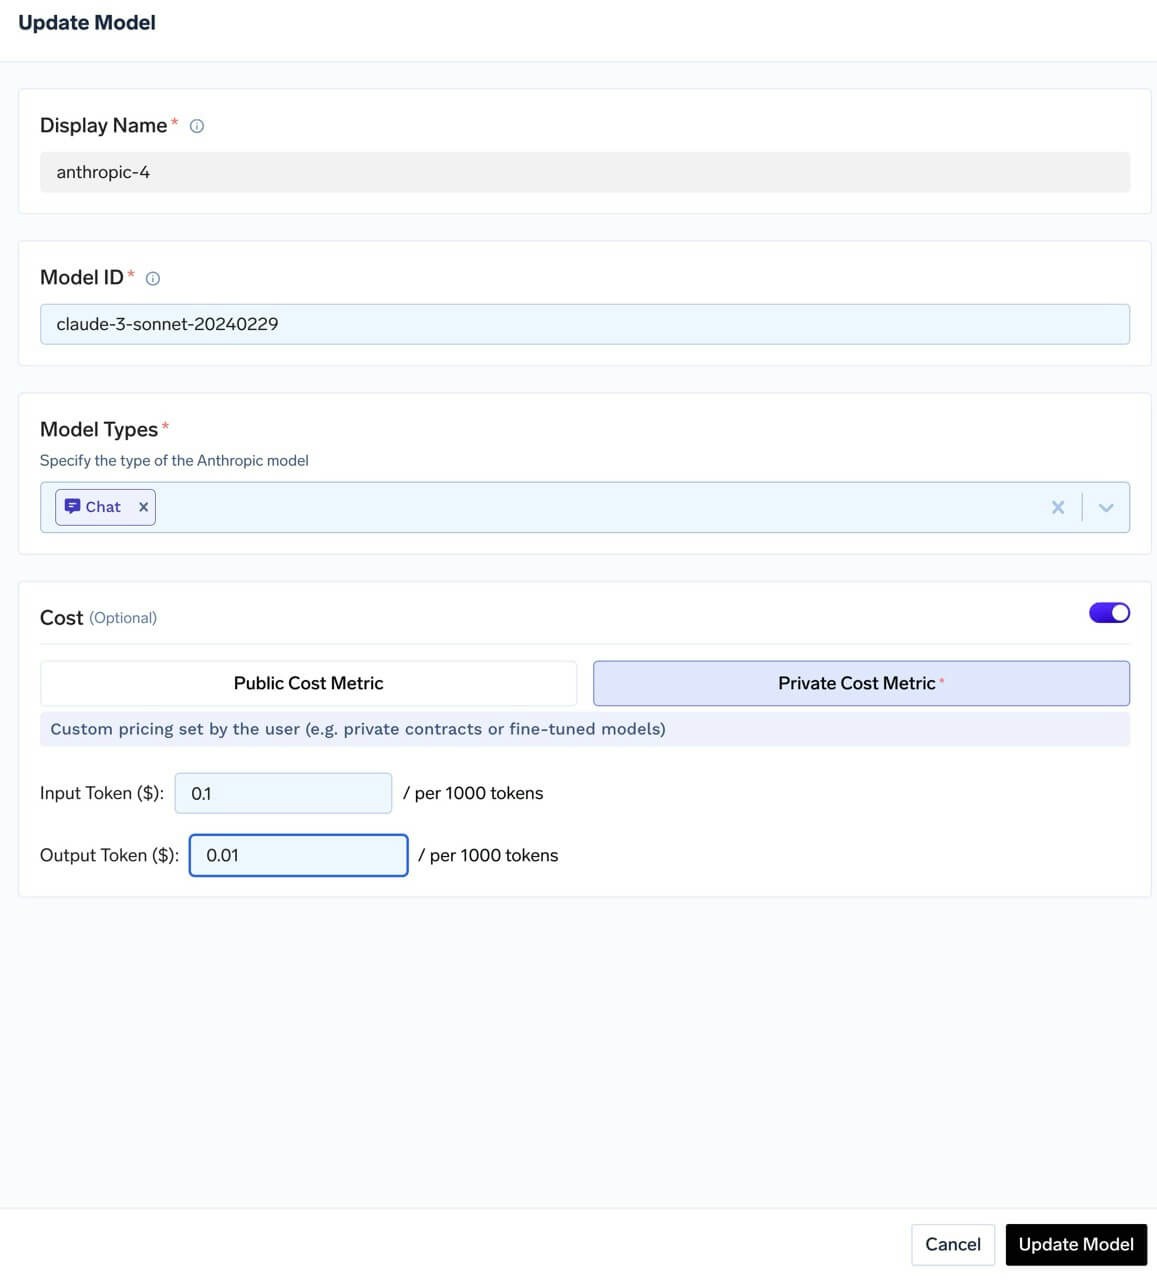 Private cost lets you set custom pricing for:
* Models without public pricing
* Custom pricing contracts
* Fine-tuned models
## Viewing Your Costs
Once set up, you can easily view and analyze your costs in the Metrics section. Go to `AI Gateway` > `Metrics`.
Private cost lets you set custom pricing for:
* Models without public pricing
* Custom pricing contracts
* Fine-tuned models
## Viewing Your Costs
Once set up, you can easily view and analyze your costs in the Metrics section. Go to `AI Gateway` > `Metrics`.
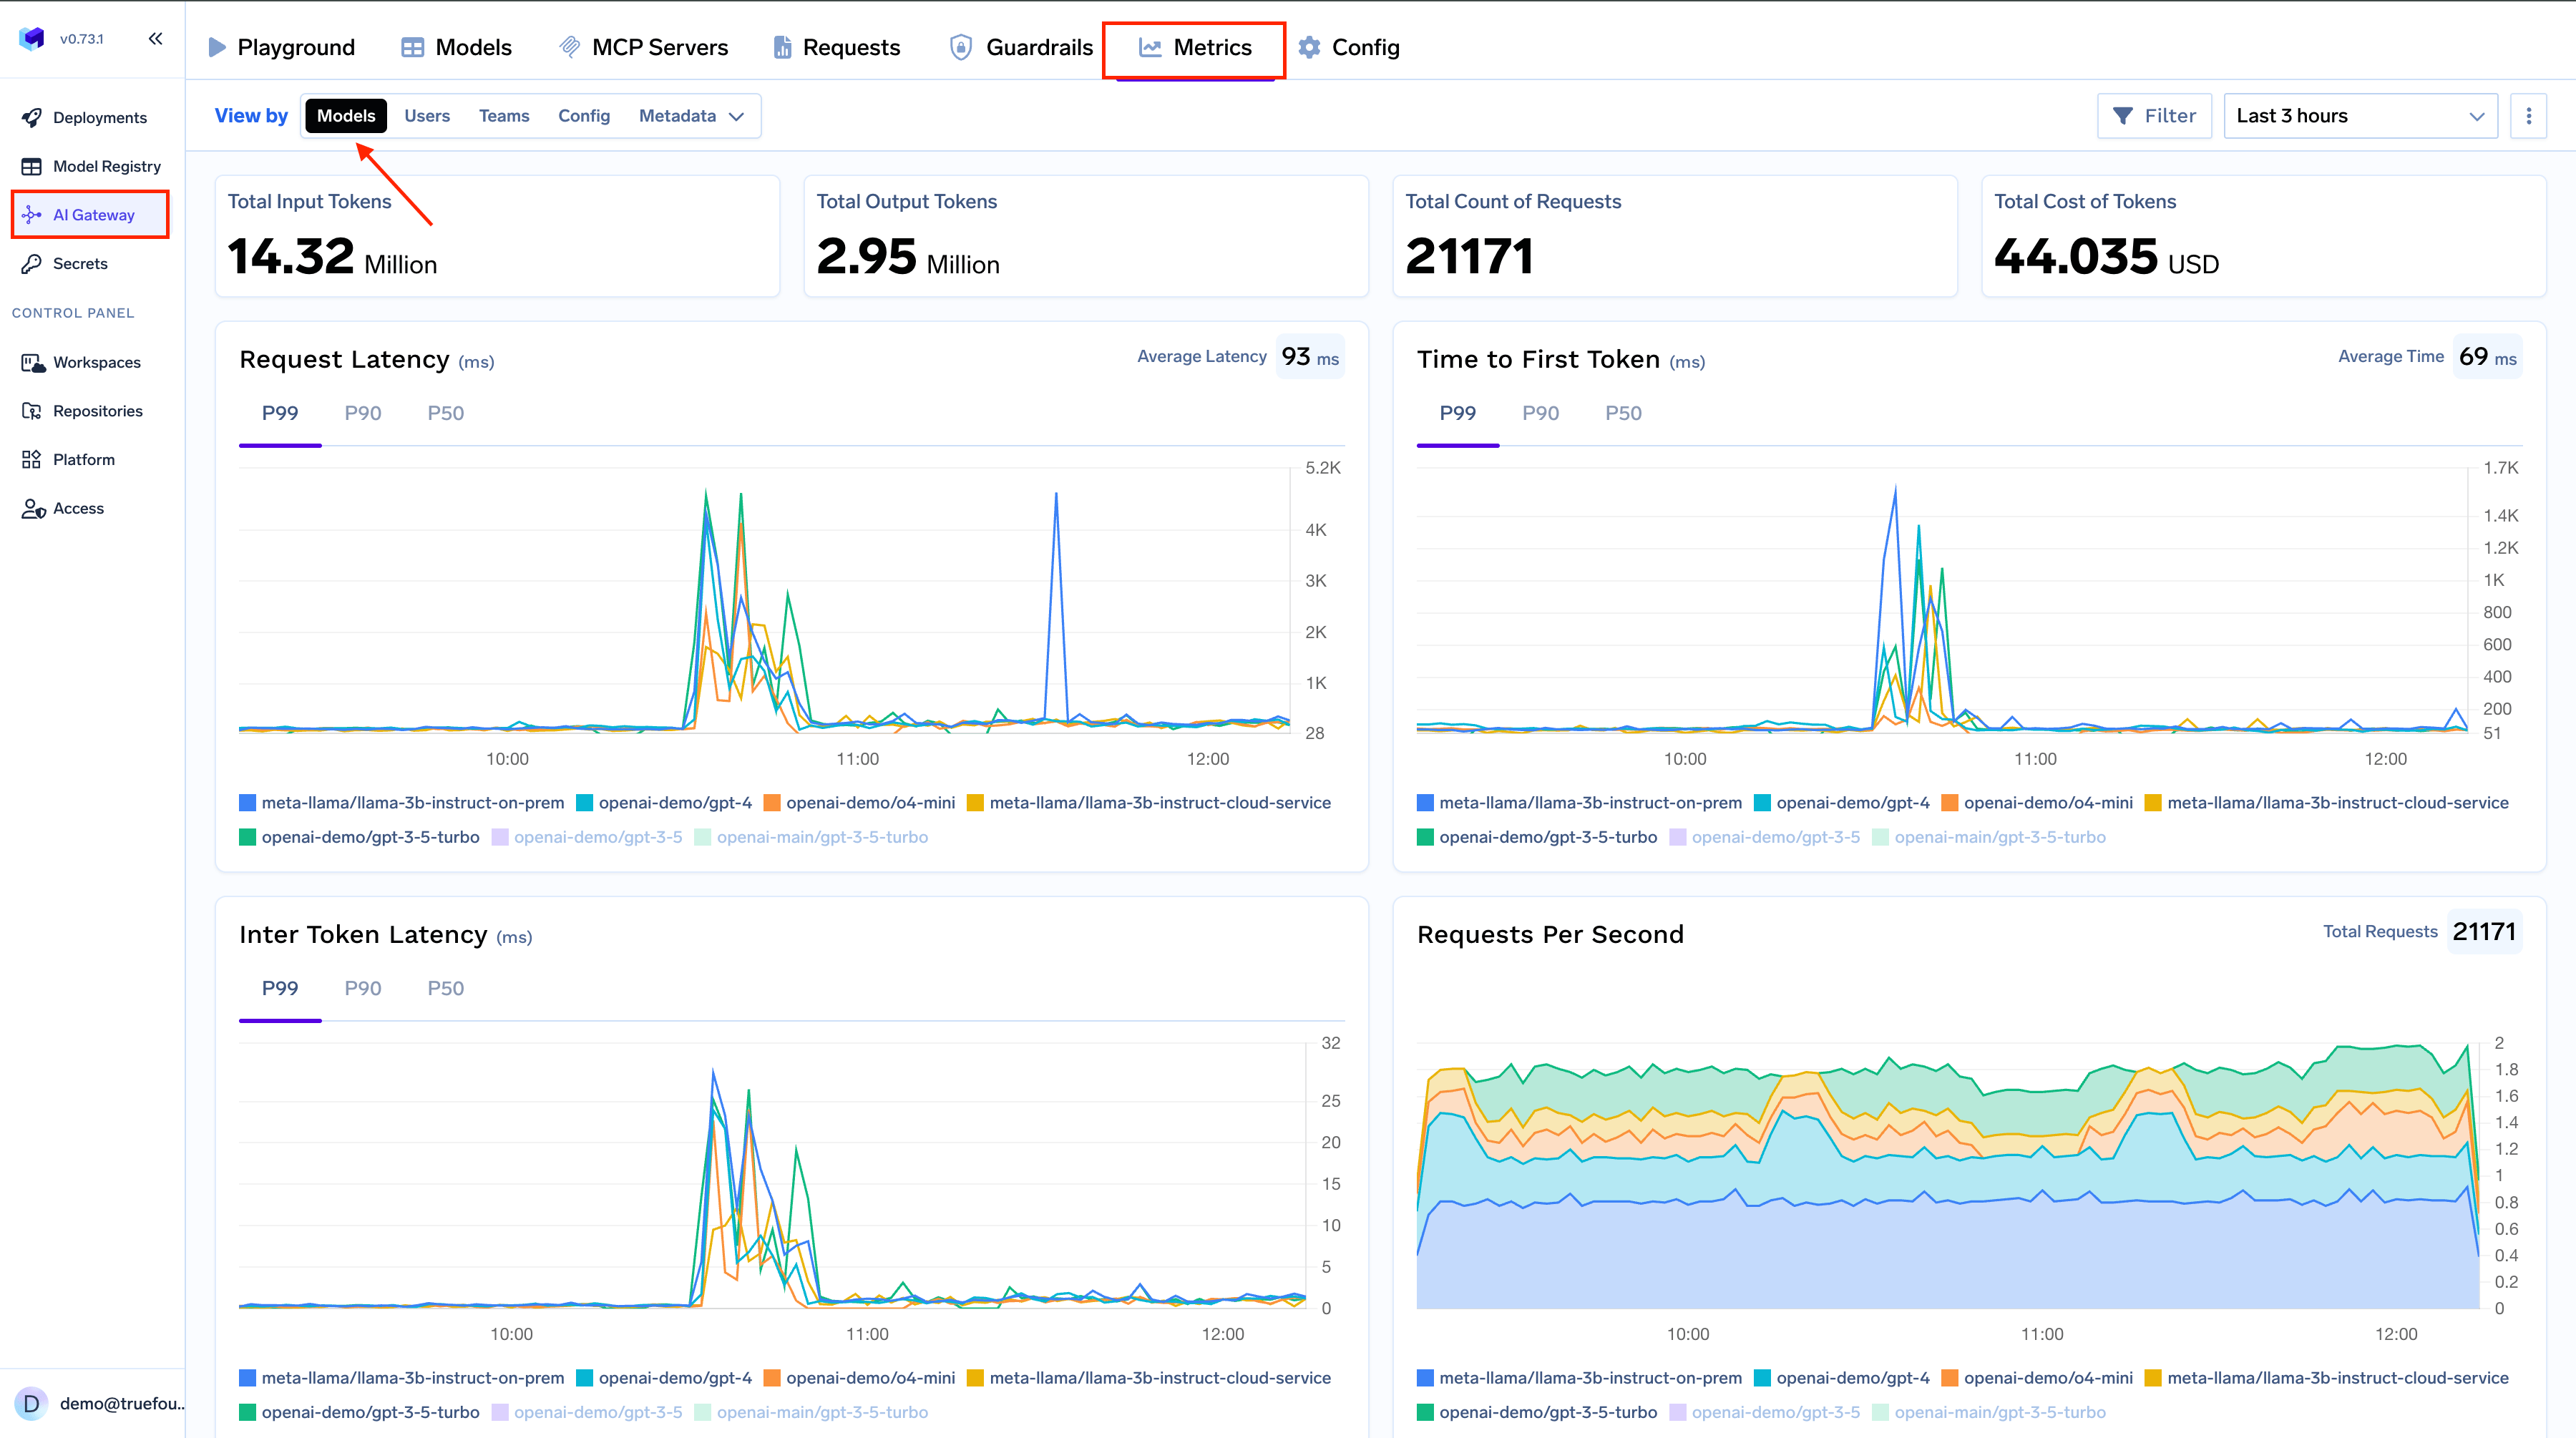 The Metrics page shows your total costs, usage trends, and provides interactive filters to analyze your spending patterns.
## Cost Breakdowns
View your costs from different perspectives with a single click:
The Metrics page shows your total costs, usage trends, and provides interactive filters to analyze your spending patterns.
## Cost Breakdowns
View your costs from different perspectives with a single click:
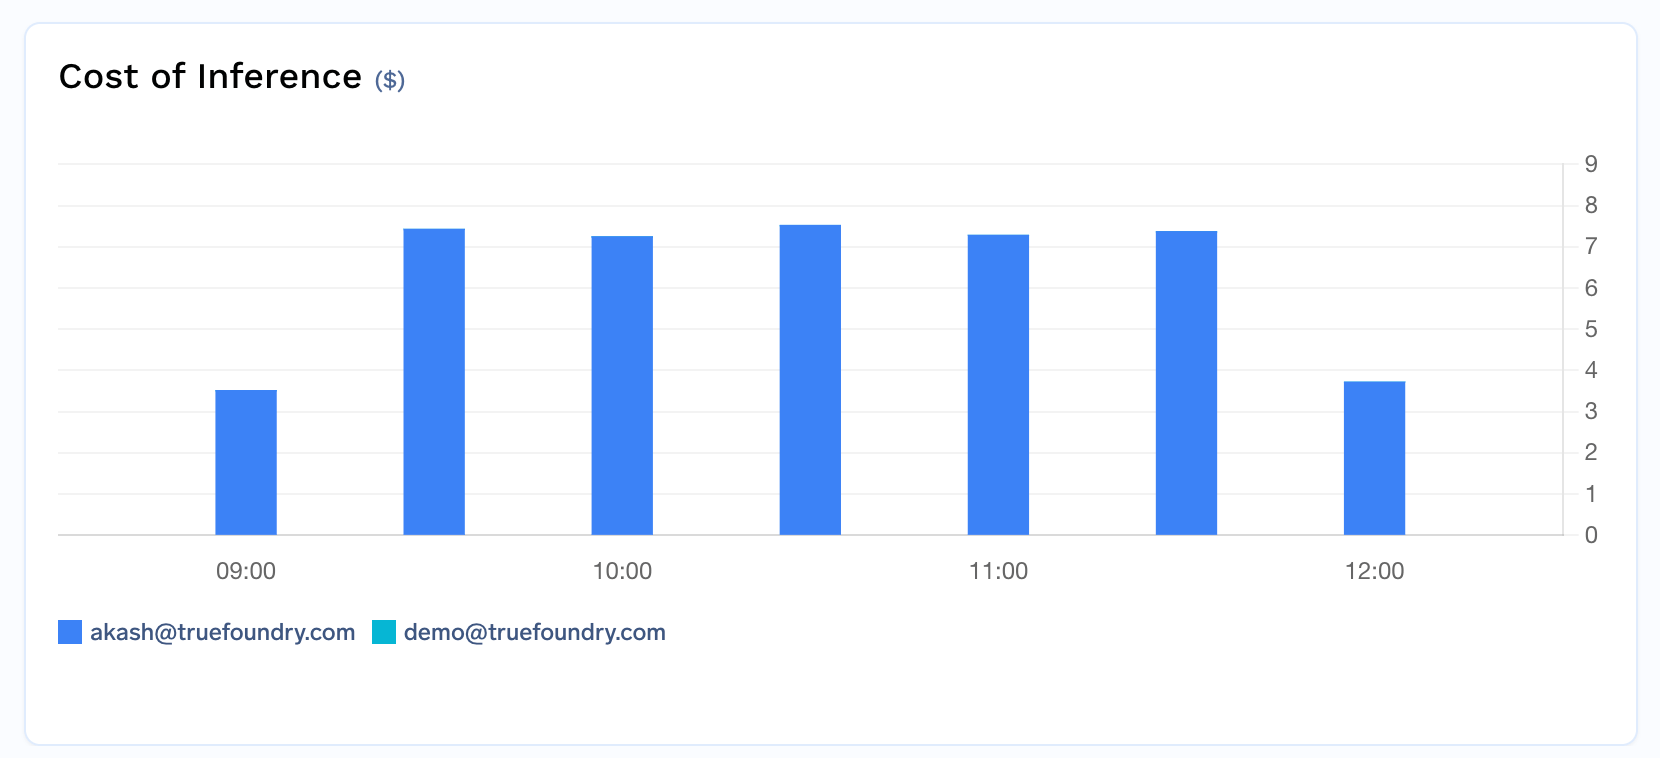
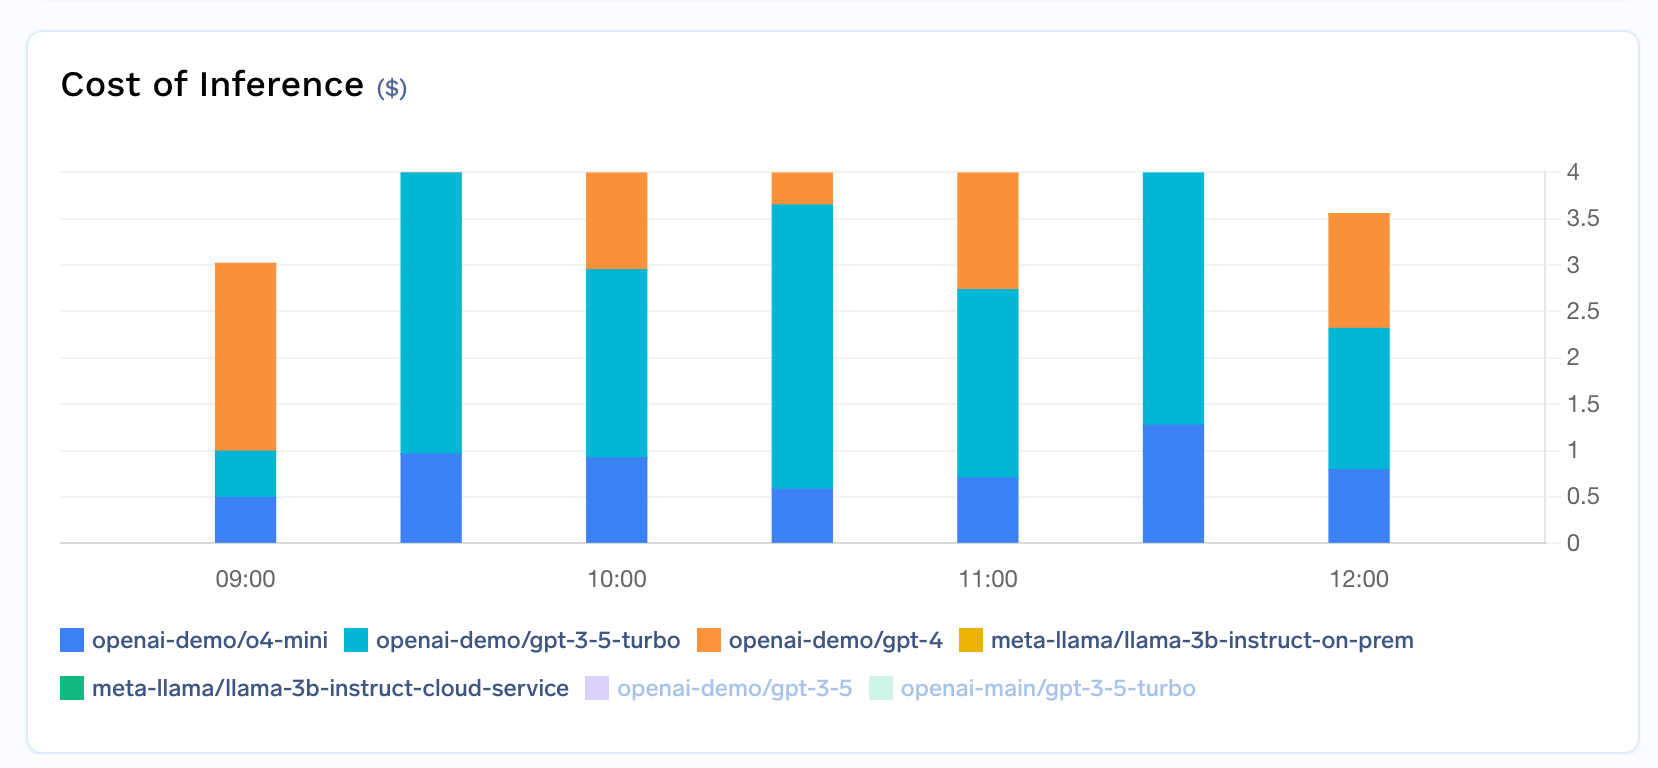
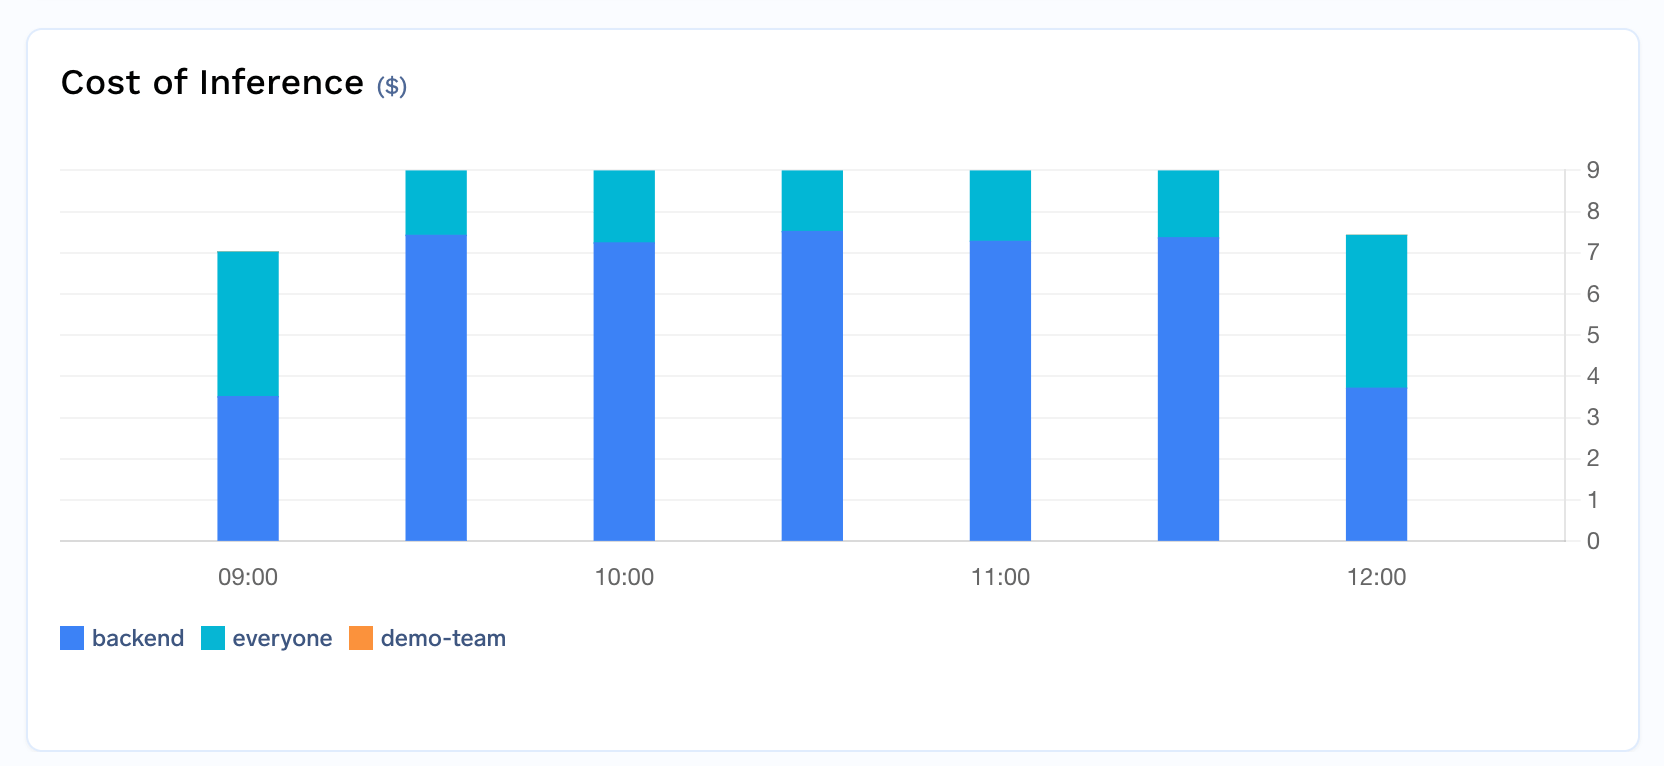 Each view helps you understand different aspects of your AI usage:
* **User view**: Identify high-usage individuals
* **Model view**: See which models cost the most
* **Team view**: Track department or project spending
## Cost Attribution with Metadata
Beyond the built-in user, model, and team breakdowns, you can use [custom metadata](/docs/ai-gateway/request-headers#custom-metadata) to build fine-grained cost attribution tailored to your organization's structure — by application, environment, customer, cost center, or any other dimension.
### Automatic Metadata for Cost Attribution
TrueFoundry can automatically inject metadata into requests, enabling cost attribution without any client-side changes:
Assign tags to your [virtual accounts](/docs/platform/virtual-account-management) (e.g., `application`, `environment`, `cost_center`). These tags are automatically injected as metadata on every request made with that account's token, giving you per-application and per-environment cost breakdowns without modifying any code.
When a [PAT is associated with a team](/docs/generating-truefoundry-api-keys#personal-access-tokens-pats), and that team has tags configured, those tags are automatically added to every request. This provides automatic team-level cost attribution for individual users. Admins can [mandate team selection](/docs/generating-truefoundry-api-keys#admin-controls) to ensure every PAT is tied to a team.
Use the [Metadata Validation](/docs/ai-gateway/metadata-validation) guardrail to require specific metadata keys on every request. For example, mandate that every request includes a `cost_center` or `project_id` key — requests missing required metadata are rejected before reaching the model, ensuring complete cost attribution across your organization.
### Viewing Costs by Metadata
Once metadata is attached to requests (either manually or via automatic injection), you can filter and group cost data by any metadata key in the Metrics dashboard. For example:
* Group by `application` to see cost per service
* Group by `environment` to compare staging vs. production spend
* Group by `customer_id` to track per-customer costs for chargeback
When [exporting cost data](#exporting-cost-data), you can include metadata keys in the `groupBy` fields to get detailed breakdowns in your exported reports.
## Exporting Cost Data
Each view helps you understand different aspects of your AI usage:
* **User view**: Identify high-usage individuals
* **Model view**: See which models cost the most
* **Team view**: Track department or project spending
## Cost Attribution with Metadata
Beyond the built-in user, model, and team breakdowns, you can use [custom metadata](/docs/ai-gateway/request-headers#custom-metadata) to build fine-grained cost attribution tailored to your organization's structure — by application, environment, customer, cost center, or any other dimension.
### Automatic Metadata for Cost Attribution
TrueFoundry can automatically inject metadata into requests, enabling cost attribution without any client-side changes:
Assign tags to your [virtual accounts](/docs/platform/virtual-account-management) (e.g., `application`, `environment`, `cost_center`). These tags are automatically injected as metadata on every request made with that account's token, giving you per-application and per-environment cost breakdowns without modifying any code.
When a [PAT is associated with a team](/docs/generating-truefoundry-api-keys#personal-access-tokens-pats), and that team has tags configured, those tags are automatically added to every request. This provides automatic team-level cost attribution for individual users. Admins can [mandate team selection](/docs/generating-truefoundry-api-keys#admin-controls) to ensure every PAT is tied to a team.
Use the [Metadata Validation](/docs/ai-gateway/metadata-validation) guardrail to require specific metadata keys on every request. For example, mandate that every request includes a `cost_center` or `project_id` key — requests missing required metadata are rejected before reaching the model, ensuring complete cost attribution across your organization.
### Viewing Costs by Metadata
Once metadata is attached to requests (either manually or via automatic injection), you can filter and group cost data by any metadata key in the Metrics dashboard. For example:
* Group by `application` to see cost per service
* Group by `environment` to compare staging vs. production spend
* Group by `customer_id` to track per-customer costs for chargeback
When [exporting cost data](#exporting-cost-data), you can include metadata keys in the `groupBy` fields to get detailed breakdowns in your exported reports.
## Exporting Cost Data
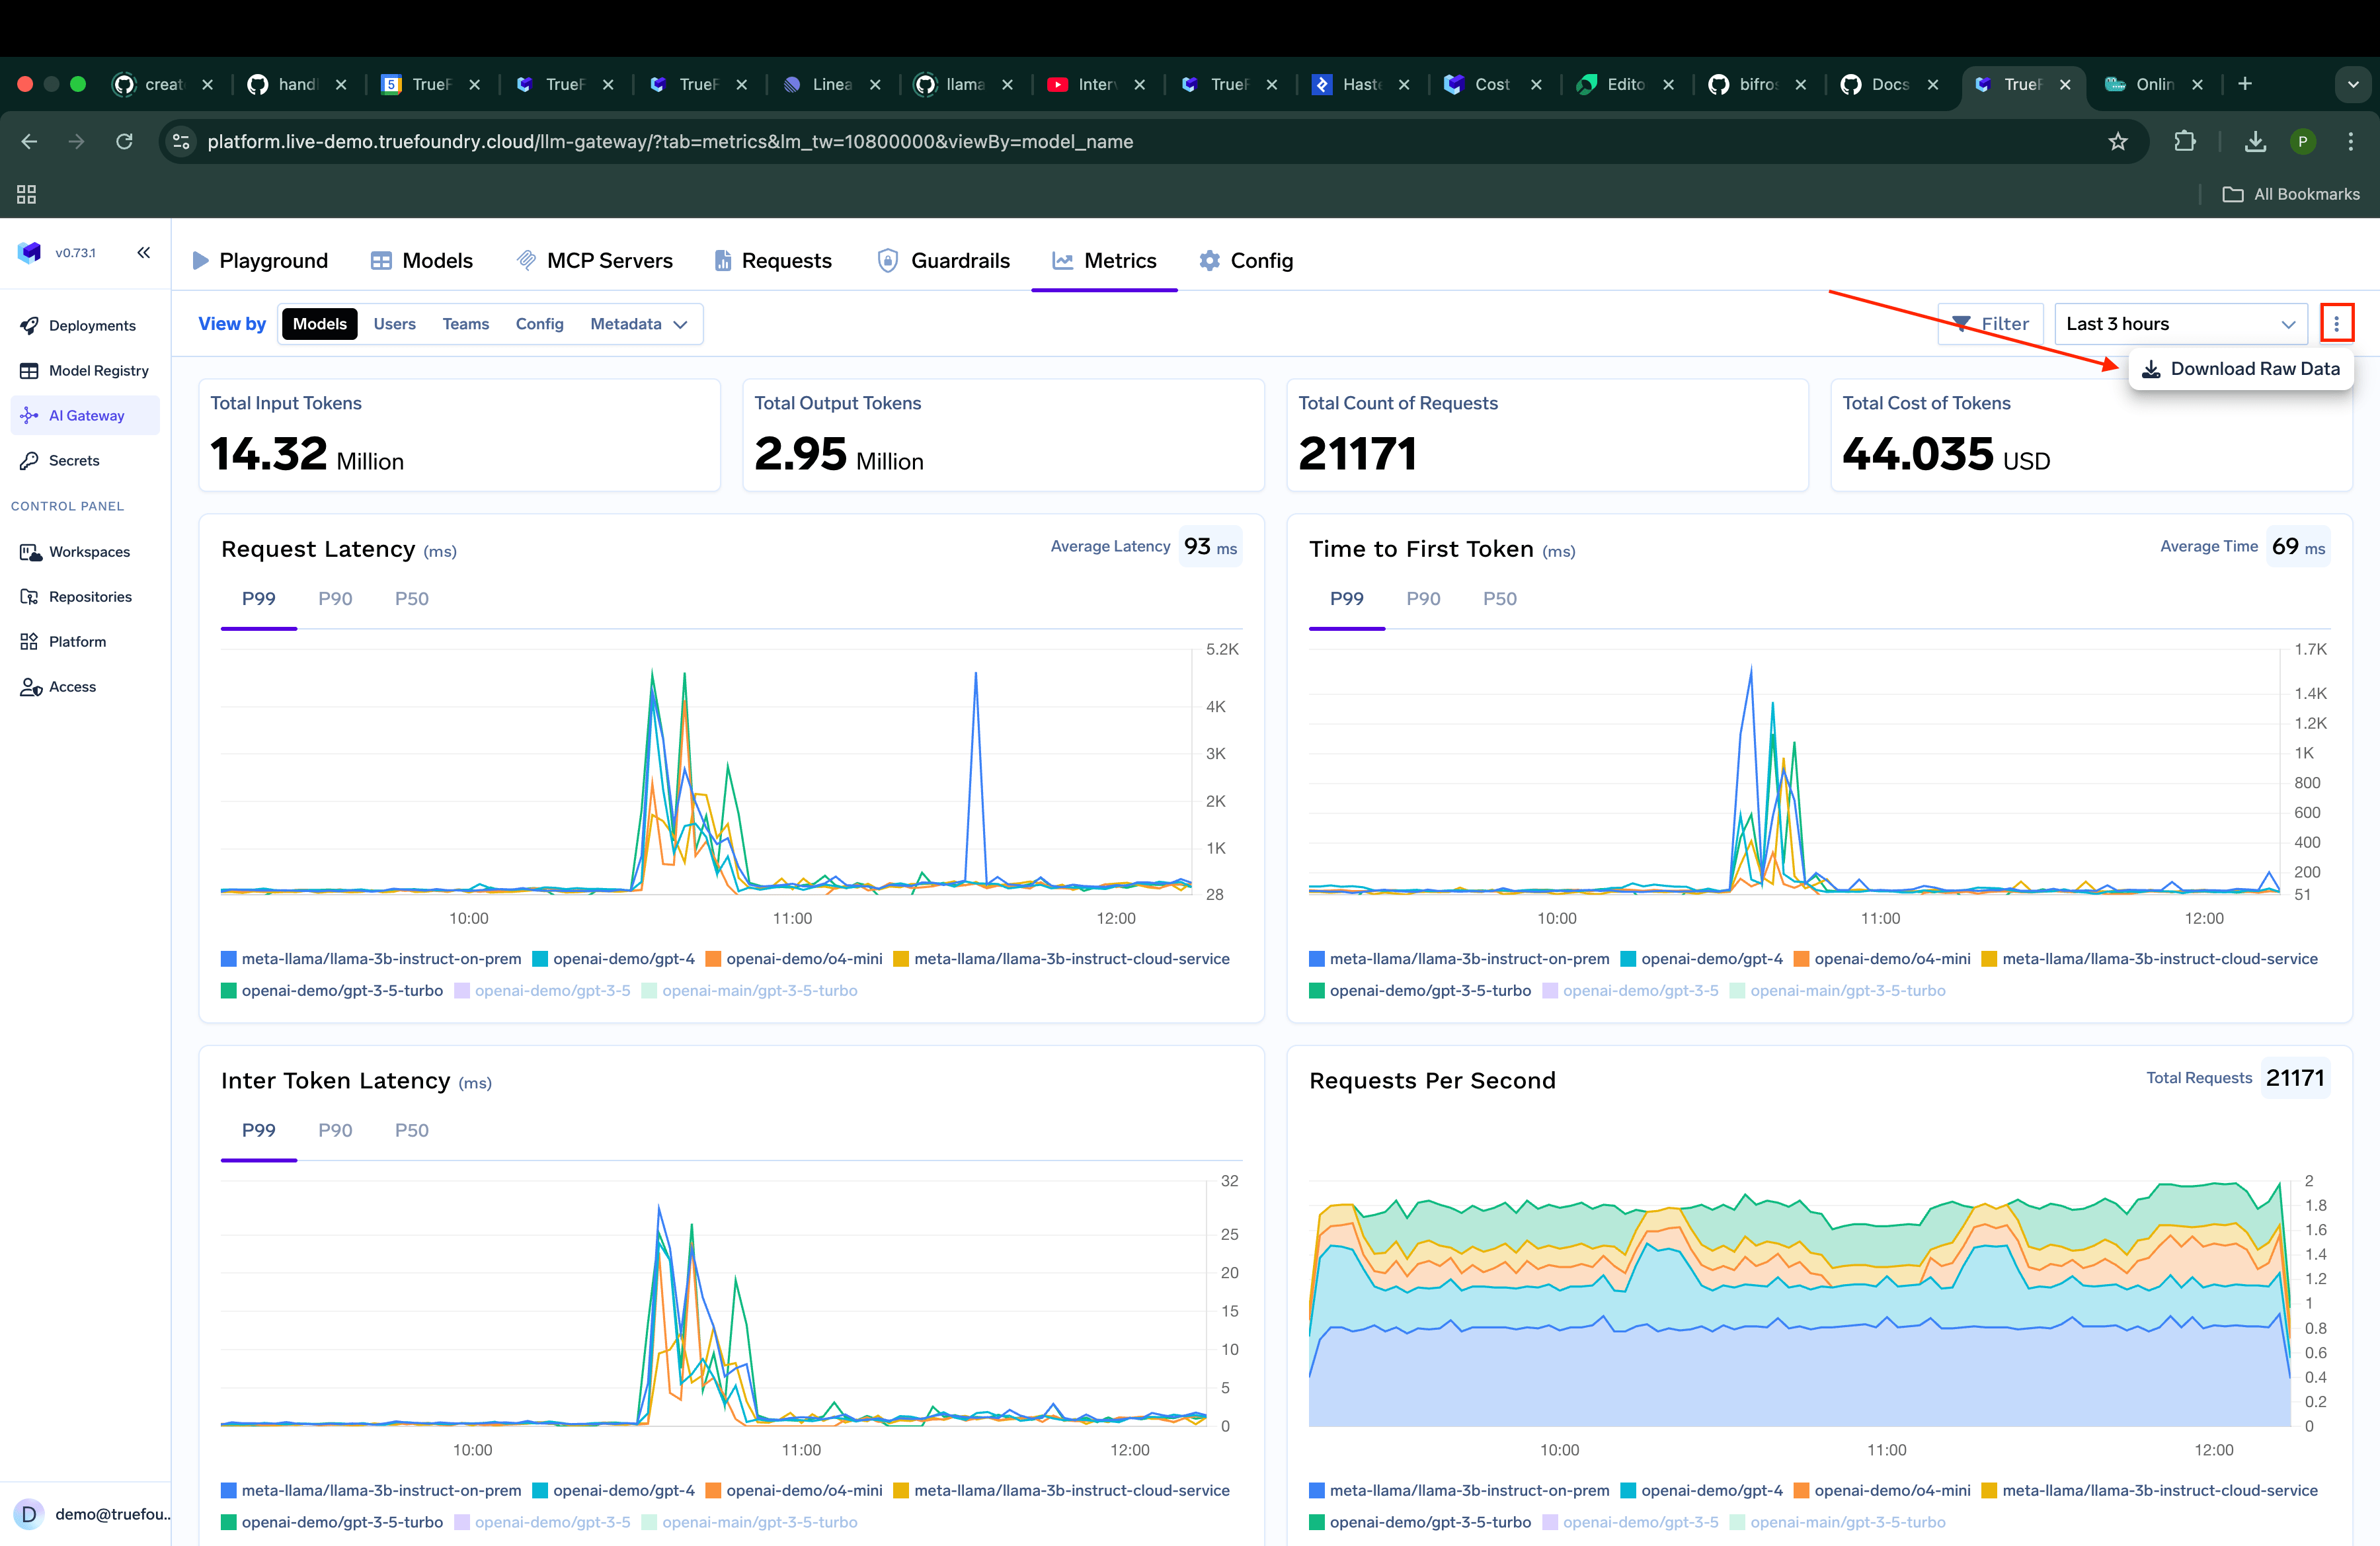 Need to analyze your data further? Easily export it:
1. Go to the `Metrics` section
2. Click on the `3 dots` button and then click on `Download Raw Data`
3. Choose the fields you want to `groupBy` the data
### Custom Grouping Options
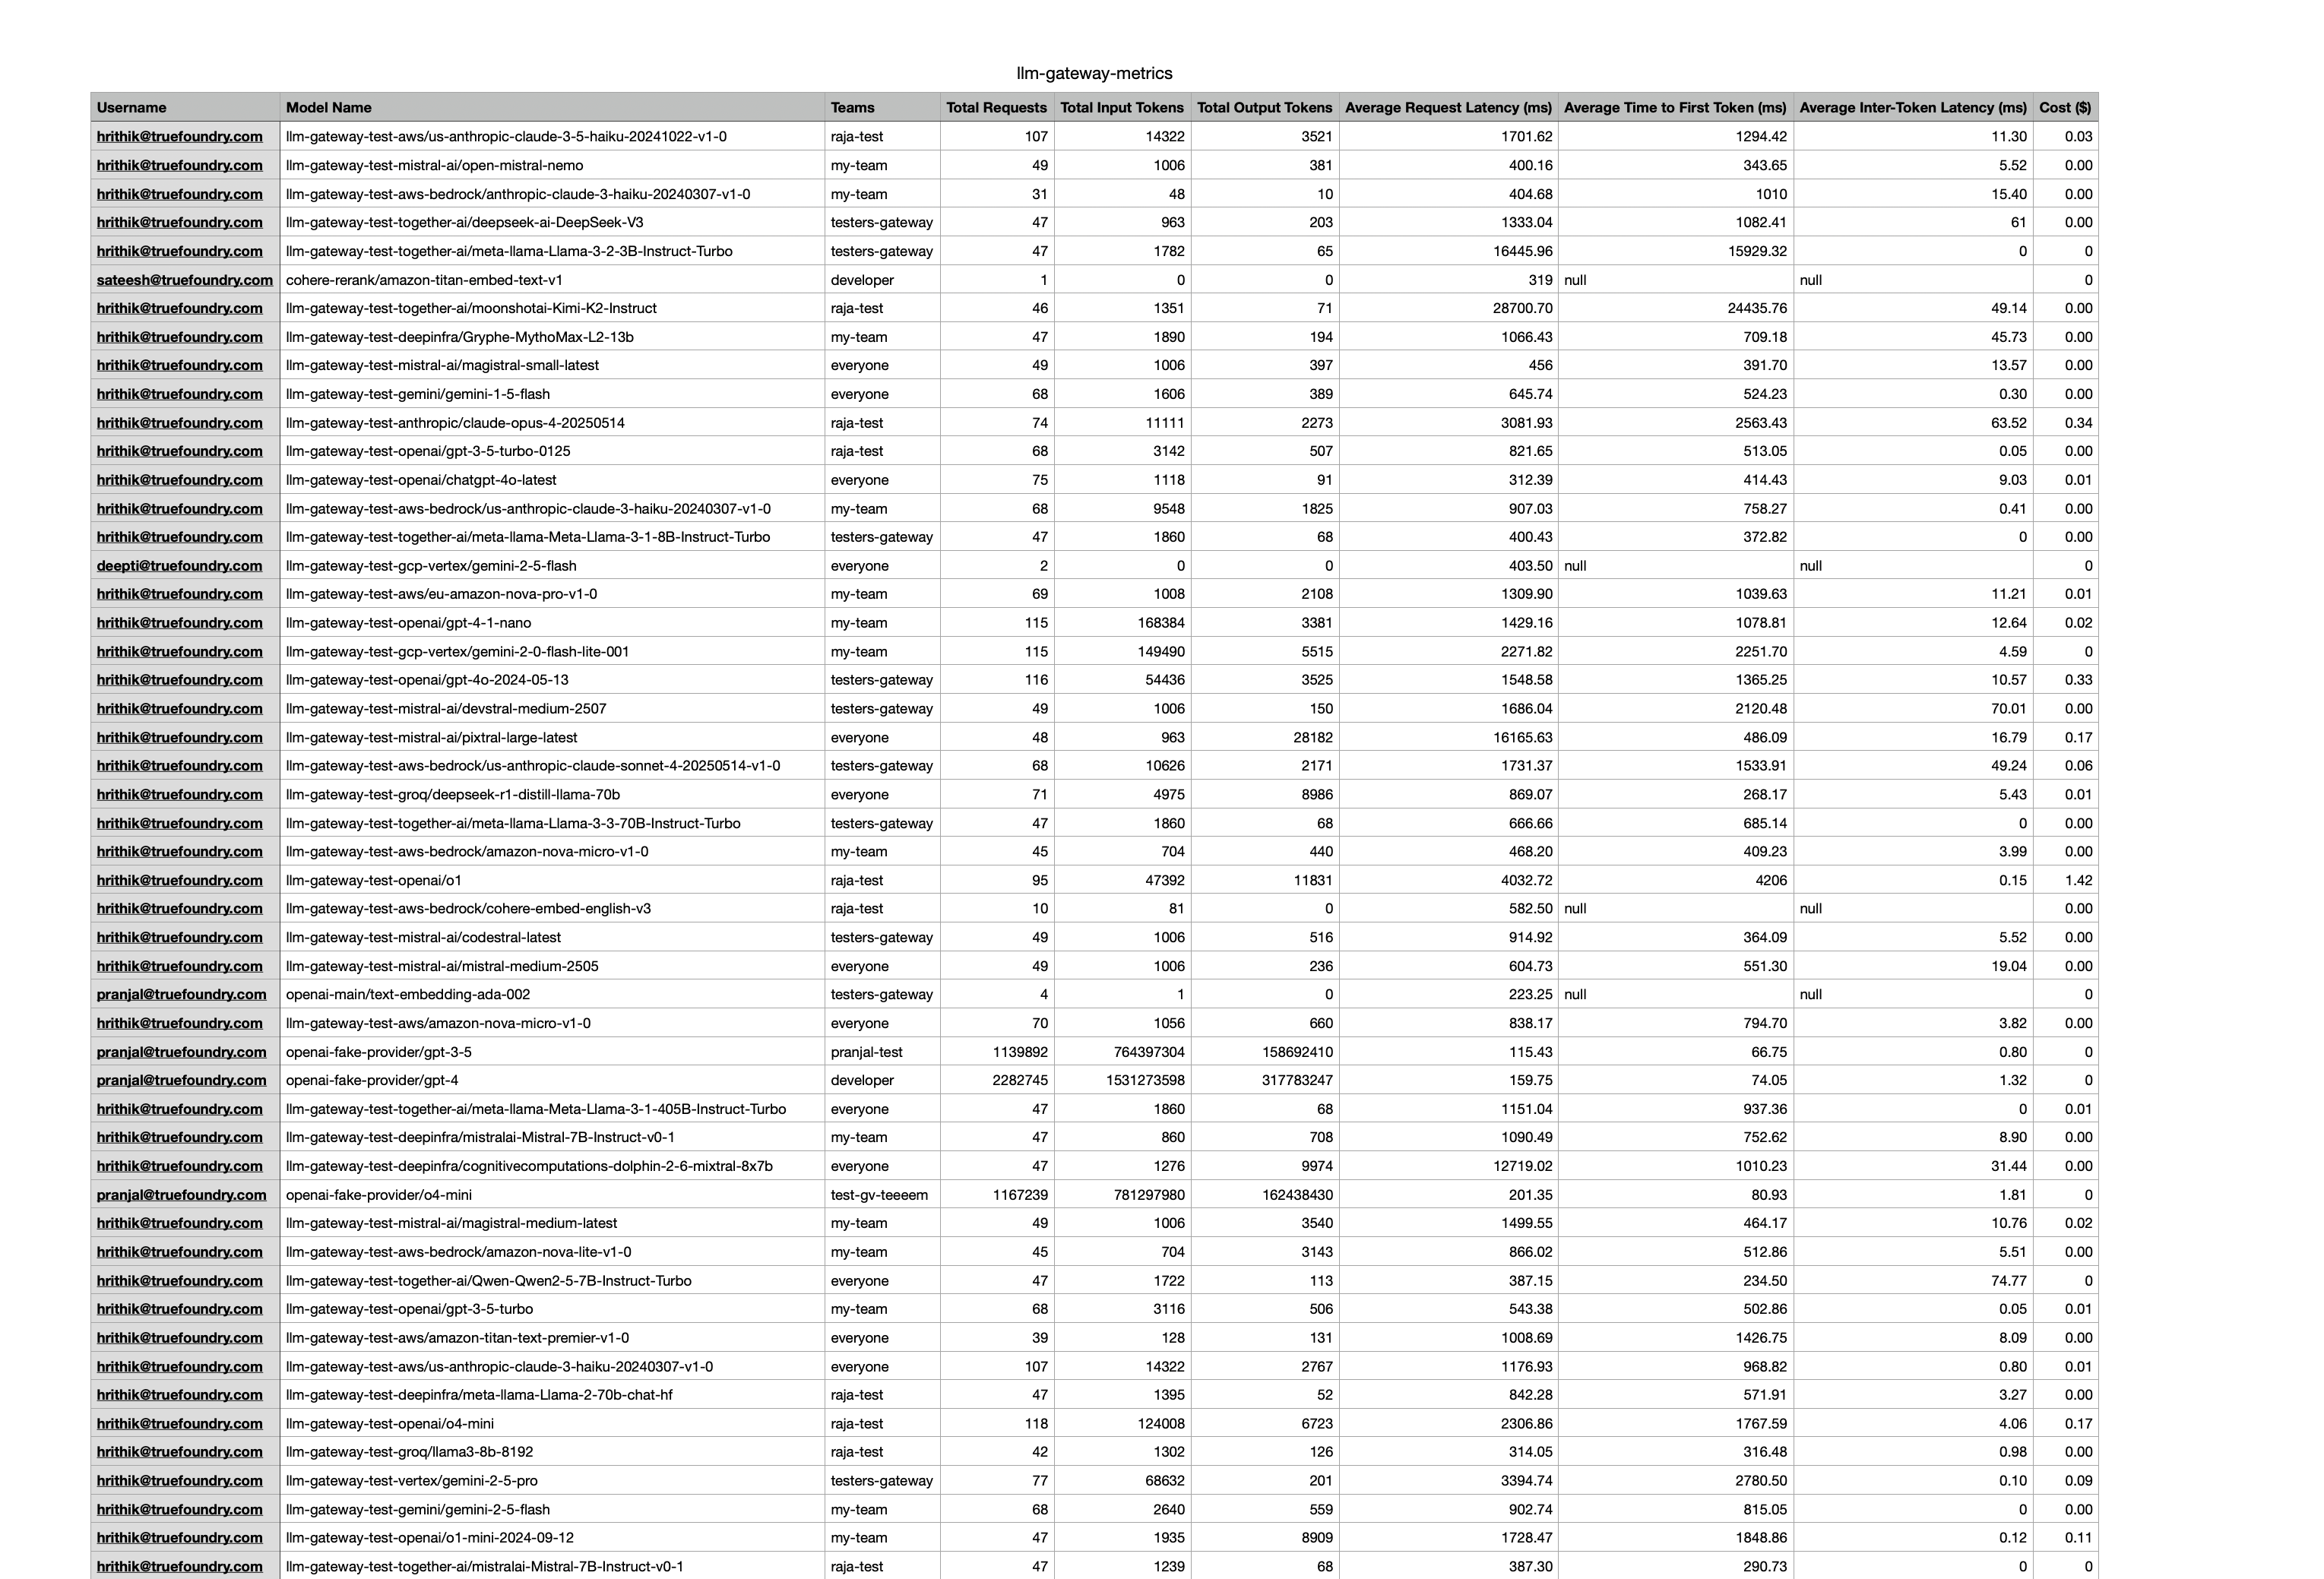
You can customize how data is grouped in your exports. Simply select the fields you want to group by, such as username, model\_name, or teams, to get exactly the data organization you need for your analysis.
Need to analyze your data further? Easily export it:
1. Go to the `Metrics` section
2. Click on the `3 dots` button and then click on `Download Raw Data`
3. Choose the fields you want to `groupBy` the data
### Custom Grouping Options
You can customize how data is grouped in your exports. Simply select the fields you want to group by, such as username, model\_name, or teams, to get exactly the data organization you need for your analysis.